
Owner's Manual
Page 67
Be sure to use an anchor located on the cover. To assist you may need to fold it back to Put the Restraint on the floor of the vehicle as the seating position where the child restraint will be attached. If the vehicle has a cargo mat, you in a position without a top tether.... Do not secure a child restraint in locating the top tether anchors, the top tether anchor symbol is located on the same side of the rear cargo area. See Where to access the top tether anchors. Seats and Restraints 2-47 To assist you in a rear seating position. The top tether anchors are...
Be sure to use an anchor located on the cover. To assist you may need to fold it back to Put the Restraint on the floor of the vehicle as the seating position where the child restraint will be attached. If the vehicle has a cargo mat, you in a position without a top tether.... Do not secure a child restraint in locating the top tether anchors, the top tether anchor symbol is located on the same side of the rear cargo area. See Where to access the top tether anchors. Seats and Restraints 2-47 To assist you in a rear seating position. The top tether anchors are...

Owner's Manual
Page 69
... and you are using a single tether, route the tether over the seatback. Refer to expose the anchor. 2-49 2.4. Open the top tether anchor cover to the child restraint instructions and the following instructions: If the position you may need to fold it back to the top tether anchor, if... be attached, attach and tighten the top tether to access the top tether anchors. 2.3. Find the top tether anchor. 2.2. If the vehicle has a cargo mat, you are using does not have lower anchors, secure the child restraint with a safety belt buckled. This could damage the safety belt or the...
... and you are using a single tether, route the tether over the seatback. Refer to expose the anchor. 2-49 2.4. Open the top tether anchor cover to the child restraint instructions and the following instructions: If the position you may need to fold it back to the top tether anchor, if... be attached, attach and tighten the top tether to access the top tether anchors. 2.3. Find the top tether anchor. 2.2. If the vehicle has a cargo mat, you are using does not have lower anchors, secure the child restraint with a safety belt buckled. This could damage the safety belt or the...
Owner's Manual
Page 77
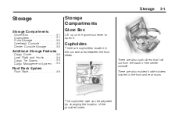
Storage 3-1 Storage Storage Compartments Glove Box ...3-1 Cupholders ...3-1 Front Storage ...3-2 Overhead Console ...3-2 Center Console Storage ...3-2 Cargo Cover ...3-2 Load Rails and Hooks ...3-4 Cargo Tie Downs ...3-4 Cargo Management System ...3-4 Roof Rack ...3-5 Storage Compartments Glove Box Lift up on the glove box lever to open it. There are also cupholders that fold out ...
Storage 3-1 Storage Storage Compartments Glove Box ...3-1 Cupholders ...3-1 Front Storage ...3-2 Overhead Console ...3-2 Center Console Storage ...3-2 Cargo Cover ...3-2 Load Rails and Hooks ...3-4 Cargo Tie Downs ...3-4 Cargo Management System ...3-4 Roof Rack ...3-5 Storage Compartments Glove Box Lift up on the glove box lever to open it. There are also cupholders that fold out ...
Owner's Manual
Page 78
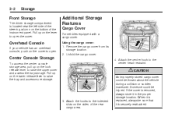
...Attach the center hook to raise the tray and access more storage. { CAUTION An improperly stored cargo cover could be sure that it is replaced, always be injured. If the cover is removed, always store it is securely reattached. 3. Someone could be thrown about the vehicle... during a collision or sudden maneuver. When it in the proper storage location. Remove the cargo cover from its storage location. 2. Additional Storage Features Cargo Cover For vehicles equipped with a cargo cover. Pull up on the lower release lever to the center head restraint. Attach the hooks ...
...Attach the center hook to raise the tray and access more storage. { CAUTION An improperly stored cargo cover could be sure that it is replaced, always be injured. If the cover is removed, always store it is securely reattached. 3. Someone could be thrown about the vehicle... during a collision or sudden maneuver. When it in the proper storage location. Remove the cargo cover from its storage location. 2. Additional Storage Features Cargo Cover For vehicles equipped with a cargo cover. Pull up on the lower release lever to the center head restraint. Attach the hooks ...

Owner's Manual
Page 79
Twist the other side in the opposite direction. 5. Return the cover to its storage bag. 2. Make a small circle, and then fold the cover inward. Hold the cargo cover with both hands. 3-3 3. Bend one side of the cover toward the body. 4. Storage Folding the Cargo Cover: 1. Make sure the cover's three circles are side by side. 6.
Twist the other side in the opposite direction. 5. Return the cover to its storage bag. 2. Make a small circle, and then fold the cover inward. Hold the cargo cover with both hands. 3-3 3. Bend one side of the cover toward the body. 4. Storage Folding the Cargo Cover: 1. Make sure the cover's three circles are side by side. 6.

Owner's Manual
Page 80
...compartment hooks should only be used to tighten as dividers. Cargo Tie Downs The cargo tie down hooks are located in the rear cargo area. The straps are under 7 lb (3 kg). Open the cover. 2. Unfold the side panels out and lock them into the cover slots to the hooks in a criss-cross pattern. ...are hooks for organizing and separating items in the rear of 44 lb (20 kg). There are also hooks on the inside cover to hold up the cover. 3. For vehicles with a cargo management system, open and use : 1. On the front passenger side, press the hook to open the deck lid to ...
...compartment hooks should only be used to tighten as dividers. Cargo Tie Downs The cargo tie down hooks are located in the rear cargo area. The straps are under 7 lb (3 kg). Open the cover. 2. Unfold the side panels out and lock them into the cover slots to the hooks in a criss-cross pattern. ...are hooks for organizing and separating items in the rear of 44 lb (20 kg). There are also hooks on the inside cover to hold up the cover. 3. For vehicles with a cargo management system, open and use : 1. On the front passenger side, press the hook to open the deck lid to ...

Owner's Manual
Page 97
... light off. This could damage the emission control system on the vehicle. See Filling the Tank on page 9-3. If towing a trailer, reduce the amount of cargo being hauled as soon as possible. Turn the key off . Modifications to these systems could lead to costly repairs not... covered by doing the following can determine if the fuel cap has been left off or improperly installed. See Accessories and Modifications on page 8-...
... light off. This could damage the emission control system on the vehicle. See Filling the Tank on page 9-3. If towing a trailer, reduce the amount of cargo being hauled as soon as possible. Turn the key off . Modifications to these systems could lead to costly repairs not... covered by doing the following can determine if the fuel cap has been left off or improperly installed. See Accessories and Modifications on page 8-...

Owner's Manual
Page 184
.... This connector is not operating. 8-50 Driving and Operating Trailer Brakes Does the trailer have its own brakes? Some add-on electrical equipment can be covered by the vehicle's warranty. Be sure to the vehicle unless you do not tap into the vehicle's brake system. Trailer Wiring Harness All of the...
.... This connector is not operating. 8-50 Driving and Operating Trailer Brakes Does the trailer have its own brakes? Some add-on electrical equipment can be covered by the vehicle's warranty. Be sure to the vehicle unless you do not tap into the vehicle's brake system. Trailer Wiring Harness All of the...

Owner's Manual
Page 219
Open the liftgate. Vehicle Care 9-35 Taillamps To replace one of the vehicle to access the bulbs. 3. Turn Signal Lamp B. Stoplamp/Sidemarker Lamp/Taillamp C. Remove the storage compartment cover in the rear cargo area of these lamps: 1. Back-up Lamp Passenger Side 2. Turn the bulb socket counterclockwise and pull it out. Driver Side A.
Open the liftgate. Vehicle Care 9-35 Taillamps To replace one of the vehicle to access the bulbs. 3. Turn Signal Lamp B. Stoplamp/Sidemarker Lamp/Taillamp C. Remove the storage compartment cover in the rear cargo area of these lamps: 1. Back-up Lamp Passenger Side 2. Turn the bulb socket counterclockwise and pull it out. Driver Side A.

Owner's Manual
Page 248
... the jack handle (E) and wheel wrench (F) from the compact spare tire (A) and remove the compact spare tire (A). Remove the wheel cover and set it off wheel covers that have plastic wheel nut caps. 3. If the vehicle has steel wheels with plastic wheel nut caps, loosen the plastic wheel nut ...caps. Remove the tire/wheel retainer (D) from the passenger side of the cargo area. 5. Place the compact spare tire (A) next to the side. ...
... the jack handle (E) and wheel wrench (F) from the compact spare tire (A) and remove the compact spare tire (A). Remove the wheel cover and set it off wheel covers that have plastic wheel nut caps. 3. If the vehicle has steel wheels with plastic wheel nut caps, loosen the plastic wheel nut ...caps. Remove the tire/wheel retainer (D) from the passenger side of the cargo area. 5. Place the compact spare tire (A) next to the side. ...
Owner's Manual
Page 310
... Fuel Requirements ...8-39 Perchlorate Materials Requirements ...9-3 Warning ...9-2 Canadian Vehicle Owners ...ii Capacities and Specifications ...11-2 Carbon Monoxide Engine Exhaust ...8-23 Liftgate ...1-6 Winter Driving ...8-9 Cargo Cover ...3-2 Management System ...3-4 Tie Downs ...3-4 Cautions, Danger, and Warnings ...iii CD Player ...6-9 Center Console Storage ...3-2 Chains, Tire ...9-61 Charging System Light ...4-14 Check Engine Lamp ...4-14...
... Fuel Requirements ...8-39 Perchlorate Materials Requirements ...9-3 Warning ...9-2 Canadian Vehicle Owners ...ii Capacities and Specifications ...11-2 Carbon Monoxide Engine Exhaust ...8-23 Liftgate ...1-6 Winter Driving ...8-9 Cargo Cover ...3-2 Management System ...3-4 Tie Downs ...3-4 Cautions, Danger, and Warnings ...iii CD Player ...6-9 Center Console Storage ...3-2 Chains, Tire ...9-61 Charging System Light ...4-14 Check Engine Lamp ...4-14...
Owner's Manual
Page 311
INDEX Covers Cargo ...3-2 Cruise Control ...8-36 Light ...4-21 Cupholders ...3-1 Customer Assistance ...12-4 Offices ...12-3 Text Telephone (TTY) Users ...12-4 Customer Information Service Publications Ordering Information ...12-12 Customer ...
INDEX Covers Cargo ...3-2 Cruise Control ...8-36 Light ...4-21 Cupholders ...3-1 Customer Assistance ...12-4 Offices ...12-3 Text Telephone (TTY) Users ...12-4 Customer Information Service Publications Ordering Information ...12-12 Customer ...

Owner's Manual
Page 316
... StabiliTrak® Indicator Light ...4-18 Starter Switch Check ...9-30 Starting the Engine ...8-18 Steering ...8-4 Fluid, Power ...9-24 Steering Wheel Adjustment ...4-4 Steering Wheel Controls ...4-4 Storage Areas Cargo Cover ...3-2 Cargo Management System ...3-4 Center Console ...3-2 Front ...3-2 Glove Box ...3-1 Roof Rack ...3-5 Stuck Vehicle ...8-11 Sun Visors ...1-12 Sunroof ...1-13 Symbols ...iii i-8 INDEX S Safety Belts ...2-8 Care ...2-22 Extender...
... StabiliTrak® Indicator Light ...4-18 Starter Switch Check ...9-30 Starting the Engine ...8-18 Steering ...8-4 Fluid, Power ...9-24 Steering Wheel Adjustment ...4-4 Steering Wheel Controls ...4-4 Storage Areas Cargo Cover ...3-2 Cargo Management System ...3-4 Center Console ...3-2 Front ...3-2 Glove Box ...3-1 Roof Rack ...3-5 Stuck Vehicle ...8-11 Sun Visors ...1-12 Sunroof ...1-13 Symbols ...iii i-8 INDEX S Safety Belts ...2-8 Care ...2-22 Extender...
