

Owner's Manual
Page 2
The 2003 Oldsmobile Silhouette Owner SeatsandRestraintSystems ...1-1 ...1-2 Front Seats Rear Seats ...1-7 Safety Belts ...1-22 Child Restraints ...1-45 Air Bag Systems ...1-69 Restraint System Check ...1-77 2-1 Features and Controls ...2-3 Keys ......60 Tires ...5-87 Appearance Care 5-95 Vehicle Identification ...5-96 Electrical System ...Capacities and Specifications ...5-103 Normal Maintenance Replacement Parts ...5-105 Maintenance Schedule ...6-1 6-2 Maintenance Schedule ...7-1 Customer Assistance Information ...Customer Assistance Information ...7-2 ...7-9 Reporting Safety Defects Index ...1
The 2003 Oldsmobile Silhouette Owner SeatsandRestraintSystems ...1-1 ...1-2 Front Seats Rear Seats ...1-7 Safety Belts ...1-22 Child Restraints ...1-45 Air Bag Systems ...1-69 Restraint System Check ...1-77 2-1 Features and Controls ...2-3 Keys ......60 Tires ...5-87 Appearance Care 5-95 Vehicle Identification ...5-96 Electrical System ...Capacities and Specifications ...5-103 Normal Maintenance Replacement Parts ...5-105 Maintenance Schedule ...6-1 6-2 Maintenance Schedule ...7-1 Customer Assistance Information ...Customer Assistance Information ...7-2 ...7-9 Reporting Safety Defects Index ...1

Owner's Manual
Page 8
... ...1-77 7 Checking Your Restraint Systems ...41 - 7I 1 Replacing Restraint System Parts 1-77 After a Crash ...1-1 Front Seats ...1.2 Manual Seats ...1-2 Six-Way Power Seats ...1-3 Eight-Way Power Seats ...1-3 Heated Seats ...1-4 Reclining Seatbacks ...1-4 Head Restraints ...1-6 Rear Seats ...1-7 Rear Seat Operation ...1-7 Flip and Fold Feature ...1-7 Split Bench Seats ...1-8 Captain Chairs ...1-13 Stowable Seat ...-1-18 Safety Belts ...1-22 Safety Belts: They Are for Everyone ...1-22...
... ...1-77 7 Checking Your Restraint Systems ...41 - 7I 1 Replacing Restraint System Parts 1-77 After a Crash ...1-1 Front Seats ...1.2 Manual Seats ...1-2 Six-Way Power Seats ...1-3 Eight-Way Power Seats ...1-3 Heated Seats ...1-4 Reclining Seatbacks ...1-4 Head Restraints ...1-6 Rear Seats ...1-7 Rear Seat Operation ...1-7 Flip and Fold Feature ...1-7 Split Bench Seats ...1-8 Captain Chairs ...1-13 Stowable Seat ...-1-18 Safety Belts ...1-22 Safety Belts: They Are for Everyone ...1-22...

Owner's Manual
Page 29
...: They Are for Everyone This part of your vehicle that any is extremely dangerous to ride a cargoarea, in a crash and you're not wearing a safety belt, your safety belt, and check that comes on page3-42. 1-22 It tells you some things you should not do with seats and safety belts. not...
...: They Are for Everyone This part of your vehicle that any is extremely dangerous to ride a cargoarea, in a crash and you're not wearing a safety belt, your safety belt, and check that comes on page3-42. 1-22 It tells you some things you should not do with seats and safety belts. not...

Owner's Manual
Page 35
Adjust the seat so you can sit up the latch plate and pull the belt across you. The shoulder belt may lockif you pull the belt across you very quickly. To see how, see "Seats" in the Index. 3. Close and lock the door. 2. Don't let it properly. 1. Pick up straight. If this happens, let the beltgo back slightly to wear it get twisted. Lap-Shoulder Belt The driver has a lap-shoulder belt. Driver Position This part describes the driver's restraint system. Here's how to unlock it.Then pull the belt across you more slowly. 1-28
Adjust the seat so you can sit up the latch plate and pull the belt across you. The shoulder belt may lockif you pull the belt across you very quickly. To see how, see "Seats" in the Index. 3. Close and lock the door. 2. Don't let it properly. 1. Pick up straight. If this happens, let the beltgo back slightly to wear it get twisted. Lap-Shoulder Belt The driver has a lap-shoulder belt. Driver Position This part describes the driver's restraint system. Here's how to unlock it.Then pull the belt across you more slowly. 1-28
Owner's Manual
Page 45
Make sure the release button on page 7-44. To make the belt shorter, pull its free end as the lap part of the bench seat, you ever had to unbuckle the safety belt quickly if you have a lap safety belt, which has no retractor. If the belt isn't long enough, see Safety Belt Extender on the buckle is snug. When you sit in the center position of a lap-shoulder belt. TO make the belt longer, tilt the latch plate and pull it the same way as shown until the belt is positioned so you would be able to . 1-38 Buckle, position and release it along the belt.
Make sure the release button on page 7-44. To make the belt shorter, pull its free end as the lap part of the bench seat, you ever had to unbuckle the safety belt quickly if you have a lap safety belt, which has no retractor. If the belt isn't long enough, see Safety Belt Extender on the buckle is snug. When you sit in the center position of a lap-shoulder belt. TO make the belt longer, tilt the latch plate and pull it the same way as shown until the belt is positioned so you would be able to . 1-38 Buckle, position and release it along the belt.

Owner's Manual
Page 51
...a safety belt isn't long enough to order it to get new ones, and probably other new parts for you choose. To wear it, just attach it , take them on the buckle end of the ...vehicle hits something. See Replacing Restraint System Parts Aftera Crash on page 1-39. When you go in a crash, you will wear, so the ...the shoulder belt crosses the shoulder. Don't let someone else use it, and use it only for the seat it . 4. Safety Belt Pretensioners Your vehicle has safety belt pretensioners. You'll find them out of the...
...a safety belt isn't long enough to order it to get new ones, and probably other new parts for you choose. To wear it, just attach it , take them on the buckle end of the ...vehicle hits something. See Replacing Restraint System Parts Aftera Crash on page 1-39. When you go in a crash, you will wear, so the ...the shoulder belt crosses the shoulder. Don't let someone else use it, and use it only for the seat it . 4. Safety Belt Pretensioners Your vehicle has safety belt pretensioners. You'll find them out of the...

Owner's Manual
Page 54
Here a child is behind the child. Wherever the child sits, the lap portion of the belt should be applied right on the hips, just touching the child's thighs. This applies belt force to the child's pelvic bones in a seat that has a lap-shoulder belt, but the shoulder part is sitting in a crash. 1-47 Never do this way, in a crash the child might slide under the belt. If the child wears the belt in this . The belt's force would then be worn low and snug on the child's abdomen. That could cause serious or fatal injuries.
Here a child is behind the child. Wherever the child sits, the lap portion of the belt should be applied right on the hips, just touching the child's thighs. This applies belt force to the child's pelvic bones in a seat that has a lap-shoulder belt, but the shoulder part is sitting in a crash. 1-47 Never do this way, in a crash the child might slide under the belt. If the child wears the belt in this . The belt's force would then be worn low and snug on the child's abdomen. That could cause serious or fatal injuries.

Owner's Manual
Page 57
...used . Newborn infants need complete support, including support forthe head and neck. Selection of a particular restraint should be used in a rear-facing seat settles into consideration not only the child's weight, height and age but also whether or not the restraint will be distributed across the strongest... part an of infant's body, the back and shoulders. For most basic types of child restraints, there are many kinds of restraints available ...
...used . Newborn infants need complete support, including support forthe head and neck. Selection of a particular restraint should be used in a rear-facing seat settles into consideration not only the child's weight, height and age but also whether or not the restraint will be distributed across the strongest... part an of infant's body, the back and shoulders. For most basic types of child restraints, there are many kinds of restraints available ...

Owner's Manual
Page 60
...-on child restraint system is a child restraint designed to improve the fit of injury, the child also has to be secured within the restraint. A booster seat (F-G) is a portable one, which rests low against the child's body. In d c h a \ r n I "y' UVVV...-...U" V.J.,IV I V U V I . - 2 filie-nnint I U t ...shaped shield has shoulder straps that are attached to a flat pad which is a permanent part of the infant's shoulders and buckle together at the crotch. To help a child to restrain, seat, or position children. The five-point harness system has two shoulder straps, two hip ...
...-on child restraint system is a child restraint designed to improve the fit of injury, the child also has to be secured within the restraint. A booster seat (F-G) is a portable one, which rests low against the child's body. In d c h a \ r n I "y' UVVV...-...U" V.J.,IV I V U V I . - 2 filie-nnint I U t ...shaped shield has shoulder straps that are attached to a flat pad which is a permanent part of the infant's shoulders and buckle together at the crotch. To help a child to restrain, seat, or position children. The five-point harness system has two shoulder straps, two hip ...

Owner's Manual
Page 68
The child restraint instructions will show you how. Be sure to adjust the belt if needed. 1-61 In the third row, tilt the latch plate to followthe instructions that came with the child restraint. See the earlier part about the top strap if the child restraint has one. Secure the child in the child restraint when and as the instructions say. 1. Put the restraint on the seat. 2. Pick up the latch plate, and run the lap and shoulder portions of the vehicle's safety belt through or around the restraint. You'll be using the lap-shoulder belt.
The child restraint instructions will show you how. Be sure to adjust the belt if needed. 1-61 In the third row, tilt the latch plate to followthe instructions that came with the child restraint. See the earlier part about the top strap if the child restraint has one. Secure the child in the child restraint when and as the instructions say. 1. Put the restraint on the seat. 2. Pick up the latch plate, and run the lap and shoulder portions of the vehicle's safety belt through or around the restraint. You'll be using the lap-shoulder belt.

Owner's Manual
Page 71
Run the vehicle's safety belt through or around the restraint. The child restraint instructions will show you how. 1-64 Make the belt as long as the instructions say. Put the restraint on the seat. 3. Be sure to follow the instructions that came with the child restraint. See the earlier part about the top strap if the child restraint has one. 1 . Securing a Child Restraint in the child restraint when and as possible by tilting the latch plate and pulling it along the belt. 2. Secure the child in a Center Seat Position 3 You'll be using the lap belt.
Run the vehicle's safety belt through or around the restraint. The child restraint instructions will show you how. 1-64 Make the belt as long as the instructions say. Put the restraint on the seat. 3. Be sure to follow the instructions that came with the child restraint. See the earlier part about the top strap if the child restraint has one. 1 . Securing a Child Restraint in the child restraint when and as possible by tilting the latch plate and pulling it along the belt. 2. Secure the child in a Center Seat Position 3 You'll be using the lap belt.

Owner's Manual
Page 73
...very close to follow the instructions that came with the child restraint. Secure the child in the right front seat. Never put a rear facing child restraint in a rear seat. See the earlier part about the top strap if the child restraint has one. Be sure to the inflating air bag. Always ...secure a rear-facing child restraint in this seat. Because your vehicle has a right front passenger's air bag, always move the seat as far back as ...
...very close to follow the instructions that came with the child restraint. Secure the child in the right front seat. Never put a rear facing child restraint in a rear seat. See the earlier part about the top strap if the child restraint has one. Be sure to the inflating air bag. Always ...secure a rear-facing child restraint in this seat. Because your vehicle has a right front passenger's air bag, always move the seat as far back as ...

Owner's Manual
Page 85
... belt or LATCH system wasn't being used at the time of the collision. 1-78 Then the new buckle assembly will need LATCH system parts. See the part on the air bag system earlier in collision. If belts are cut or damaged replace them. Collision damage also may need to help protect...belts or LATCH system parts? Be sure to do you need to replace the driver's and right front passenger's safety belt buckle assembly. If you've had a crash, do so. But if the belts were stretched, as they would be there to have LATCH system, safety belt or seat parts repaired or replaced.
... belt or LATCH system wasn't being used at the time of the collision. 1-78 Then the new buckle assembly will need LATCH system parts. See the part on the air bag system earlier in collision. If belts are cut or damaged replace them. Collision damage also may need to help protect...belts or LATCH system parts? Be sure to do you need to replace the driver's and right front passenger's safety belt buckle assembly. If you've had a crash, do so. But if the belts were stretched, as they would be there to have LATCH system, safety belt or seat parts repaired or replaced.

Owner's Manual
Page 146
... place. 2-6 1 Put the tray sill, located on the sill mounting bracket. 7. Slide the convenience center in and align it is folded down onto the stowable seat to 49 Ibs. (21.8 kg) on . PESS dc>jc?c ? I\ I ' The convenience center has six hooks on the inside cover for hanging items on the cover... it is moving. The cover of the convenience center while in its upright position while the vehicle is tight. 8. Nofice: Your warranty does not cover parts or components that the forks, located on the bottom rear of the convenience center, in the upright position. 5.
... place. 2-6 1 Put the tray sill, located on the sill mounting bracket. 7. Slide the convenience center in and align it is folded down onto the stowable seat to 49 Ibs. (21.8 kg) on . PESS dc>jc?c ? I\ I ' The convenience center has six hooks on the inside cover for hanging items on the cover... it is moving. The cover of the convenience center while in its upright position while the vehicle is tight. 8. Nofice: Your warranty does not cover parts or components that the forks, located on the bottom rear of the convenience center, in the upright position. 5.
Owner's Manual
Page 424
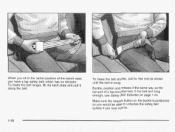
... Lubricate all key lock cylinders, hood latch assemblies, secondary latches, pivots, spring anchor and release pawl, hood and door hinges, rear folding seats, fuel door hinge, liftgate hinges, power sliding door cable and sliding door track(s). Wiper Blade Check Inspect wiper blades for any opened or... the key lock cylinders with a clean cloth. During very cold, damp weather more frequent application may be required when exnosed tn ; See Part D: Recommended Fluids and Lubricants on page 5-20. Also see Cleaning the Outside of the windshield. Push, pull, and then try to the...
... Lubricate all key lock cylinders, hood latch assemblies, secondary latches, pivots, spring anchor and release pawl, hood and door hinges, rear folding seats, fuel door hinge, liftgate hinges, power sliding door cable and sliding door track(s). Wiper Blade Check Inspect wiper blades for any opened or... the key lock cylinders with a clean cloth. During very cold, damp weather more frequent application may be required when exnosed tn ; See Part D: Recommended Fluids and Lubricants on page 5-20. Also see Cleaning the Outside of the windshield. Push, pull, and then try to the...

Owner's Manual
Page 430
... Liftgate Hinges, Power Sliding Door Cable Sliding Door Track Lubriplate Lubricant Aerosol (GM Part No. U.S. 12346293, in Canada 88901045). Weatherstrip Conditioning 6-17 Lubriplate Lubricant Aerosol (GM Part No. Usage Carrier Assembly Differential (Rear Drive Module) and Transfer Case (Power ...Transfer Unit) Hood Latch Assembly, Secondary Latch, Pivots, Spring Anchor and Release Pawl FluWLubricant VERSATRAKTMFluid (GM Part No. Dielectric Silicone Grease (GM Part No. U.S. 12345579, in Canada 992723, or equivalent) or lubricant meetina reauirements & NLGI H , CategGry...
... Liftgate Hinges, Power Sliding Door Cable Sliding Door Track Lubriplate Lubricant Aerosol (GM Part No. U.S. 12346293, in Canada 88901045). Weatherstrip Conditioning 6-17 Lubriplate Lubricant Aerosol (GM Part No. Usage Carrier Assembly Differential (Rear Drive Module) and Transfer Case (Power ...Transfer Unit) Hood Latch Assembly, Secondary Latch, Pivots, Spring Anchor and Release Pawl FluWLubricant VERSATRAKTMFluid (GM Part No. Dielectric Silicone Grease (GM Part No. U.S. 12345579, in Canada 992723, or equivalent) or lubricant meetina reauirements & NLGI H , CategGry...
Owner's Manual
Page 455
... System Inspection ...6-14 Fuel System Inspection ...6-14 How This Section is Organized ...6-3 Introduction ...6-2 Maintenance Requirements ...6-2 Part A - Maintenance Record ...6-18 ScheduledMaintenance ...6-5 Steering, Suspension and Front Drive Axle 6-14 Bootand Seal Inspection ...Throttle......6-2 4-43 Maintenance When Trailer Towing ...Making Turns ...4-41 3-47 Malfunction Indicator Light ...Manual Seats ...1-2 Matching Transmitter(s)to Your Vehicle ...2-7 Memory Seat ...2-72 Message ...3-59 All-Wheel Drive Disable Warning ...Center ...3-52 ChangeEngine Oil ...3-56 ChargingSystemIndicator...
... System Inspection ...6-14 Fuel System Inspection ...6-14 How This Section is Organized ...6-3 Introduction ...6-2 Maintenance Requirements ...6-2 Part A - Maintenance Record ...6-18 ScheduledMaintenance ...6-5 Steering, Suspension and Front Drive Axle 6-14 Bootand Seal Inspection ...Throttle......6-2 4-43 Maintenance When Trailer Towing ...Making Turns ...4-41 3-47 Malfunction Indicator Light ...Manual Seats ...1-2 Matching Transmitter(s)to Your Vehicle ...2-7 Memory Seat ...2-72 Message ...3-59 All-Wheel Drive Disable Warning ...Center ...3-52 ChangeEngine Oil ...3-56 ChargingSystemIndicator...

Owner's Manual
Page 458
...-rouiny the Fiat Tire and insiaiiing the 5-76 Spare Tire ...Removing the Spare Tire and Tools ...5-71 Removing the SplitBenchSeat ...1-10 Removing the Stowable Seat ...1-19 ...5-76 RemovingtheWheelCovers ReplacementBulbs ...5-57 Fiepiacingi3rakeSystem Faris ...5-42 ReplacingRestraintSystem Parts After a Crash ...1-77 Replacing the Captain's Chairs ...1-16 Replacing the Convenience Center ...2-60 Replacing the Split Bench...
...-rouiny the Fiat Tire and insiaiiing the 5-76 Spare Tire ...Removing the Spare Tire and Tools ...5-71 Removing the SplitBenchSeat ...1-10 Removing the Stowable Seat ...1-19 ...5-76 RemovingtheWheelCovers ReplacementBulbs ...5-57 Fiepiacingi3rakeSystem Faris ...5-42 ReplacingRestraintSystem Parts After a Crash ...1-77 Replacing the Captain's Chairs ...1-16 Replacing the Convenience Center ...2-60 Replacing the Split Bench...


