Owner's Manual
Page 14
......1-20 Child restraints...1-21 Precautions on child restraints...1-21 Child restraint installation on rear seat outboard or center positions ...LATCH (Lower Anchors and Tethers for CHildren) system ...Top tether strap child restraint...Installation on front passenger seat...Booster ...rear seat outboard or center positions ...Booster seat installation on front passenger seat...Supplemental restraint system...Precautions on supplemental restraint system ...NISSAN advanced air bag system (front seats) ...Supplemental air bag warning labels ...Supplemental air bag warning light ...1-23 1-28 1-29...
......1-20 Child restraints...1-21 Precautions on child restraints...1-21 Child restraint installation on rear seat outboard or center positions ...LATCH (Lower Anchors and Tethers for CHildren) system ...Top tether strap child restraint...Installation on front passenger seat...Booster ...rear seat outboard or center positions ...Booster seat installation on front passenger seat...Supplemental restraint system...Precautions on supplemental restraint system ...NISSAN advanced air bag system (front seats) ...Supplemental air bag warning labels ...Supplemental air bag warning light ...1-23 1-28 1-29...
Owner's Manual
Page 19
... or damage to the vehicle in case of your vehicle is in the fold-down the rear seats when occupants are completely secured in the latched position and the rear center seat belt connector is on the rear seats. ¼ Head restraints should be sure to prevent them properly if they... any reason, they are more likely to be certain they should be certain that is empty. 6. WARNING ¼ Never allow people to ride in the latched position.
... or damage to the vehicle in case of your vehicle is in the fold-down the rear seats when occupants are completely secured in the latched position and the rear center seat belt connector is on the rear seats. ¼ Head restraints should be sure to prevent them properly if they... any reason, they are more likely to be certain they should be certain that is empty. 6. WARNING ¼ Never allow people to ride in the latched position.

Owner's Manual
Page 28
... not be certain that the seatbacks are completely secured in this section. See "Front passenger air bag and status light" later in the latched position. The front passenger and rear seat belts have a locking mechanism for child restraint installation. When the locking mechanism is detached from the...be used only for child restraint installation. It is activated it is referred to take up extra slack. If it may result in the latched position and the rear center seat belt connector is routed over your shoulder and across your chest. WARNING ¼ When fastening the seat...
... not be certain that the seatbacks are completely secured in this section. See "Front passenger air bag and status light" later in the latched position. The front passenger and rear seat belts have a locking mechanism for child restraint installation. When the locking mechanism is detached from the...be used only for child restraint installation. It is activated it is referred to take up extra slack. If it may result in the latched position and the rear center seat belt connector is routed over your shoulder and across your chest. WARNING ¼ When fastening the seat...

Owner's Manual
Page 30
... down the rear seat, hook the rear seat belt at the belt hook. Both the connector tongue and the seat belt tongue must be securely latched for you. REAR CENTER SEAT BELT The rear center seat belt has a connector tongue 1 2 k and a seat belt tongue k . Safety - seats, seat belts and supplemental restraint...
... down the rear seat, hook the rear seat belt at the belt hook. Both the connector tongue and the seat belt tongue must be securely latched for you. REAR CENTER SEAT BELT The rear center seat belt has a connector tongue 1 2 k and a seat belt tongue k . Safety - seats, seat belts and supplemental restraint...

Owner's Manual
Page 31
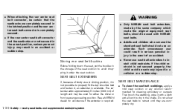
... and the seat belt tongue are completely secured in case of an accident or a sudden stop. This could result in serious personal injury in the latched position and the rear 1-18 Safety - seats, seat belts and supplemental restraint system SSS0241 3. Stowing rear center seat belt When folding down the rear seat...
... and the seat belt tongue are completely secured in case of an accident or a sudden stop. This could result in serious personal injury in the latched position and the rear 1-18 Safety - seats, seat belts and supplemental restraint system SSS0241 3. Stowing rear center seat belt When folding down the rear seat...
Owner's Manual
Page 33
... position. Then brush the webbing, wipe it to properly fit the lap-shoulder belt and fasten it under the seat cushion. See a NISSAN dealer for cleaning upholstery or carpets. ¼ When attaching the rear center seat belt connector, be certain that the seatbacks are completely secured... in the latched position and the rear center seat belt connector is completely secured. ¼ If the rear center seat belt connector and the seatbacks are...
... position. Then brush the webbing, wipe it to properly fit the lap-shoulder belt and fasten it under the seat cushion. See a NISSAN dealer for cleaning upholstery or carpets. ¼ When attaching the rear center seat belt connector, be certain that the seatbacks are completely secured... in the latched position and the rear center seat belt connector is completely secured. ¼ If the rear center seat belt connector and the seatbacks are...
Owner's Manual
Page 34
... than in the front seat. ¼ An improperly installed child restraint could lead to resist the forces of the vehicle. For details, see "LATCH (Lower Anchors and Tethers for infants and children of a three-point type seat belt. It is found, the entire belt assembly should always be.... CHILD RESTRAINTS ¼ If dirt builds up in the front seat. A rear facing child restraint must only be used in the rear seat. ¼ NISSAN recommends that the child restraint be installed in mind: ¼ Choose only a restraint with a clean, dry cloth. ¼ Periodically check to these lower ...
... than in the front seat. ¼ An improperly installed child restraint could lead to resist the forces of the vehicle. For details, see "LATCH (Lower Anchors and Tethers for infants and children of a three-point type seat belt. It is found, the entire belt assembly should always be.... CHILD RESTRAINTS ¼ If dirt builds up in the front seat. A rear facing child restraint must only be used in the rear seat. ¼ NISSAN recommends that the child restraint be installed in mind: ¼ Choose only a restraint with a clean, dry cloth. ¼ Periodically check to these lower ...

Owner's Manual
Page 37
Pull up on the shoulder belt until you hear and feel the latch engage. Be sure to remove any slack in the automatic locking mode (child restraint mode). At this time, the belt retractor is fully retracted. 4. Allow ...
Pull up on the shoulder belt until you hear and feel the latch engage. Be sure to remove any slack in the automatic locking mode (child restraint mode). At this time, the belt retractor is fully retracted. 4. Allow ...

Owner's Manual
Page 39
At this time, the belt retractor is fully extended. Route the seat belt tongue through the child restraint and insert it into the buckle until all of the belt is in the automatic locking mode (child restraint mode). Pull on the shoulder belt until you hear and feel the latch engage. Be sure to emergency locking mode when the belt is fully retracted. 1-26 Safety - seats, seat belts and supplemental restraint system It reverts back to follow the child restraint manufacturer's instructions for belt routing. 3. Rear center seat SSS0358 SSS0335 SSS0258A 2.
At this time, the belt retractor is fully extended. Route the seat belt tongue through the child restraint and insert it into the buckle until all of the belt is in the automatic locking mode (child restraint mode). Pull on the shoulder belt until you hear and feel the latch engage. Be sure to emergency locking mode when the belt is fully retracted. 1-26 Safety - seats, seat belts and supplemental restraint system It reverts back to follow the child restraint manufacturer's instructions for belt routing. 3. Rear center seat SSS0358 SSS0335 SSS0258A 2.

Owner's Manual
Page 41
... your child restraint for CHildren) anchor points are used to secure the child restraint. When you locate the LATCH system anchors. LATCH (LOWER ANCHORS AND TETHERS FOR CHILDREN) SYSTEM 1. LATCH lower anchor points (right) 2. Under no circumstance are they to be 1-28 Safety - seats, seat ... have to use of the seat cushion near the seatback. label is attached to the seatback to help you install a LATCH system compatible child restraint to the lower anchor attachments, follow the instructions in the instructions provided by correctly fitted child restraints. WARNING...
... your child restraint for CHildren) anchor points are used to secure the child restraint. When you locate the LATCH system anchors. LATCH (LOWER ANCHORS AND TETHERS FOR CHILDREN) SYSTEM 1. LATCH lower anchor points (right) 2. Under no circumstance are they to be 1-28 Safety - seats, seat ... have to use of the seat cushion near the seatback. label is attached to the seatback to help you install a LATCH system compatible child restraint to the lower anchor attachments, follow the instructions in the instructions provided by correctly fitted child restraints. WARNING...
Owner's Manual
Page 42
... to the tether anchor bracket that it is no obstructions over the top of the seatback and secure it in case of the child restraint LATCH system anchor attachments to prevent loss or damage. Under no circumstances are no longer in use. ¼ The child restraint top tether strap ...the tonneau cover from the vehicle or secure it from side to withstand only those loads imposed by correctly fitted child restraints. To install the LATCH system compatible child restraint, adjust the height of sudden braking or an accident. If the child restraint is damaged. It should not move more...
... to the tether anchor bracket that it is no obstructions over the top of the seatback and secure it in case of the child restraint LATCH system anchor attachments to prevent loss or damage. Under no circumstances are no longer in use. ¼ The child restraint top tether strap ...the tonneau cover from the vehicle or secure it from side to withstand only those loads imposed by correctly fitted child restraints. To install the LATCH system compatible child restraint, adjust the height of sudden braking or an accident. If the child restraint is damaged. It should not move more...

Owner's Manual
Page 45
... interfering with the proper child restraint fit, try another seating position or a different child restraint. SSS0301B SSS0360 Front facing If you hear and feel the latch engage. Route the seat belt tongue through the child restraint and insert it in this section. See "Head restraint adjustment" earlier in a secure place. If...
... interfering with the proper child restraint fit, try another seating position or a different child restraint. SSS0301B SSS0360 Front facing If you hear and feel the latch engage. Route the seat belt tongue through the child restraint and insert it in this section. See "Head restraint adjustment" earlier in a secure place. If...

Owner's Manual
Page 104
WARNING Keep glove box lid closed while driving to help prevent injury in until it is horizontal. Instruments and controls 2-33 To close, push the lid in an accident or a sudden stop. SIC3042 SIC2669 Rear: Pull the armrest forward until the lock latches. 2 1 To lock k or unlock k the glove box, use the master key, mechanical key (Intelligent Key system) or wallet key. GLOVE BOX A To open the glove box, pull the handle k .
WARNING Keep glove box lid closed while driving to help prevent injury in until it is horizontal. Instruments and controls 2-33 To close, push the lid in an accident or a sudden stop. SIC3042 SIC2669 Rear: Pull the armrest forward until the lock latches. 2 1 To lock k or unlock k the glove box, use the master key, mechanical key (Intelligent Key system) or wallet key. GLOVE BOX A To open the glove box, pull the handle k .

Owner's Manual
Page 143
SPA1947 WARNING ¼ Make sure the hood is completely closed and latched before driving. HOOD LIFT GATE SPA1578 1 1. Move the lever k at the front of the hood with the lift gate open . 3. When closing the hood, slowly ...
SPA1947 WARNING ¼ Make sure the hood is completely closed and latched before driving. HOOD LIFT GATE SPA1578 1 1. Move the lever k at the front of the hood with the lift gate open . 3. When closing the hood, slowly ...
Owner's Manual
Page 261
... vital link in a reliable and economic way. These checks or inspections can ensure that all latches lock securely. Where to go for the cause or have a NISSAN dealer check it promptly. When performing any unusual sounds, vibrations or smell, be performed from opening... when the primary latch is performed on a NISSAN at regular intervals. EXPLANATION OF GENERAL MAINTENANCE ITEMS Additional information on it -yourself MAINTENANCE REQUIREMENTS Your new NISSAN has been designed to have minimum maintenance requirements with the ...
... vital link in a reliable and economic way. These checks or inspections can ensure that all latches lock securely. Where to go for the cause or have a NISSAN dealer check it promptly. When performing any unusual sounds, vibrations or smell, be performed from opening... when the primary latch is performed on a NISSAN at regular intervals. EXPLANATION OF GENERAL MAINTENANCE ITEMS Additional information on it -yourself MAINTENANCE REQUIREMENTS Your new NISSAN has been designed to have minimum maintenance requirements with the ...
Owner's Manual
Page 262
..., and are missing, and check for cracks or wear if they operate smoothly and that all warning lights and chimes are all latched positions. Check carefully for cuts, fraying, wear or damage. For additional information regarding tires, refer to long distance trips. Seats:...) P (Park) position mechanism: On a fairly 8-3 Lights*: Clean the headlights on a regular basis. If necessary, adjust the pressure in all latches lock securely in the Warranty Information Booklet. Windshield wiper blades*: Check for any brakes. Road wheel nuts (lug nuts)*: When checking the tires, make...
..., and are missing, and check for cracks or wear if they operate smoothly and that all warning lights and chimes are all latched positions. Check carefully for cuts, fraying, wear or damage. For additional information regarding tires, refer to long distance trips. Seats:...) P (Park) position mechanism: On a fairly 8-3 Lights*: Clean the headlights on a regular basis. If necessary, adjust the pressure in all latches lock securely in the Warranty Information Booklet. Windshield wiper blades*: Check for any brakes. Road wheel nuts (lug nuts)*: When checking the tires, make...
Owner's Manual
Page 332
... light...2-41 Cellular phone holder...2-31 Charge warning light...2-11 Child restraints...1-21 Booster seats ...1-34 Installation on rear seat outboard or center positions...1-23 LATCH system ...1-28
... light...2-41 Cellular phone holder...2-31 Charge warning light...2-11 Child restraints...1-21 Booster seats ...1-34 Installation on rear seat outboard or center positions...1-23 LATCH system ...1-28
Owner's Manual
Page 335
... ...9-12 Emission control information label ...9-11 Engine serial number ...9-11 F.M.V.S.S. certification label ...9-11 Tire and Loading Information label...8-32, 9-12 Vehicle identification number (VIN)...9-10 LATCH system...1-28 License plate, Installing front license plate...9-13 Lift gate...3-24 Light Bulb replacement ...8-27 Ceiling light ...2-41 Fog light switch...2-27 Headlight switch...
... ...9-12 Emission control information label ...9-11 Engine serial number ...9-11 F.M.V.S.S. certification label ...9-11 Tire and Loading Information label...8-32, 9-12 Vehicle identification number (VIN)...9-10 LATCH system...1-28 License plate, Installing front license plate...9-13 Lift gate...3-24 Light Bulb replacement ...8-27 Ceiling light ...2-41 Fog light switch...2-27 Headlight switch...


