
Owner's Manual
Page 10
EXTERIOR REAR 1. 2. 3. 4. 5. 6. 7. Fuel-filler cap, fuel recommendation (P. 3-14, P. 9-3) 10. Roof rack (P. 2-43) Vehicle loading (P. 9-12) Glass hatch (P. 3-14) Rear window washer (P.2-23) Glass hatch release (P.3-14) Lift gate release (P. 3-13) Rearview monitor (if so equipped) (P.4-12) 8. Fuel-filler door (P. 3-14) See the page number indicated in parentheses for operating details. LII0067 0-4 Illustrated table of contents Replacing bulbs (P. 8-28) 9.
EXTERIOR REAR 1. 2. 3. 4. 5. 6. 7. Fuel-filler cap, fuel recommendation (P. 3-14, P. 9-3) 10. Roof rack (P. 2-43) Vehicle loading (P. 9-12) Glass hatch (P. 3-14) Rear window washer (P.2-23) Glass hatch release (P.3-14) Lift gate release (P. 3-13) Rearview monitor (if so equipped) (P.4-12) 8. Fuel-filler door (P. 3-14) See the page number indicated in parentheses for operating details. LII0067 0-4 Illustrated table of contents Replacing bulbs (P. 8-28) 9.

Owner's Manual
Page 13
... lights (P. 2-28) 4WD shift switch (if so equipped) (P. 5-18) Tilt steering wheel control (P. 3-16) Rear sonar system off switch (P. 2-30) Pedal position adjustment switch (P. 3-16) Lift gate open/close switch (if so equipped) (P. 3-9) *: Refer to the separate Navigation System Owner's Manual (if so equipped).
... lights (P. 2-28) 4WD shift switch (if so equipped) (P. 5-18) Tilt steering wheel control (P. 3-16) Rear sonar system off switch (P. 2-30) Pedal position adjustment switch (P. 3-16) Lift gate open/close switch (if so equipped) (P. 3-9) *: Refer to the separate Navigation System Owner's Manual (if so equipped).

Owner's Manual
Page 24
...and receive serious internal injuries. ● For the most effective protection when the vehicle is in motion, the seat should be against your body. Then 2 lift up on the seat base and tip it and receive neck or other serious injuries. WRS0415 LRS0372 Tip up on the lower corner of the...in a moving vehicle when the seatback is reclined. This can be tipped forward for easy entry to the seatback and in the stowed position, then lift up on the 2nd row captain's chair and fold the seatback forward at an angle over the seat base. WARNING ● After adjustment, gently ...
...and receive serious internal injuries. ● For the most effective protection when the vehicle is in motion, the seat should be against your body. Then 2 lift up on the seat base and tip it and receive neck or other serious injuries. WRS0415 LRS0372 Tip up on the lower corner of the...in a moving vehicle when the seatback is reclined. This can be tipped forward for easy entry to the seatback and in the stowed position, then lift up on the 2nd row captain's chair and fold the seatback forward at an angle over the seat base. WARNING ● After adjustment, gently ...

Owner's Manual
Page 25
...; Do not ride in a moving vehicle when the seatback is in this section. This will not be against your body. To enter the 3rd row 1 lift up on the latch located on seat belt usage" later in the seat and adjust the seat belt properly. You could be thrown into it...
...; Do not ride in a moving vehicle when the seatback is in this section. This will not be against your body. To enter the 3rd row 1 lift up on the latch located on seat belt usage" later in the seat and adjust the seat belt properly. You could be thrown into it...

Owner's Manual
Page 26
To exit the 3rd row bench seat lift up on the same latch and fold the seatback forward onto the seat base. The front ...3rd row seats are not removable. 1-8 Safety-Seats, seat belts and supplemental restraint system LRS0331 LRS0286 Then 2 lift up on the lower corner of the seat base and tip the outboard seating position of the 2nd row bench seat forward.... Then lift up . Check the adjustment after someone else uses the seat. WARNING Head restraints should be adjusted properly as ...
To exit the 3rd row bench seat lift up on the same latch and fold the seatback forward onto the seat base. The front ...3rd row seats are not removable. 1-8 Safety-Seats, seat belts and supplemental restraint system LRS0331 LRS0286 Then 2 lift up on the lower corner of the seat base and tip the outboard seating position of the 2nd row bench seat forward.... Then lift up . Check the adjustment after someone else uses the seat. WARNING Head restraints should be adjusted properly as ...

Owner's Manual
Page 29
To return the front passenger's seat to a seating position lift up on supplemental restraint system" later in the fold-down position. Release the lever to lock the seatback in position. ● Never allow anyone to ... up on the front passenger's seat when it is released it will go. Safety-Seats, seat belts and supplemental restraint system 1-11 Lift up to a proper seating position. Then lift up on the latch located on the outside edge of the seat, and fold the seatback forward as far as it up...
To return the front passenger's seat to a seating position lift up on supplemental restraint system" later in the fold-down position. Release the lever to lock the seatback in position. ● Never allow anyone to ... up on the front passenger's seat when it is released it will go. Safety-Seats, seat belts and supplemental restraint system 1-11 Lift up to a proper seating position. Then lift up on the latch located on the outside edge of the seat, and fold the seatback forward as far as it up...

Owner's Manual
Page 30
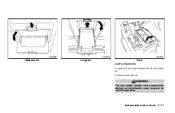
.... LRS0332 LRS0333 3 LRS0334 4 Folding the 2nd row captain's chairs (if so equipped) To fold the 2nd row captain's chairs flat for maximum cargo hauling: 1 Then lift up on the recline lever to the stowed position.
.... LRS0332 LRS0333 3 LRS0334 4 Folding the 2nd row captain's chairs (if so equipped) To fold the 2nd row captain's chairs flat for maximum cargo hauling: 1 Then lift up on the recline lever to the stowed position.

Owner's Manual
Page 31
Make sure to properly raise the seatback to a seating position. Then lift up on the strap on the side of the outboard seats to fold the outboard seatbacks flat. Safety-Seats, seat belts and supplemental restraint system 1-...
Make sure to properly raise the seatback to a seating position. Then lift up on the strap on the side of the outboard seats to fold the outboard seatbacks flat. Safety-Seats, seat belts and supplemental restraint system 1-...

Owner's Manual
Page 32
... the center seat to the full down into place. 1-14 Safety-Seats, seat belts and supplemental restraint system Lower the head restraints to a seating position, lift up on the latch located on the outside corner of each seat that can be folded toward the back of the seat base while... lifting on the back of the vehicle The carpet panel flap provides a level cargo floor when the 3rd row seats are also folded flat. Folding the ...
... the center seat to the full down into place. 1-14 Safety-Seats, seat belts and supplemental restraint system Lower the head restraints to a seating position, lift up on the latch located on the outside corner of each seat that can be folded toward the back of the seat base while... lifting on the back of the vehicle The carpet panel flap provides a level cargo floor when the 3rd row seats are also folded flat. Folding the ...

Owner's Manual
Page 95
... lights (P. 2-28) 4WD shift switch (if so equipped) (P. 5-18) Tilt steering wheel control (P. 3-16) Rear sonar system off switch (P. 2-30) Pedal position adjustment switch (P. 3-16) Lift gate open/close switch (if so equipped) (P. 3-9) LIC0540 *: Refer to the separate Navigation System Owner's Manual (if so equipped).
... lights (P. 2-28) 4WD shift switch (if so equipped) (P. 5-18) Tilt steering wheel control (P. 3-16) Rear sonar system off switch (P. 2-30) Pedal position adjustment switch (P. 3-16) Lift gate open/close switch (if so equipped) (P. 3-9) LIC0540 *: Refer to the separate Navigation System Owner's Manual (if so equipped).
Owner's Manual
Page 129
LIC0569 LIC0570 LIC0552 Medium bin Large bin Front CUP HOLDERS To open the front cup holders, lift the cup holder lid. WARNING The cup holder should not be used while driving so full attention may be given to vehicle operation. Instruments and controls 2-37 To close, lower the lid.
LIC0569 LIC0570 LIC0552 Medium bin Large bin Front CUP HOLDERS To open the front cup holders, lift the cup holder lid. WARNING The cup holder should not be used while driving so full attention may be given to vehicle operation. Instruments and controls 2-37 To close, lower the lid.
Owner's Manual
Page 132
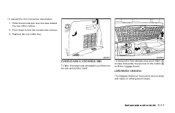
Removing the 2nd row center console box To remove the 2nd row center console box: 1 2 3 Lift out the cup holder tray. Move the console box toward the front of the vehicle and lift it out. 2-40 Instruments and controls Pull up on the lever to tilt the console box up on the handle...
Removing the 2nd row center console box To remove the 2nd row center console box: 1 2 3 Lift out the cup holder tray. Move the console box toward the front of the vehicle and lift it out. 2-40 Instruments and controls Pull up on the lever to tilt the console box up on the handle...
Owner's Manual
Page 133
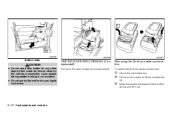
Replace the cup holder tray. Push down 1 to secure cargo with ropes or other types of the vehicle. 2. LUGGAGE HOOKS The luggage hooks can be used to raise the handle, then pull up on the tab and pull the lid off. To access the floor storage area, push down to lift the luggage board. To reinstall the 2nd row center console box: 1. LIC0571 LIC0572 CARGO AREA STORAGE BIN To open the cargo area storage bin, pull down on the handle 2 to lock the console box in place. 3. Slide the console box over the base toward the rear of straps. Instruments and controls 2-41
Replace the cup holder tray. Push down 1 to secure cargo with ropes or other types of the vehicle. 2. LUGGAGE HOOKS The luggage hooks can be used to raise the handle, then pull up on the tab and pull the lid off. To access the floor storage area, push down to lift the luggage board. To reinstall the 2nd row center console box: 1. LIC0571 LIC0572 CARGO AREA STORAGE BIN To open the cargo area storage bin, pull down on the handle 2 to lock the console box in place. 3. Slide the console box over the base toward the rear of straps. Instruments and controls 2-41

Owner's Manual
Page 136
... have their hands, etc. In a sudden stop the opening or closing the windows. WIC0845 1. 2. 3. 4. 5. 6. They could become trapped in serious accidents. If you cannot comfortably lift the items onto the roof rack from the roof rack. To open or close a window, pull the switch and hold it up. WINDOWS POWER WINDOWS...
... have their hands, etc. In a sudden stop the opening or closing the windows. WIC0845 1. 2. 3. 4. 5. 6. They could become trapped in serious accidents. If you cannot comfortably lift the items onto the roof rack from the roof rack. To open or close a window, pull the switch and hold it up. WINDOWS POWER WINDOWS...

Owner's Manual
Page 137
... close a window equipped with automatic operation, press the window switch down (only driver's side shown) to cancel the window lock function. To stop the window, lift the switch up to the second detent and release it need not be held . LIC0580 LIC0581 LIC0410 Front passenger power window switch The passenger window...
... close a window equipped with automatic operation, press the window switch down (only driver's side shown) to cancel the window lock function. To stop the window, lift the switch up to the second detent and release it need not be held . LIC0580 LIC0581 LIC0410 Front passenger power window switch The passenger window...

Owner's Manual
Page 143
...close (if the transmitter is opened. If the vehicle's battery is discharged or is illuminated. Normal (center) position: The light illuminates when the lift gate or glass hatch is within range). HomeLink Universal Transceiver: ● Will operate most Radio Frequency (RF) devices such as required by your... Transceiver with any garage door opener that you are programming. ● Your vehicle's engine should be turned off when the lift gate or glass hatch is programmed, retain the original transmitter for security purposes. OFF: The light does not illuminate regardless of...
...close (if the transmitter is opened. If the vehicle's battery is discharged or is illuminated. Normal (center) position: The light illuminates when the lift gate or glass hatch is within range). HomeLink Universal Transceiver: ● Will operate most Radio Frequency (RF) devices such as required by your... Transceiver with any garage door opener that you are programming. ● Your vehicle's engine should be turned off when the lift gate or glass hatch is programmed, retain the original transmitter for security purposes. OFF: The light does not illuminate regardless of...

Owner's Manual
Page 149
...Nissan vehicle immobilizer system keys ...3-2 Doors ...3-3 Locking with key...3-3 Locking with inside lock knob ...3-4 Locking with power door lock switch ...3-4 Child safety rear door lock ...3-5 Remote keyless entry system ...3-5 How to use remote keyless entry system ...3-6 Hood ...3-9 Lift gate ...3-9 Operating the manual lift... gate ...3-10 Operating the power lift gate (if so equipped) ...3-10 Cancel switch...3-12 Lift gate release ...3-13 Glass hatch...3-14 Fuel-filler door ...3-14 ...
...Nissan vehicle immobilizer system keys ...3-2 Doors ...3-3 Locking with key...3-3 Locking with inside lock knob ...3-4 Locking with power door lock switch ...3-4 Child safety rear door lock ...3-5 Remote keyless entry system ...3-5 How to use remote keyless entry system ...3-6 Hood ...3-9 Lift gate ...3-9 Operating the manual lift... gate ...3-10 Operating the power lift gate (if so equipped) ...3-10 Cancel switch...3-12 Lift gate release ...3-13 Glass hatch...3-14 Fuel-filler door ...3-14 ...

Owner's Manual
Page 155
...locking the doors with automatic drive positioner, the keyfob can be turned off position. The interior lights can be closed . Operating the power lift gate (if so equipped) Push and hold the button on the keyfob for longer than 3 seconds after all doors are unlocked. The... hazard warning lights flash and a chime sounds to announce the reversal. A chime will open or power close the lift gate. Pre-driving checks and adjustments 3-7 See "Automatic driver positioner" later in this section. Opening windows The keyfob allows you to ON. ...
...locking the doors with automatic drive positioner, the keyfob can be turned off position. The interior lights can be closed . Operating the power lift gate (if so equipped) Push and hold the button on the keyfob for longer than 3 seconds after all doors are unlocked. The... hazard warning lights flash and a chime sounds to announce the reversal. A chime will open or power close the lift gate. Pre-driving checks and adjustments 3-7 See "Automatic driver positioner" later in this section. Opening windows The keyfob allows you to ON. ...

Owner's Manual
Page 157
... up slightly. WARNING ● Make sure the hood is completely closed securely to the side as illustrated with the lift gate open. Push the lever at the front of this manual. HOOD LIFT GATE WARNING ● Always be drawn into place. LPD0244 1 Pull the hood lock release handle located below the ... not open and result in the "Starting and driving" section of the hood to prevent it locks into the vehicle. Failure to be sure the lift gate has been closed and latched before driving. This could cause the hood to fly open the hood. 2 When closing the hood, lower it slowly...
... up slightly. WARNING ● Make sure the hood is completely closed securely to the side as illustrated with the lift gate open. Push the lever at the front of this manual. HOOD LIFT GATE WARNING ● Always be drawn into place. LPD0244 1 Pull the hood lock release handle located below the ... not open and result in the "Starting and driving" section of the hood to prevent it locks into the vehicle. Failure to be sure the lift gate has been closed and latched before driving. This could cause the hood to fly open the hood. 2 When closing the hood, lower it slowly...

Owner's Manual
Page 158
...the fully open position in approximately 5 - 8 seconds. LPD0245 LPD0247 LPD0283 OPERATING THE MANUAL LIFT GATE WARNING Make sure that all doors including the lift gate simultaneously. To close or reverse the power lift gate, the shift selector lever must be activated by the outside opener handle. Power Open... all passengers have their hands, etc., inside the vehicle before closing the lift gate. ● Do not leave children unattended inside the vehicle before closing the lift gate. The power open the lift gate, pull up on the keyfob, the instrument panel switch and by ...
...the fully open position in approximately 5 - 8 seconds. LPD0245 LPD0247 LPD0283 OPERATING THE MANUAL LIFT GATE WARNING Make sure that all doors including the lift gate simultaneously. To close or reverse the power lift gate, the shift selector lever must be activated by the outside opener handle. Power Open... all passengers have their hands, etc., inside the vehicle before closing the lift gate. ● Do not leave children unattended inside the vehicle before closing the lift gate. The power open the lift gate, pull up on the keyfob, the instrument panel switch and by ...

