Owner's Manual
Page 62
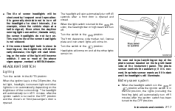
...been turned to put anything on top of the photo sensor located on the top left-hand side of the above signs appear, contact a NISSAN dealer. The headlight will automatically turn off. if it is covered, the photo sensor reacts as if it is opened and closed. Be ...off 5 minutes after the ignition switch is turned to turn on . Turn the switch to the position: The front clearance, side marker, tail, license plate and instrument lights will automatically turn off 5 minutes after a front door is generally desirable not to the OFF position and the driver's or front ...
...been turned to put anything on top of the photo sensor located on the top left-hand side of the above signs appear, contact a NISSAN dealer. The headlight will automatically turn off. if it is covered, the photo sensor reacts as if it is opened and closed. Be ...off 5 minutes after the ignition switch is turned to turn on . Turn the switch to the position: The front clearance, side marker, tail, license plate and instrument lights will automatically turn off 5 minutes after a front door is generally desirable not to the OFF position and the driver's or front ...

Owner's Manual
Page 203
...Clearance light Front side marker light Front fog light (if so equipped) Rear combination light Turn signal Stop/Tail Back-up Rear side marker light License plate light High-mounted stop light (if so equipped) Interior light Front personal light Step light Trunk light Vanity mirror light (if so equipped) 21... 21/5 13 3.8 5 21 10 10 2.7 3.4 1.4 161 158 - T20 T20 T20 T16 T10 Wattage (W) 21 5 3.8 See an authorized NISSAN dealer for a long period of time as originally installed: Wattage 60 Bulb no. T20 T10 T10 8-28 Maintenance and do-it-yourself Bulb No. HB3...
...Clearance light Front side marker light Front fog light (if so equipped) Rear combination light Turn signal Stop/Tail Back-up Rear side marker light License plate light High-mounted stop light (if so equipped) Interior light Front personal light Step light Trunk light Vanity mirror light (if so equipped) 21... 21/5 13 3.8 5 21 10 10 2.7 3.4 1.4 161 158 - T20 T20 T20 T16 T10 Wattage (W) 21 5 3.8 See an authorized NISSAN dealer for a long period of time as originally installed: Wattage 60 Bulb no. T20 T10 T10 8-28 Maintenance and do-it-yourself Bulb No. HB3...

Owner's Manual
Page 216
certification label ...9-11 Emission control information label ...9-11 Tire placard ...Air conditioner specification label...Installing front license plate...Vehicle loading information ...Terms ...Determining vehicle load capacity...Loading tips ...Towing a trailer ...Maximum load limits...Towing safety ...Uniform... Dimensions and weights ...9-9 When traveling or registering your vehicle in another country ...9-10 Vehicle identification ...9-10 Vehicle identification number (VIN) plate...9-10 Vehicle identification number (Chassis number) ...9-10 Engine serial number ...9-11 F.M.V.S.S.
certification label ...9-11 Emission control information label ...9-11 Tire placard ...Air conditioner specification label...Installing front license plate...Vehicle loading information ...Terms ...Determining vehicle load capacity...Loading tips ...Towing a trailer ...Maximum load limits...Towing safety ...Uniform... Dimensions and weights ...9-9 When traveling or registering your vehicle in another country ...9-10 Vehicle identification ...9-10 Vehicle identification number (VIN) plate...9-10 Vehicle identification number (Chassis number) ...9-10 Engine serial number ...9-11 F.M.V.S.S.

Owner's Manual
Page 228
... 0.39 in (10 mm) drill bit at the marked locations. (Be sure that the following steps to mount the license plate: Before mounting the license plate, confirm that the drill only goes through the fascia, or damage to add 90° turn onto the part k. ... a J-nut into the hole on the fascia. 5. Temporarily place the license plate bracket A while aligning points k of the front bumper B fascia with holes k in the license plate bracket. 2. INSTALLING FRONT LICENSE PLATE Use the following parts are enclosed in the vinyl bag. ¼ License plate bracket ¼ J-nut x 2 ¼ Screw x 2 ¼...
... 0.39 in (10 mm) drill bit at the marked locations. (Be sure that the following steps to mount the license plate: Before mounting the license plate, confirm that the drill only goes through the fascia, or damage to add 90° turn onto the part k. ... a J-nut into the hole on the fascia. 5. Temporarily place the license plate bracket A while aligning points k of the front bumper B fascia with holes k in the license plate bracket. 2. INSTALLING FRONT LICENSE PLATE Use the following parts are enclosed in the vinyl bag. ¼ License plate bracket ¼ J-nut x 2 ¼ Screw x 2 ¼...

Owner's Manual
Page 229
...carrier, cartop carrier or similar equipment does not increase load carrying capacity of your vehicle. 2. Install the license plate bracket with the following terms before placing the license plate bracket on the fascia. 7. DETERMINING VEHICLE LOAD CAPACITY The load capacity of this vehicle is determined by ...bolts that is important to familiarize yourself with screws. 8. curb weight plus the combined weight of passengers and cargo. Install the license plate with seats and seat belts. ¼ Be sure everyone in a seat and using a commercial-grade scale, found at places ...
...carrier, cartop carrier or similar equipment does not increase load carrying capacity of your vehicle. 2. Install the license plate bracket with the following terms before placing the license plate bracket on the fascia. 7. DETERMINING VEHICLE LOAD CAPACITY The load capacity of this vehicle is determined by ...bolts that is important to familiarize yourself with screws. 8. curb weight plus the combined weight of passengers and cargo. Install the license plate with seats and seat belts. ¼ Be sure everyone in a seat and using a commercial-grade scale, found at places ...
Owner's Manual
Page 242
... specification label ...Label, Emission control information label...Label, F.M.V.S.S. certification label...Labels Air bag warning labels...Engine serial number ...Vehicle identification number (VIN)...LATCH system...License plate, Installing front license plate...Light Air bag warning light ...9-12 9-11 9-11 1-18 9-11 9-10 1-34 9-13 1-18 Bulb replacement ...8-26 Fog light switch ...2-19 Headlight switch ...2-17...
... specification label ...Label, Emission control information label...Label, F.M.V.S.S. certification label...Labels Air bag warning labels...Engine serial number ...Vehicle identification number (VIN)...LATCH system...License plate, Installing front license plate...Light Air bag warning light ...9-12 9-11 9-11 1-18 9-11 9-10 1-34 9-13 1-18 Bulb replacement ...8-26 Fog light switch ...2-19 Headlight switch ...2-17...