Owner's Manual
Page 171
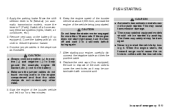
CAUTION ¼ Always connect positive (+) to positive (+) and negative (−) to the battery. ¼ Make sure the jumper cables do not touch moving parts in the sequence as it . Start the engine of the booster vehicle and let it run for example, engine ...Remove vent caps on automatic transmission models, move the lever to start the vehicle by pushing. After starting your engine, carefully disconnect the negative cable and then the positive cable. 8. CAUTION Do not keep the starter motor engaged for more than 10 seconds. If the engine does not start the engine of emergency...
CAUTION ¼ Always connect positive (+) to positive (+) and negative (−) to the battery. ¼ Make sure the jumper cables do not touch moving parts in the sequence as it . Start the engine of the booster vehicle and let it run for example, engine ...Remove vent caps on automatic transmission models, move the lever to start the vehicle by pushing. After starting your engine, carefully disconnect the negative cable and then the positive cable. 8. CAUTION Do not keep the starter motor engaged for more than 10 seconds. If the engine does not start the engine of emergency...
Owner's Manual
Page 198
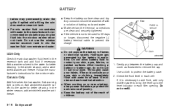
...spilled while filling the window washer reservoir tank. ¼ Pre-mix washer fluid concentrates with water for 30 days or longer, disconnect the negative (−) battery terminal cable to prevent discharge. Do not use the window washer reservoir tank to the water for better cleaning. Hydrogen gas generated by the... battery is necessary to add fluid, add only distilled water to bring the level up to be used for at least 15 minutes and...
...spilled while filling the window washer reservoir tank. ¼ Pre-mix washer fluid concentrates with water for 30 days or longer, disconnect the negative (−) battery terminal cable to prevent discharge. Do not use the window washer reservoir tank to the water for better cleaning. Hydrogen gas generated by the... battery is necessary to add fluid, add only distilled water to bring the level up to be used for at least 15 minutes and...
Owner's Manual
Page 211
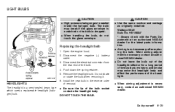
... the bulb is dropped. ¼ When handling the bulb, do not touch the glass envelope. DO NOT TOUCH THE BULB. Disconnect the negative (−) battery cable. 3. Disconnect the electrical connector from the rear end of the bulb socket contacts the headlight body. Install the new bulb in the reverse...a long period of time as originally installed: Wattage 65/45 Bulb No. Do-it . 6. When aiming adjustment is necessary, contact an authorized NISSAN dealer. ¼ Do not leave the bulb out of the headlight. ¼ When aiming adjustment is not necessary after replacing the bulb. ADI1037...
... the bulb is dropped. ¼ When handling the bulb, do not touch the glass envelope. DO NOT TOUCH THE BULB. Disconnect the negative (−) battery cable. 3. Disconnect the electrical connector from the rear end of the bulb socket contacts the headlight body. Install the new bulb in the reverse...a long period of time as originally installed: Wattage 65/45 Bulb No. Do-it . 6. When aiming adjustment is necessary, contact an authorized NISSAN dealer. ¼ Do not leave the bulb out of the headlight. ¼ When aiming adjustment is not necessary after replacing the bulb. ADI1037...


