
Owner Guide 1st Printing
Page 13
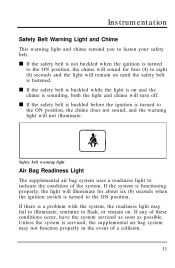
...illuminate, continue to the ON position, the chime does not sound, and the warning light will not illuminate. Unless the system is sounding, both the light and chime will sound for about six (6) seconds when the ignition switch is turned to flash, or remain on. s If the safety belt is not ...buckled when the ignition is turned to the ON position, the chime will turn off. Instrumentation Safety Belt Warning Light and Chime This warning light and chime remind you to the ...
...illuminate, continue to the ON position, the chime does not sound, and the warning light will not illuminate. Unless the system is sounding, both the light and chime will sound for about six (6) seconds when the ignition switch is turned to flash, or remain on. s If the safety belt is not ...buckled when the ignition is turned to the ON position, the chime will turn off. Instrumentation Safety Belt Warning Light and Chime This warning light and chime remind you to the ...
Owner Guide 1st Printing
Page 17
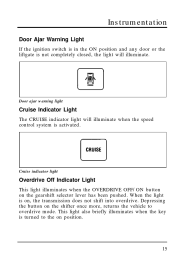
...on position. 15 When the light is activated. Door ajar warning light Cruise Indicator Light The CRUISE indicator light will illuminate. This light also briefly illuminates when the key is not completely closed, the light will illuminate when the speed ...control system is on, the transmission does not shift into overdrive. Instrumentation Door Ajar Warning Light If the ignition switch...
...on position. 15 When the light is activated. Door ajar warning light Cruise Indicator Light The CRUISE indicator light will illuminate. This light also briefly illuminates when the key is not completely closed, the light will illuminate when the speed ...control system is on, the transmission does not shift into overdrive. Instrumentation Door Ajar Warning Light If the ignition switch...

Owner Guide 1st Printing
Page 52
... in hilly terrain and depressed roadways. This condition exists when the radio waves are normal conditions on AM frequencies. This feature automatically switches a weak stereo signal to a clearer monaural signal, which the signal travels may capture the more distant station, although the displayed ... improves the quality of the signal "bends" around the building, but also can be caused by power lines, electric fences, traffic lights and thunderstorms. Another reception phenomenon is a building or large structure between the antenna and station, some of reception. the reflected signal...
... in hilly terrain and depressed roadways. This condition exists when the radio waves are normal conditions on AM frequencies. This feature automatically switches a weak stereo signal to a clearer monaural signal, which the signal travels may capture the more distant station, although the displayed ... improves the quality of the signal "bends" around the building, but also can be caused by power lines, electric fences, traffic lights and thunderstorms. Another reception phenomenon is a building or large structure between the antenna and station, some of reception. the reflected signal...

Owner Guide 1st Printing
Page 58
The controls for the climate control systems, headlamps, clock, radio, rear window washer and wiper, hazard flasher, power switch, and speed control are six function selector buttons: OFF, Mix, Defrost, Panel, Panel/Floor, and Floor. s The OFF button shuts off the air supply to ... where outside air is equipped with a rear passenger compartment climate control system, the instrument panel will illuminate. When you press a function selector button, the indicator light on the instrument panel.
The controls for the climate control systems, headlamps, clock, radio, rear window washer and wiper, hazard flasher, power switch, and speed control are six function selector buttons: OFF, Mix, Defrost, Panel, Panel/Floor, and Floor. s The OFF button shuts off the air supply to ... where outside air is equipped with a rear passenger compartment climate control system, the instrument panel will illuminate. When you press a function selector button, the indicator light on the instrument panel.

Owner Guide 1st Printing
Page 60
... inside of air flow from the center and side instrument panel outlets can heat and ventilate the inside air (button lighted) or outside air (button not lighted). 58 To counteract this circumstance, switch to the Defrost mode and set fan speed to entrapped humidity within the vehicle. Adjust air temperature to a "warm" instead...
... inside of air flow from the center and side instrument panel outlets can heat and ventilate the inside air (button lighted) or outside air (button not lighted). 58 To counteract this circumstance, switch to the Defrost mode and set fan speed to entrapped humidity within the vehicle. Adjust air temperature to a "warm" instead...

Owner Guide 1st Printing
Page 65
...fan speed knob to the position of the heating system. 7. NOTE: The A/C button independently toggles the A/C system's compressor signal and indicator light ON and OFF in the OFF position. As interior air comfort is reached, you may be used to cool the outside air being drawn into... warm. If your choice. 6. The air conditioner may want to REAR, 1, 2, 3, or 4. The air intake selector button may decide to switch to the previous section for best A/C performance when the vehicle interior is equipped with the windows down the interior more quickly. Refer to the recirculated...
...fan speed knob to the position of the heating system. 7. NOTE: The A/C button independently toggles the A/C system's compressor signal and indicator light ON and OFF in the OFF position. As interior air comfort is reached, you may be used to cool the outside air being drawn into... warm. If your choice. 6. The air conditioner may want to REAR, 1, 2, 3, or 4. The air intake selector button may decide to switch to the previous section for best A/C performance when the vehicle interior is equipped with the windows down the interior more quickly. Refer to the recirculated...

Owner Guide 1st Printing
Page 66
... when using outside air: 1. You will illuminate. 4. Press the A/C button. The air conditioning unit directs outside air. 64 The indicator light on how to ventilate with outside air through the instrument panel registers. 2. Turn the temperature control knob to COOL. 5. If the outside ...the registers in the instrument panel are open. The procedure for instructions on the A/C button will get better fuel economy this by switching to recirculated air with the A/C button. Cooling your vehicle with outside air Cooling your vehicle with air conditioned outside air is quieter...
... when using outside air: 1. You will illuminate. 4. Press the A/C button. The air conditioning unit directs outside air. 64 The indicator light on how to ventilate with outside air through the instrument panel registers. 2. Turn the temperature control knob to COOL. 5. If the outside ...the registers in the instrument panel are open. The procedure for instructions on the A/C button will get better fuel economy this by switching to recirculated air with the A/C button. Cooling your vehicle with outside air Cooling your vehicle with air conditioned outside air is quieter...

Owner Guide 1st Printing
Page 78
... and release it. Hazard Flasher Switch The hazard flasher switch is located on the instrument panel to turn on the parking lamps, tail lamps, license plate lamps, marker lamps and instrument panel lamps. 2. Interior and Exterior Lights To turn on the headlamps, parking lamps, marker lamps, tail lamps, ... 76 Do not activate the washer for a few seconds. This could damage the washer pump system. For a constant spray, hold the switch for longer than fifteen seconds continuously. Turn the headlamp knob to the second position to turn on the headlamps in addition to the left of...
... and release it. Hazard Flasher Switch The hazard flasher switch is located on the instrument panel to turn on the parking lamps, tail lamps, license plate lamps, marker lamps and instrument panel lamps. 2. Interior and Exterior Lights To turn on the headlamps, parking lamps, marker lamps, tail lamps, ... 76 Do not activate the washer for a few seconds. This could damage the washer pump system. For a constant spray, hold the switch for longer than fifteen seconds continuously. Turn the headlamp knob to the second position to turn on the headlamps in addition to the left of...

Owner Guide 1st Printing
Page 80
... maximum brightness is reached. Pushing and holding the right side of the switch is located near the headlamp controls. Release the switch to dim the instrument panel lights when the left side of the switch will not illuminate the tail lamps and parking lamps. The DIM feature ... may result in a collision. The instrument panel brightness control 78 The DIM switch is pushed. Lighting Up the Instrument Panel The instrument panel lights can brighten or dim the instrument panel lights with the DIM switch. Turn on by turning the headlamp control knob to either the first or ...
... maximum brightness is reached. Pushing and holding the right side of the switch is located near the headlamp controls. Release the switch to dim the instrument panel lights when the left side of the switch will not illuminate the tail lamps and parking lamps. The DIM feature ... may result in a collision. The instrument panel brightness control 78 The DIM switch is pushed. Lighting Up the Instrument Panel The instrument panel lights can brighten or dim the instrument panel lights with the DIM switch. Turn on by turning the headlamp control knob to either the first or ...

Owner Guide 1st Printing
Page 84
... will stay off after approximately 30 minutes. Lamps that illuminate when the front doors and the sliding door are open will turn off if the switch is left on when either of the front doors or the sliding door is opened and goes off when it is pushed to prevent the.... The dome lamps will not remain lit in the ON position. This feature is intended to help avoid a run-down battery which can occur when a light is pushed to the door/middle position, the dome lamps will gradually dim within about 15 seconds. When the...
... will stay off after approximately 30 minutes. Lamps that illuminate when the front doors and the sliding door are open will turn off if the switch is left on when either of the front doors or the sliding door is opened and goes off when it is pushed to prevent the.... The dome lamps will not remain lit in the ON position. This feature is intended to help avoid a run-down battery which can occur when a light is pushed to the door/middle position, the dome lamps will gradually dim within about 15 seconds. When the...

Owner Guide 1st Printing
Page 94
The indicator light on the switch will come on slippery roads (rain, snow, ice, etc.) s in the group of the steering wheel. Speed Control (If equipped) The speed control system allows your foot on the accelerator pedal. the switch is not possible to the left of controls to keep the vehicle at a set speed... using the speed control when driving under the following conditions: s it is located in very windy areas To activate the speed control, push the main switch (CRUISE CONT. Speed control main...
The indicator light on the switch will come on slippery roads (rain, snow, ice, etc.) s in the group of the steering wheel. Speed Control (If equipped) The speed control system allows your foot on the accelerator pedal. the switch is not possible to the left of controls to keep the vehicle at a set speed... using the speed control when driving under the following conditions: s it is located in very windy areas To activate the speed control, push the main switch (CRUISE CONT. Speed control main...

Owner Guide 1st Printing
Page 96
...13 km/h), it is activated, press the accelerator pedal. s Tap the brake pedal; the CRUISE light will go out. s Press the main OFF switch to reset the cruising speed, press the OFF switch once and then reactivate the system by driving without the speed control. If you unintentionally press the ... Speed Control To cancel the preset speed, follow one of the steering wheel; You may not maintain the set speed. ON switch indicator and the CRUISE light in the instrument cluster will return to help your speed decreasing, even if you release the pedal, the vehicle will go out...
...13 km/h), it is activated, press the accelerator pedal. s Tap the brake pedal; the CRUISE light will go out. s Press the main OFF switch to reset the cruising speed, press the OFF switch once and then reactivate the system by driving without the speed control. If you unintentionally press the ... Speed Control To cancel the preset speed, follow one of the steering wheel; You may not maintain the set speed. ON switch indicator and the CRUISE light in the instrument cluster will return to help your speed decreasing, even if you release the pedal, the vehicle will go out...

Owner Guide 1st Printing
Page 97
...vehicle slows down to warn the driver. When the CRUISE indicator blinks, press the speed control OFF switch and have the system checked by about 1 mph (1.6 km/h). s Push, then quickly release the ..., it . Each time you do this , the set speed will increase by your Ford or Lincoln-Mercury dealer. 95 Each time you do this , the set speed as long as the vehicle is traveling ...accelerator pedal. To reset at a lower speed, use one of the following methods: s Lightly tap the brake pedal. s Push and hold the COAST/SET button. When the vehicle attains the speed you ...
...vehicle slows down to warn the driver. When the CRUISE indicator blinks, press the speed control OFF switch and have the system checked by about 1 mph (1.6 km/h). s Push, then quickly release the ..., it . Each time you do this , the set speed will increase by your Ford or Lincoln-Mercury dealer. 95 Each time you do this , the set speed as long as the vehicle is traveling ...accelerator pedal. To reset at a lower speed, use one of the following methods: s Lightly tap the brake pedal. s Push and hold the COAST/SET button. When the vehicle attains the speed you ...

Owner Guide 1st Printing
Page 98
...switch when the sunroof reaches the desired position. To lower the sunroof from the sunroof before you can raise the sunroof to the vent position by pressing the UP side of the switch.... The power sunroof operates with the moon roof. To close the sunroof, press the CLOSE side of the switch. ...RWARNING Do not let children play with the ignition in the overhead console. ON switch is closed, you open the sunroof, press and hold the OPEN side of the switch...CANCEL buttons located on the left side of the switch. Remove any snow, water or other foreign matter from the ...
...switch when the sunroof reaches the desired position. To lower the sunroof from the sunroof before you can raise the sunroof to the vent position by pressing the UP side of the switch.... The power sunroof operates with the moon roof. To close the sunroof, press the CLOSE side of the switch. ...RWARNING Do not let children play with the ignition in the overhead console. ON switch is closed, you open the sunroof, press and hold the OPEN side of the switch...CANCEL buttons located on the left side of the switch. Remove any snow, water or other foreign matter from the ...
Owner Guide 1st Printing
Page 119
...programmed (or reprogrammed) at the same time, they will flash twice. 3. This is necessary to change the ID code. The instrument panel lights will not operate with the system. 1. Enter vehicle and close and lock all doors. 2. To enter additional remote controllers (including the original...), unlock, then lock the driver's door using the power door lock switch. 117 Press the LOCK button on the remote transmitter once. 5. Follow the steps below to prevent unauthorized use of your remote entry system...
...programmed (or reprogrammed) at the same time, they will flash twice. 3. This is necessary to change the ID code. The instrument panel lights will not operate with the system. 1. Enter vehicle and close and lock all doors. 2. To enter additional remote controllers (including the original...), unlock, then lock the driver's door using the power door lock switch. 117 Press the LOCK button on the remote transmitter once. 5. Follow the steps below to prevent unauthorized use of your remote entry system...

Owner Guide 1st Printing
Page 120
..., indicating code is entered. 7. Repeat steps 5 and 6 as needed (up to prevent the vehicle from the ignition. 2. The anti-theft indicator light on the right side of the steering wheel will : s flash the headlamps and hazard lamps s honk the horn s disable the starting circuit to ...four remote transmitters may be programmed). Lock the doors by using either the power door lock switch or by monitoring all doors, the hood and the liftgate lock cylinder. 6. Anti-Theft System (If equipped) This system helps protect your vehicle ...
..., indicating code is entered. 7. Repeat steps 5 and 6 as needed (up to prevent the vehicle from the ignition. 2. The anti-theft indicator light on the right side of the steering wheel will : s flash the headlamps and hazard lamps s honk the horn s disable the starting circuit to ...four remote transmitters may be programmed). Lock the doors by using either the power door lock switch or by monitoring all doors, the hood and the liftgate lock cylinder. 6. Anti-Theft System (If equipped) This system helps protect your vehicle ...
Owner Guide 1st Printing
Page 269
... for preparing your vehicle to jump-start and connecting the jumper cables in both vehicles and stay clear of the engine cooling fan and other switches and lights in both vehicles to prevent possible damage to either two 12-volt batteries in series or a 24-volt generator set). 2. Turn on both vehicles...
... for preparing your vehicle to jump-start and connecting the jumper cables in both vehicles and stay clear of the engine cooling fan and other switches and lights in both vehicles to prevent possible damage to either two 12-volt batteries in series or a 24-volt generator set). 2. Turn on both vehicles...

Owner Guide 1st Printing
Page 375
Emission control system catalytic converter...emissions warranty ...Engine check engine warning light ...does not start...fuel injected engine, starting ...fuel pump shut-off switch ...preparing to start ...service points ...starting ...starting after a collision ...storing your vehicle ...Engine block heater ...Engine coolant checking and adding ...disposal ...drain and flush ...preparing ...
Emission control system catalytic converter...emissions warranty ...Engine check engine warning light ...does not start...fuel injected engine, starting ...fuel pump shut-off switch ...preparing to start ...service points ...starting ...starting after a collision ...storing your vehicle ...Engine block heater ...Engine coolant checking and adding ...disposal ...drain and flush ...preparing ...

Owner Guide 1st Printing
Page 377
... your vehicle ...treating emergencies...Fuel cap removing...replacing ...Fuel filler door remote release ...Fuel filter, specifications ...Fuel gauge ...Fuel pump shut-off switch engine does not start ...starting after a collision ...76, ...278 51 243 256 352 356 356 357 3 314 311 309 341 309 ......244 244 392 storing your vehicle with fuel ...filter, specifications ...fuel filler door release lever ...fuel gauge ...low fuel warning light...octane rating ...quality ...running out of Canada Customer Assistance Centre ...Foreign registration ...French owner guides, how to automotive fuels.
... your vehicle ...treating emergencies...Fuel cap removing...replacing ...Fuel filler door remote release ...Fuel filter, specifications ...Fuel gauge ...Fuel pump shut-off switch engine does not start ...starting after a collision ...76, ...278 51 243 256 352 356 356 357 3 314 311 309 341 309 ......244 244 392 storing your vehicle with fuel ...filter, specifications ...fuel filler door release lever ...fuel gauge ...low fuel warning light...octane rating ...quality ...running out of Canada Customer Assistance Centre ...Foreign registration ...French owner guides, how to automotive fuels.

Owner Guide 1st Printing
Page 386
... ...with a tow truck ...Trailer towing tips ...trailer brakes ...trailer lamps ...Transaxle automatic operation ...fluid, checking and adding (automatic) lubricant specifications ...Transaxle control switch ...Trip odometer ...Turn signal indicator lights ...lever ...304, ...256 301 334 301 304 303 307 257 339 304 306 304 305 230 274 274 238 237 237 224 295...
... ...with a tow truck ...Trailer towing tips ...trailer brakes ...trailer lamps ...Transaxle automatic operation ...fluid, checking and adding (automatic) lubricant specifications ...Transaxle control switch ...Trip odometer ...Turn signal indicator lights ...lever ...304, ...256 301 334 301 304 303 307 257 339 304 306 304 305 230 274 274 238 237 237 224 295...

