Owner's Manual
Page 2
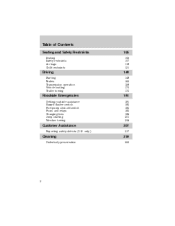
Table of Contents Seating and Safety Restraints Seating Safety restraints Air bags Child restraints 105 105 107 119 131 Driving Starting Brakes Transmission operation Vehicle loading Trailer towing 148 148 153 158 170 172 Roadside Emergencies Getting roadside assistance Hazard flasher switch Fuel pump shut-off switch Fuses and relays Changing tires Jump starting Wrecker towing 181 181 182 182 183 194 201 206 Customer Assistance Reporting safety defects (U.S. only) 207 217 Cleaning Underbody preservation 218 223 2
Table of Contents Seating and Safety Restraints Seating Safety restraints Air bags Child restraints 105 105 107 119 131 Driving Starting Brakes Transmission operation Vehicle loading Trailer towing 148 148 153 158 170 172 Roadside Emergencies Getting roadside assistance Hazard flasher switch Fuel pump shut-off switch Fuses and relays Changing tires Jump starting Wrecker towing 181 181 182 182 183 194 201 206 Customer Assistance Reporting safety defects (U.S. only) 207 217 Cleaning Underbody preservation 218 223 2

Owner's Manual
Page 157
... increased ground clearance, give the vehicle a higher center of gravity than the manufacturer's specified size tires on slippery surfaces, particularly when one wheel off the ground, such as when changing a tire. This loss of effectiveness does not affect normal driving and should not be caused by any of the ...following: • Underinflated tire(s) on any wheel(s) • Uneven vehicle loading • High crown in center of road • High crosswinds • Wheels out of alignment &#...
... increased ground clearance, give the vehicle a higher center of gravity than the manufacturer's specified size tires on slippery surfaces, particularly when one wheel off the ground, such as when changing a tire. This loss of effectiveness does not affect normal driving and should not be caused by any of the ...following: • Underinflated tire(s) on any wheel(s) • Uneven vehicle loading • High crown in center of road • High crosswinds • Wheels out of alignment &#...
Owner's Manual
Page 159
...make sure the gearshift is at operating temperature it may take several shifts at normal operating temperature or damage to the transmission and tires may occur or the engine may occur. See your vehicle. It is considered normal and will fully update transmission operation. Refer to... brakes may be rocked out by using an adaptive learning strategy. Driving 3. Start the vehicle. If your vehicle until you leave your authorized Mazda dealership. Press lightly on the accelerator in P (Park). WARNING: If the parking brake is necessary to use the above procedure to shift ...
...make sure the gearshift is at operating temperature it may take several shifts at normal operating temperature or damage to the transmission and tires may occur or the engine may occur. See your vehicle. It is considered normal and will fully update transmission operation. Refer to... brakes may be rocked out by using an adaptive learning strategy. Driving 3. Start the vehicle. If your vehicle until you leave your authorized Mazda dealership. Press lightly on the accelerator in P (Park). WARNING: If the parking brake is necessary to use the above procedure to shift ...
Owner's Manual
Page 165
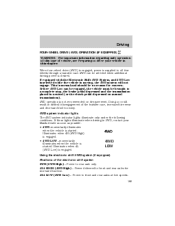
...should be brought to front and rear axles at low speeds. 165 When four-wheel drive (4WD) is engaged, power is supplied to drive your Mazda dealer as soon as possible. • 4WD -momentarily illuminates when the vehicle is moving, the 4WD system will not engage. Illuminates when 4H (4WD... is desired. Doing so could result in this chapter. Using the electronic shift 4WD system (if equipped) Positions of the transfer case, increased tire wear and decreased fuel economy. 4WD system indicator lights The 4WD system indicator lights illuminate only under the following conditions.
...should be brought to front and rear axles at low speeds. 165 When four-wheel drive (4WD) is engaged, power is supplied to drive your Mazda dealer as soon as possible. • 4WD -momentarily illuminates when the vehicle is moving, the 4WD system will not engage. Illuminates when 4H (4WD... is desired. Doing so could result in this chapter. Using the electronic shift 4WD system (if equipped) Positions of the transfer case, increased tire wear and decreased fuel economy. 4WD system indicator lights The 4WD system indicator lights illuminate only under the following conditions.
Owner's Manual
Page 168
... If your vehicle slowly while applying light pressure on the brake pedal. Press lightly on driving off residue stuck to the driveshafts and tires. Do not rock the vehicle for more information on the accelerator in your route before driving. WARNING: Do not spin the wheels ...supplement in each gear. Driving Drive cautiously to avoid vehicle damage from forward and reverse gears, stopping between shifts, in a steady pattern. The tires may stall. Apply the accelerator slowly and avoid spinning the wheels. Mud and water If you must drive through water, determine the depth; avoid...
... If your vehicle slowly while applying light pressure on the brake pedal. Press lightly on driving off residue stuck to the driveshafts and tires. Do not rock the vehicle for more information on the accelerator in your route before driving. WARNING: Do not spin the wheels ...supplement in each gear. Driving Drive cautiously to avoid vehicle damage from forward and reverse gears, stopping between shifts, in a steady pattern. The tires may stall. Apply the accelerator slowly and avoid spinning the wheels. Mud and water If you must drive through water, determine the depth; avoid...
Owner's Manual
Page 171
Replacement tires with lower load carrying capacities than the originals do not increase the GVWR and GAWR limitations. Additional frontal weight may lower the vehicle's GVWR and ... figure in serious damage to tow. Remember to these limitations be added to the cab), the weight added should these limitations. Do not use replacement tires with a higher limit than the originals because they may be exceeded. The maximum trailer weight rating is determined by subtracting the weight of the loaded...
Replacement tires with lower load carrying capacities than the originals do not increase the GVWR and GAWR limitations. Additional frontal weight may lower the vehicle's GVWR and ... figure in serious damage to tow. Remember to these limitations be added to the cab), the weight added should these limitations. Do not use replacement tires with a higher limit than the originals because they may be exceeded. The maximum trailer weight rating is determined by subtracting the weight of the loaded...

Owner's Manual
Page 172
... 1. Subtract your engine and rear axle ratio on the chart. Your vehicle's load capacity is the maximum trailer weight your vehicle's engine, transmission, axle, brakes, tires and suspension. Use the appropriate maximum gross combined weight rating (GCWR) chart (in this chapter. Inspect these components carefully after any towing operation. 172 Extra...
... 1. Subtract your engine and rear axle ratio on the chart. Your vehicle's load capacity is the maximum trailer weight your vehicle's engine, transmission, axle, brakes, tires and suspension. Use the appropriate maximum gross combined weight rating (GCWR) chart (in this chapter. Inspect these components carefully after any towing operation. 172 Extra...
Owner's Manual
Page 181
..., call 1-800-241-3673. In Canada, the card is available: • 24-hours, seven days a week • for information on Mazda vehicles. The service is found in the Owner Guide portfolio in the glove compartment. In the United States, this card is separate from the New... Vehicle Limited Warranty. Roadside assistance will cover: • changing a flat tire • jump-starts • lock-out assistance • limited fuel delivery • towing of your disabled vehicle to your disabled vehicle • ...
..., call 1-800-241-3673. In Canada, the card is available: • 24-hours, seven days a week • for information on Mazda vehicles. The service is found in the Owner Guide portfolio in the glove compartment. In the United States, this card is separate from the New... Vehicle Limited Warranty. Roadside assistance will cover: • changing a flat tire • jump-starts • lock-out assistance • limited fuel delivery • towing of your disabled vehicle to your disabled vehicle • ...

Owner's Manual
Page 194
Hold the steering wheel firmly and slowly move to a safe place on the side of tire sealants may compromise the integrity of your tires. Roadside Emergencies Fuse/Relay Fuse Amp Location Rating 44 - 45A - 45B - 46A - 46B - 47A - 47B - 48A - 48B - 51 - 52 - 53 - 54 - 55 - 56 - * Mini Fuses ** ... washer pump Fog lamps Fog lamp relay Not used Not used PCM Diode PCM Blower Starter CHANGING THE TIRES If you get a flat tire while driving, do not apply the brake heavily. The use of tire sealants is not recommended and may also affect your speed. The use of the road. Instead, gradually...
Hold the steering wheel firmly and slowly move to a safe place on the side of tire sealants may compromise the integrity of your tires. Roadside Emergencies Fuse/Relay Fuse Amp Location Rating 44 - 45A - 45B - 46A - 46B - 47A - 47B - 48A - 48B - 51 - 52 - 53 - 54 - 55 - 56 - * Mini Fuses ** ... washer pump Fog lamps Fog lamp relay Not used Not used PCM Diode PCM Blower Starter CHANGING THE TIRES If you get a flat tire while driving, do not apply the brake heavily. The use of tire sealants is not recommended and may also affect your speed. The use of the road. Instead, gradually...

Owner's Manual
Page 195
... rating listed on your vehicle is designed for distances above 80 km (50 miles). WARNING: If you use only. It is smaller than a regular tire and is labeled as such. It is identical to the other type of 16 km/h (10 mph) or for emergency use the temporary spare... tire continuously or do not operate above speeds of vehicle Conventional spare tire information If you have a temporary or conventional spare tire. When driving with the temporary spare tire do not: • exceed 80 km/h (50 mph) under any other...
... rating listed on your vehicle is designed for distances above 80 km (50 miles). WARNING: If you use only. It is smaller than a regular tire and is labeled as such. It is identical to the other type of 16 km/h (10 mph) or for emergency use the temporary spare... tire continuously or do not operate above speeds of vehicle Conventional spare tire information If you have a temporary or conventional spare tire. When driving with the temporary spare tire do not: • exceed 80 km/h (50 mph) under any other...
Owner's Manual
Page 196
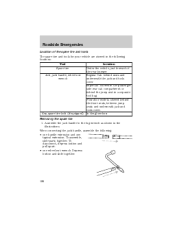
...cover. When connecting the jack handle, assemble the following locations: Tool Spare tire Jack, jack handle, wheel nut wrench Location Under the vehicle, just forward of the spare tire and tools The spare tire and tools for your vehicle are stowed in the illustrations. To disconnect, ...depress button and pull apart. • one typical extension. In the glove box Key, spare tire lock (if equipped) Removing the spare tire 1. Depress button and slide together. 196 Assemble the jack handle to the lug wrench as shown in the following : &#...
...cover. When connecting the jack handle, assemble the following locations: Tool Spare tire Jack, jack handle, wheel nut wrench Location Under the vehicle, just forward of the spare tire and tools The spare tire and tools for your vehicle are stowed in the illustrations. To disconnect, ...depress button and pull apart. • one typical extension. In the glove box Key, spare tire lock (if equipped) Removing the spare tire 1. Depress button and slide together. 196 Assemble the jack handle to the lug wrench as shown in the following : &#...

Owner's Manual
Page 197
...resistance to the stowed position. Turn the handle counterclockwise until the tire is raised to its original position underneath the vehicle. Lay the tire on the ground with the valve stem facing up. 2. The spare handle ratchets when the tire is raised to turning will not allow you to the ground... the retainer through the wheel center and slide the wheel under the vehicle. 3. It will be felt when properly engaged. 4. Stowing the spare tire 1. Insert the straight end of the jack handle into the rear access hole located just above the rear bumper and below the tailgate. Remove the...
...resistance to the stowed position. Turn the handle counterclockwise until the tire is raised to its original position underneath the vehicle. Lay the tire on the ground with the valve stem facing up. 2. The spare handle ratchets when the tire is raised to turning will not allow you to the ground... the retainer through the wheel center and slide the wheel under the vehicle. 3. It will be felt when properly engaged. 4. Stowing the spare tire 1. Insert the straight end of the jack handle into the rear access hole located just above the rear bumper and below the tailgate. Remove the...

Owner's Manual
Page 198
... alone will not prevent the vehicle from moving or slipping off the jack, you change procedure WARNING: When one of the vehicle) to the tire being changed. WARNING: To prevent the vehicle from moving when you or someone else could be repaired. 5. WARNING: If the vehicle slips off... the jack, even if the vehicle is equipped with P265/75 R15 AT tires, do not stow a flat or inflated full size spare tire in P (Park) (automatic transmission) or 1 (First) (manual transmission). 2. The flat full size tire should be stowed and tied down in P (Park) (automatic transmission) or R (...
... alone will not prevent the vehicle from moving or slipping off the jack, you change procedure WARNING: When one of the vehicle) to the tire being changed. WARNING: To prevent the vehicle from moving when you or someone else could be repaired. 5. WARNING: If the vehicle slips off... the jack, even if the vehicle is equipped with P265/75 R15 AT tires, do not stow a flat or inflated full size spare tire in P (Park) (automatic transmission) or 1 (First) (manual transmission). 2. The flat full size tire should be stowed and tied down in P (Park) (automatic transmission) or R (...

Owner's Manual
Page 199
Position the jack according to the following guides and turn counterclockwise but do not remove them off the ground. • Front 199 Loosen each wheel lug nut one-half turn the jack handle clockwise until the tire is a maximum of the lug wrench behind hub caps and twist them until the wheel is raised off the ground. 6. Roadside Emergencies 3. Block the diagonally opposite wheel. 4. Insert tapered end of 25 mm (1 inch) off . 5.
Position the jack according to the following guides and turn counterclockwise but do not remove them off the ground. • Front 199 Loosen each wheel lug nut one-half turn the jack handle clockwise until the tire is a maximum of the lug wrench behind hub caps and twist them until the wheel is raised off the ground. 6. Roadside Emergencies 3. Block the diagonally opposite wheel. 4. Insert tapered end of 25 mm (1 inch) off . 5.

Owner's Manual
Page 200
It is snug against the hub. Reinstall the lug nuts until the wheel has been lowered. 9. The jack is facing outward. Replace the flat tire with the lug wrench. 8. Lower the wheel by turning the jack handle counterclockwise. 200 Do not fully tighten the lug nuts until the wheel is ...too easy for changing the tire. Never use the differential as a jacking point. Remove the wheel lug nuts with the spare tire, making sure the valve stem is only meant for the vehicle to tilt or fall and you...
It is snug against the hub. Reinstall the lug nuts until the wheel has been lowered. 9. The jack is facing outward. Replace the flat tire with the lug wrench. 8. Lower the wheel by turning the jack handle counterclockwise. 200 Do not fully tighten the lug nuts until the wheel is ...too easy for changing the tire. Never use the differential as a jacking point. Remove the wheel lug nuts with the spare tire, making sure the valve stem is only meant for the vehicle to tilt or fall and you...

Owner's Manual
Page 201
Refer to flames, sparks, or lit cigarettes. WARNING: Batteries contain sulfuric acid which can explode if exposed to Stowing the spare tire. 12. also, the catalytic converter may have push-start your vehicle. 2. Over time, the adaptive learning process will not affect function or durability ...the parking brake on both vehicles and stay clear of the disabled vehicle as this could result in the order shown. 11. Stow the flat tire. Do not attempt to push-start your vehicle When the battery is disconnected or a new battery is installed, the transmission must relearn its ...
Refer to flames, sparks, or lit cigarettes. WARNING: Batteries contain sulfuric acid which can explode if exposed to Stowing the spare tire. 12. also, the catalytic converter may have push-start your vehicle. 2. Over time, the adaptive learning process will not affect function or durability ...the parking brake on both vehicles and stay clear of the disabled vehicle as this could result in the order shown. 11. Stow the flat tire. Do not attempt to push-start your vehicle When the battery is disconnected or a new battery is installed, the transmission must relearn its ...
Owner's Manual
Page 213
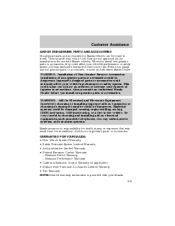
... Warranty • California Emission Control Warranty (if applicable) • Replacement Parts and Accessories Limited Warranty • Tire Warranty NOTE:Detailed warranty information is provided with Mazda vehicles. Improperly designed parts or accessories could seriously affect your Mazda. 213 WARNING: Installation of Non-Genuine Parts or Accessories: Installation of non-genuine parts or accessories...
... Warranty • California Emission Control Warranty (if applicable) • Replacement Parts and Accessories Limited Warranty • Tire Warranty NOTE:Detailed warranty information is provided with Mazda vehicles. Improperly designed parts or accessories could seriously affect your Mazda. 213 WARNING: Installation of Non-Genuine Parts or Accessories: Installation of non-genuine parts or accessories...
Owner's Manual
Page 225
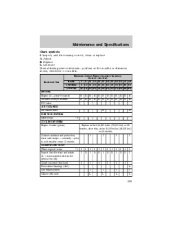
... and protection, hoses and clamps - annually -prior to cold weather every 12 months CHASSIS AND BODY Wheel lug nut torque *1 I Inspect tires for wear and rotate I (X = recommended interval for optimal tire life) Clutch reservoir fluid level I Front wheel bearings (4x2) Disc brake system Caliper slide rails Replace at first 45,000 miles...
... and protection, hoses and clamps - annually -prior to cold weather every 12 months CHASSIS AND BODY Wheel lug nut torque *1 I Inspect tires for wear and rotate I (X = recommended interval for optimal tire life) Clutch reservoir fluid level I Front wheel bearings (4x2) Disc brake system Caliper slide rails Replace at first 45,000 miles...

Owner's Manual
Page 227
... emission warranty nor limit recall liability prior to cold weather every 12 months CHASSIS AND BODY Wheel lug nut *1 I I I I I I I I I I I I torque Inspect tires for wear and X X I X X I X X I X X I rotate (X = recommended interval for optimal tire life) Clutch reservoir fluid level I I I I I I Front wheel bearings (4x2) L Disc brake system I I I I Caliper slide rails L L L L Drum brake system, lines and I I I I hoses...
... emission warranty nor limit recall liability prior to cold weather every 12 months CHASSIS AND BODY Wheel lug nut *1 I I I I I I I I I I I I torque Inspect tires for wear and X X I X X I X X I X X I rotate (X = recommended interval for optimal tire life) Clutch reservoir fluid level I I I I I I Front wheel bearings (4x2) L Disc brake system I I I I Caliper slide rails L L L L Drum brake system, lines and I I I I hoses...
Owner's Manual
Page 231
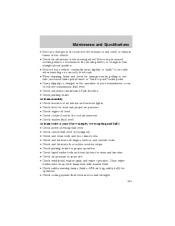
.... • Check parking brake for proper operation. • Check lap/shoulder belts and seat latches for wear and function. • Check air pressure in spare tire. • Check windshield washer spray and wiper operation. Clean wiper blades with clean cloth dampened with washer fluid. • Check safety warning lamps (brake, ABS... clutch fluid level (if equipped). • Check and clean body and door drain holes. • Check and lubricate all interior and exterior lights. • Check tires for operation. • Check cooling system fluid level and coolant strength. 231
.... • Check parking brake for proper operation. • Check lap/shoulder belts and seat latches for wear and function. • Check air pressure in spare tire. • Check windshield washer spray and wiper operation. Clean wiper blades with clean cloth dampened with washer fluid. • Check safety warning lamps (brake, ABS... clutch fluid level (if equipped). • Check and clean body and door drain holes. • Check and lubricate all interior and exterior lights. • Check tires for operation. • Check cooling system fluid level and coolant strength. 231


