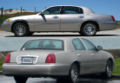
2000 Lincoln Town Car Hood - 2000 Lincoln Town Car
Research for this Lincoln vehicle
View Results Below
Free 2000 Lincoln Town Car manuals!
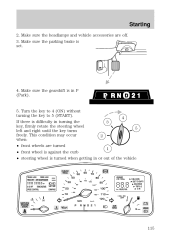
Problems with 2000 Lincoln Town Car?
Ask a Question
Other Models
Free 2000 Lincoln Town Car manuals!
Problems with 2000 Lincoln Town Car?
Ask a Question
Other Models
Related Manual Pages


Similar Questions

Hood Light Stays On
The hood light on 2003 lincoln town car stays on. Is there a fuse for the light?
The hood light on 2003 lincoln town car stays on. Is there a fuse for the light?
(Posted by don98549 9 years ago)

Can't Get The Hood To Close 1997 Lincoln Town Car
(Posted by donwLuc 10 years ago)

The Hoodlatch On My 97 Towncar Won't Catch, So I Can't Close The Hood.
Is there anywya to fix this problem myself, or am I looking having to pay a mechanic?
Is there anywya to fix this problem myself, or am I looking having to pay a mechanic?
(Posted by mrkwooley 11 years ago)