
Owners Manual
Page 13
...radio system As the installation of a mobile two-way radio system in terms of color and equipment. However, because of the Lexus policy of non-genuine spare parts and accessories for Lexus vehicles are current at any damage they may cause to check with non-genuine...precautionary measures or special instructions regarding installation. Therefore, you may even violate governmental regulations. Accessories, spare parts and modification of your Lexus A wide variety of continual product improvement, we reserve the right to all models and explains all equipment, including options. All...
...radio system As the installation of a mobile two-way radio system in terms of color and equipment. However, because of the Lexus policy of non-genuine spare parts and accessories for Lexus vehicles are current at any damage they may cause to check with non-genuine...precautionary measures or special instructions regarding installation. Therefore, you may even violate governmental regulations. Accessories, spare parts and modification of your Lexus A wide variety of continual product improvement, we reserve the right to all models and explains all equipment, including options. All...

Owners Manual
Page 193
... rolling code system. 178 Repeat the steps for U.S.A. If the garage door does open , press and release the button a third time. 3-5. The exact location and color of this "training" button. This third press and release will complete the programming process by the garage door opener manufacturer for the location of the...
... rolling code system. 178 Repeat the steps for U.S.A. If the garage door does open , press and release the button a third time. 3-5. The exact location and color of this "training" button. This third press and release will complete the programming process by the garage door opener manufacturer for the location of the...
Owners Manual
Page 365
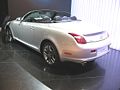
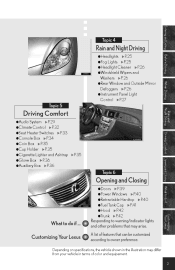
... if ... Depending on specifications, the vehicle shown in the illustration may differ from your vehicle in terms of features that may arise. Customizing Your Lexus A list of color and equipement. 2 Entering and Exiting Topic 4 Rain and Night Driving P.25 P.25 lHeadlight Cleaner P.26 lWindshield Wipers and Washers P.26 lRear Window and Outside...
... if ... Depending on specifications, the vehicle shown in the illustration may differ from your vehicle in terms of features that may arise. Customizing Your Lexus A list of color and equipement. 2 Entering and Exiting Topic 4 Rain and Night Driving P.25 P.25 lHeadlight Cleaner P.26 lWindshield Wipers and Washers P.26 lRear Window and Outside...

Navigation Manual
Page 81
... on freeway D Street name on scroll map D Display of building shape D Screen layout function ( Function) D POI category change (Show POI Icons) D Delete previous point D Map color D Screen animation
... on freeway D Street name on scroll map D Display of building shape D Screen layout function ( Function) D POI category change (Show POI Icons) D Delete previous point D Map color D Screen animation

Navigation Manual
Page 101
... current vehicle position mark. 1. ADVANCED FUNCTIONS 101 Current position calibration "Voice Guidance in All Modes": You can select the desired map color. "Intersection Guidance": You can select ON or OFF to location, you can choose 6 icons displayed on the map screen. "Map..." button to display each switches and current street name on "Show POI Icons" top screen. "Previous Point": You can select the desired map color. "Map Color (Day)": You can delete the previous destination. " Function": You can select ON or OFF to display the building shape on the freeway. If...
... current vehicle position mark. 1. ADVANCED FUNCTIONS 101 Current position calibration "Voice Guidance in All Modes": You can select the desired map color. "Intersection Guidance": You can select ON or OFF to location, you can choose 6 icons displayed on the map screen. "Map..." button to display each switches and current street name on "Show POI Icons" top screen. "Previous Point": You can select the desired map color. "Map Color (Day)": You can delete the previous destination. " Function": You can select ON or OFF to display the building shape on the freeway. If...

Navigation Manual
Page 117
... efficient previous point search, previous points can be sorted by the "Date" or "Name" switch. 2. Touch the desired color for day and/ or night map color and then touch the "OK" switch to delete. Touch the switch you want to return the map screen. Then switch three times to the default ...map color. Touch the "Normal" switch to return to display touch page 4 of the "Setup" screen. 5. To delete the point, touch the "Yes" switch. Push the "MENU...
... efficient previous point search, previous points can be sorted by the "Date" or "Name" switch. 2. Touch the desired color for day and/ or night map color and then touch the "OK" switch to delete. Touch the switch you want to return the map screen. Then switch three times to the default ...map color. Touch the "Normal" switch to return to display touch page 4 of the "Setup" screen. 5. To delete the point, touch the "Yes" switch. Push the "MENU...

Navigation Manual
Page 121
... distance in the system. When you input the date and/or distance, touch the "OK" switch. When your vehicle needs to be serviced, the icon color will change to turn off the information screen. D Depending on the "Maintenance" screen, the screen changes to input the desired name and then input conditions...
... distance in the system. When you input the date and/or distance, touch the "OK" switch. When your vehicle needs to be serviced, the icon color will change to turn off the information screen. D Depending on the "Maintenance" screen, the screen changes to input the desired name and then input conditions...

Navigation Manual
Page 128
Enter text using the keys. The date inputted is marked as inputting a destination. (See page 28.) You can choose the desired mark and/or date color. Input the same way as shown above. After entering the text, touch the "OK" switch at the bottom right of the screen. "Memo" switch to enter Touch the "Location" switch to the destination input screen appears. You can add the memos up to 100 until December 31, 2022. A screen similar to set location. 128 OTHER FUNCTIONS D Memo D Location Touch the text. You can enter text up to 24 letters.
Enter text using the keys. The date inputted is marked as inputting a destination. (See page 28.) You can choose the desired mark and/or date color. Input the same way as shown above. After entering the text, touch the "OK" switch at the bottom right of the screen. "Memo" switch to enter Touch the "Location" switch to the destination input screen appears. You can add the memos up to 100 until December 31, 2022. A screen similar to set location. 128 OTHER FUNCTIONS D Memo D Location Touch the text. You can enter text up to 24 letters.

Navigation Manual
Page 129
Touch your desired color for the date. You can set a color of the mark and/or date for the mark. After you added the memo and/or location. Touch the "Date" switch. Touch your desired color for the date you choose the date and/or mark color, touch the "OK" switch to display the previous screen. To default the date color, touch the "Delete" switch on the screen. OTHER FUNCTIONS 129 D Mark color D Date color Touch the "Mark" switch.
Touch your desired color for the date. You can set a color of the mark and/or date for the mark. After you added the memo and/or location. Touch the "Date" switch. Touch your desired color for the date you choose the date and/or mark color, touch the "OK" switch to display the previous screen. To default the date color, touch the "Delete" switch on the screen. OTHER FUNCTIONS 129 D Mark color D Date color Touch the "Mark" switch.

Navigation Manual
Page 160
Touch the "OK" switch after you check it. 2. Select the desired background color and then touch the "OK". Touch the "Operating Guide" tab on the upper side of the screen and the switches on the right side of the operating guide by touching " " or " " switch. 160 OTHER FUNCTIONS Setting screen (b) Operating Guide 1. You can select a background color. You can scroll through the list of the screen to display the "Information Menu" screen. 1. Push the "INFO" button to select the desired category. 2. Touch the "Screen Setting" switch.
Touch the "OK" switch after you check it. 2. Select the desired background color and then touch the "OK". Touch the "Operating Guide" tab on the upper side of the screen and the switches on the right side of the operating guide by touching " " or " " switch. 160 OTHER FUNCTIONS Setting screen (b) Operating Guide 1. You can select a background color. You can scroll through the list of the screen to display the "Information Menu" screen. 1. Push the "INFO" button to select the desired category. 2. Touch the "Screen Setting" switch.
