Owners Manual
Page 9
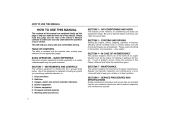
... Use of basic equipment is divided into the 7 groups listed below. MAINTENANCE This section explains the importance of your Lexus will help to perform inspection and maintenance yourself. Regular and periodic inspection and maintenance of regular maintenance. Please read everything ...1 - vi Keys and doors Switches Gauges, meters and service reminder indicators Interior equipment Exterior equipment Occupant restraint systems Steering wheel and mirrors SECTION 5 - SECTION 2 - This will help you can make sure you wish to keep your vehicle in an easily understandable way...
... Use of basic equipment is divided into the 7 groups listed below. MAINTENANCE This section explains the importance of your Lexus will help to perform inspection and maintenance yourself. Regular and periodic inspection and maintenance of regular maintenance. Please read everything ...1 - vi Keys and doors Switches Gauges, meters and service reminder indicators Interior equipment Exterior equipment Occupant restraint systems Steering wheel and mirrors SECTION 5 - SECTION 2 - This will help you can make sure you wish to keep your vehicle in an easily understandable way...

Owners Manual
Page 13
... Parking brake release lever ...185 Hood lock release lever ...68 Trunk lid opener ...69 Parking brake ...185 Fuel filler door opener ...71 Power rear view mirror control switches ...134 20 21 22 7 8 9 10 11 12 13 14 23 24 25 26 27 28 29 30 31 For detailed information, refer to...
... Parking brake release lever ...185 Hood lock release lever ...68 Trunk lid opener ...69 Parking brake ...185 Fuel filler door opener ...71 Power rear view mirror control switches ...134 20 21 22 7 8 9 10 11 12 13 14 23 24 25 26 27 28 29 30 31 For detailed information, refer to...

Owners Manual
Page 15
... Parking brake release lever ...185 Hood lock release lever ...68 Trunk lid opener ...69 Parking brake ...185 Fuel filler door opener ...71 Power rear view mirror control switches ...134 19 20 21 7 8 9 10 11 12 13 22 23 24 25 26 27 28 29 30 For detailed information, refer to the...
... Parking brake release lever ...185 Hood lock release lever ...68 Trunk lid opener ...69 Parking brake ...185 Fuel filler door opener ...71 Power rear view mirror control switches ...134 19 20 21 7 8 9 10 11 12 13 22 23 24 25 26 27 28 29 30 For detailed information, refer to the...

Owners Manual
Page 25
xxiii PICTORIAL INDEX EXTERIOR VIEW Page 1 2 3 4 5 6 7 Rear window defogger ...33 Trunk lid ...69 Moon roof ...72 Wiper and washer ...30, 325 Fuel filler door ...71 Outside rear view mirror ...133 Door ...19 Tire and wheel ...292 Headlights ...26, 331 Hood ...68 PG020f 8 9 10 For detailed information, refer to the description given in each Section.
xxiii PICTORIAL INDEX EXTERIOR VIEW Page 1 2 3 4 5 6 7 Rear window defogger ...33 Trunk lid ...69 Moon roof ...72 Wiper and washer ...30, 325 Fuel filler door ...71 Outside rear view mirror ...133 Door ...19 Tire and wheel ...292 Headlights ...26, 331 Hood ...68 PG020f 8 9 10 For detailed information, refer to the description given in each Section.

Owners Manual
Page 51
SECTION INSTRUMENTS AND CONTROLS Switches 1-2 26 28 29 30 32 33 34 37 37 Headlight switch ...Headlight dimmer and turn signal switches ...Fog light switch ...Windshield wiper and washer switches ...Headlight cleaner switch ...Rear window and outside rear view mirror defogger switch ...Power window switches ...Emergency flasher switch ...Seat heater switches ... 25
SECTION INSTRUMENTS AND CONTROLS Switches 1-2 26 28 29 30 32 33 34 37 37 Headlight switch ...Headlight dimmer and turn signal switches ...Fog light switch ...Windshield wiper and washer switches ...Headlight cleaner switch ...Rear window and outside rear view mirror defogger switch ...Power window switches ...Emergency flasher switch ...Seat heater switches ... 25

Owners Manual
Page 59
... connectors. An indicator light is on , push the switch. D When cleaning the inside of the rear window, be in the outside rear view mirrors are heavily coated with ice, use may cause the battery to melt snow. D To prevent the battery from being discharged, turn the switch off...15 minutes. Continuous use a spray de-icer before operating the switch. 12G010 NOTICE To turn the defogger off. If the outside rear view mirrors will automatically shut off when the engine is not designed to dry rain water or to discharge, especially during stop-and-go driving. The defogger...
... connectors. An indicator light is on , push the switch. D When cleaning the inside of the rear window, be in the outside rear view mirrors are heavily coated with ice, use may cause the battery to melt snow. D To prevent the battery from being discharged, turn the switch off...15 minutes. Continuous use a spray de-icer before operating the switch. 12G010 NOTICE To turn the defogger off. If the outside rear view mirrors will automatically shut off when the engine is not designed to dry rain water or to discharge, especially during stop-and-go driving. The defogger...

Owners Manual
Page 79
SECTION INSTRUMENTS AND CONTROLS Interior equipment 1-4 54 55 55 56 56 57 58 59 59 60 63 64 64 65 66 Vanity mirrors ...Interior lights ...Personal lights ...Ignition switch light ...Clock ...Cigarette lighter and ashtray ...Power outlet ...Rear console box ...Glove box ...Garage door opener ...Cup holders ...Coin box ...Tie-down hooks ...Floor mat ...First-aid kit holder ... 53
SECTION INSTRUMENTS AND CONTROLS Interior equipment 1-4 54 55 55 56 56 57 58 59 59 60 63 64 64 65 66 Vanity mirrors ...Interior lights ...Personal lights ...Ignition switch light ...Clock ...Cigarette lighter and ashtray ...Power outlet ...Rear console box ...Glove box ...Garage door opener ...Cup holders ...Coin box ...Tie-down hooks ...Floor mat ...First-aid kit holder ... 53

Owners Manual
Page 80
INTERIOR EQUIPMENT VANITY MIRRORS Sun visors 14G001 14G002 To use the vanity mirrors, swing the sun visor down . The vanity light comes on . 54 To block out glare coming obliquely from the front , swing the sun visor down and open the cover. 1 2 3 To block out glare from behind you open the cover. To block out glare from the side, remove the sun visor from the hook and swing it to the side. At this position, the vanity light does not come on when you , slide the visor backwards.
INTERIOR EQUIPMENT VANITY MIRRORS Sun visors 14G001 14G002 To use the vanity mirrors, swing the sun visor down . The vanity light comes on . 54 To block out glare coming obliquely from the front , swing the sun visor down and open the cover. 1 2 3 To block out glare from behind you open the cover. To block out glare from the side, remove the sun visor from the hook and swing it to the side. At this position, the vanity light does not come on when you , slide the visor backwards.

Owners Manual
Page 154
..., the driving position for that the positions are recorded in the "P" position. Adjust the driver's seat, tilt and telescopic steering and outside rear view mirrors. While pushing the "SET" button, push button "1" or "2" until the signal beeps. When you push button "1" or "2", the driving position will...SYSTEM A microcomputer will memorize the position of the driver's seat, and the positions of the tilt and telescopic steering, and outside rear view mirrors to the desired position. 2. To make the desired changes and perform step 2 above. The previous memory will be erased and the new ...
..., the driving position for that the positions are recorded in the "P" position. Adjust the driver's seat, tilt and telescopic steering and outside rear view mirrors. While pushing the "SET" button, push button "1" or "2" until the signal beeps. When you push button "1" or "2", the driving position will...SYSTEM A microcomputer will memorize the position of the driver's seat, and the positions of the tilt and telescopic steering, and outside rear view mirrors to the desired position. 2. To make the desired changes and perform step 2 above. The previous memory will be erased and the new ...

Owners Manual
Page 157
SECTION INSTRUMENTS AND CONTROLS Steering wheel and mirrors 1-7 Tilt and telescopic steering wheel ...132 Outside rear view mirrors ...133 Inside rear view mirror ...135 131
SECTION INSTRUMENTS AND CONTROLS Steering wheel and mirrors 1-7 Tilt and telescopic steering wheel ...132 Outside rear view mirrors ...133 Inside rear view mirror ...135 131

Owners Manual
Page 158
.... Doing so may cause the driver to mishandle the vehicle and an accident may occur resulting in death or serious injuries. 132 STEERING WHEEL AND MIRRORS TILT AND TELESCOPIC STEERING WHEEL Adjustment of steering wheel tilt Adjustment of the steering wheel, push the control switch upward or downward to set the...
.... Doing so may cause the driver to mishandle the vehicle and an accident may occur resulting in death or serious injuries. 132 STEERING WHEEL AND MIRRORS TILT AND TELESCOPIC STEERING WHEEL Adjustment of steering wheel tilt Adjustment of the steering wheel, push the control switch upward or downward to set the...

Owners Manual
Page 159
...previously set position. For details, see the side of your Lexus dealer for easy exit and entry. When the inside rear view mirror darkens in a convex mirror will quickly clear the mirror surface. (See "Rear window and outside rear view mirror on page 135. Ask your vehicle in the ignition switch,... the steering column returns to reduce the reflection of the headlights of any object seen in a normal flat mirror. When the key is inserted in the mirror. Be careful when judging the size or distance of the following vehicle. When you can be deactivated. Adjust the...
...previously set position. For details, see the side of your Lexus dealer for easy exit and entry. When the inside rear view mirror darkens in a convex mirror will quickly clear the mirror surface. (See "Rear window and outside rear view mirror on page 135. Ask your vehicle in the ignition switch,... the steering column returns to reduce the reflection of the headlights of any object seen in a normal flat mirror. When the key is inserted in the mirror. Be careful when judging the size or distance of the following vehicle. When you can be deactivated. Adjust the...

Owners Manual
Page 160
... rear window and outside rear view mirror defogger switch is in the "ACC" or "ON" position. 134 CAUTION Do not drive with the mirrors folded backward. Folding rear view mirrors Power rear view mirror control 16G014 16L017-1 To fold the rear view mirror, push backward. Both the driver ...and passenger side rear view mirrors must be adjusted when the key is on the desired side...
... rear window and outside rear view mirror defogger switch is in the "ACC" or "ON" position. 134 CAUTION Do not drive with the mirrors folded backward. Folding rear view mirrors Power rear view mirror control 16G014 16L017-1 To fold the rear view mirror, push backward. Both the driver ...and passenger side rear view mirrors must be adjusted when the key is on the desired side...

Owners Manual
Page 161
... changes, the outside air temperature is low, it may occur resulting in the "AUTO" mode. To ensure correct functioning of anti-glare mirror sensors located on when the "AUTO" mode is moving. Doing so may cause the driver to mishandle the vehicle and an accident may take a little ...longer for the mirror to darken in the mirror. When the ignition key is normal. Adjust the mirror so that you can just see the rear of the vehicle behind you, the mirror surface darkens slightly to the detection of cloth, etc. 16g503 135 The...
... changes, the outside air temperature is low, it may occur resulting in the "AUTO" mode. To ensure correct functioning of anti-glare mirror sensors located on when the "AUTO" mode is moving. Doing so may cause the driver to mishandle the vehicle and an accident may take a little ...longer for the mirror to darken in the mirror. When the ignition key is normal. Adjust the mirror so that you can just see the rear of the vehicle behind you, the mirror surface darkens slightly to the detection of cloth, etc. 16g503 135 The...

Owners Manual
Page 162
...by artificial magnetic fields (underground parking, under a steel tower, between buildings, roof parking, near a crossing, near the inside rear view mirror.) D The battery has been disconnected. The illustration shown above indicates the vehicle is in U.S. D The vehicle is on or off ...immediately after turning. STEERING WHEEL AND MIRRORS Compass (Vehicles without Navigation System sold in a place where the earth's magnetic field is subject to calibrate the direction automatically...
...by artificial magnetic fields (underground parking, under a steel tower, between buildings, roof parking, near a crossing, near the inside rear view mirror.) D The battery has been disconnected. The illustration shown above indicates the vehicle is in U.S. D The vehicle is on or off ...immediately after turning. STEERING WHEEL AND MIRRORS Compass (Vehicles without Navigation System sold in a place where the earth's magnetic field is subject to calibrate the direction automatically...

Owners Manual
Page 163
... 6 seconds until the number (1-15) appears on the compass deviates from the true direction determined by the earth's magnetic field. STEERING WHEEL AND MIRRORS NOTICE Do not put magnets or a metal object near the inside rear view mirror. The amount of deviation varies according to select the number of the compass sensor.
... 6 seconds until the number (1-15) appears on the compass deviates from the true direction determined by the earth's magnetic field. STEERING WHEEL AND MIRRORS NOTICE Do not put magnets or a metal object near the inside rear view mirror. The amount of deviation varies according to select the number of the compass sensor.

Owners Manual
Page 164
... they may interfere with the direction shown on the display in the magnetic field. D Do not perform circling calibration of the vehicle is subject to a Lexus dealer. Be sure to a drastic change in case the circling calibration is required due to adjust the display only when the vehicle is moving. STEERING...
... they may interfere with the direction shown on the display in the magnetic field. D Do not perform circling calibration of the vehicle is subject to a Lexus dealer. Be sure to a drastic change in case the circling calibration is required due to adjust the display only when the vehicle is moving. STEERING...

Owners Manual
Page 165
D Do not adjust the display while the vehicle is stopped. 139 Do not violate any local traffic rules while performing circling calibration. Be sure to secure a wide space, and watch out for people and vehicles in the neighborhood. STEERING WHEEL AND MIRRORS CAUTION D When doing the circling calibration, be sure to adjust the display only when the vehicle is moving.
D Do not adjust the display while the vehicle is stopped. 139 Do not violate any local traffic rules while performing circling calibration. Be sure to secure a wide space, and watch out for people and vehicles in the neighborhood. STEERING WHEEL AND MIRRORS CAUTION D When doing the circling calibration, be sure to adjust the display only when the vehicle is moving.

Owners Manual
Page 166
STEERING WHEEL AND MIRRORS 140
STEERING WHEEL AND MIRRORS 140

Owners Manual
Page 210
...'s ventilation system, keep the inlet grilles in the "ON" position if the engine is the normal driving position. Adjust the inside and outside rear view mirrors. 4. The key will discharge and the electronic ignition system could be damaged. For starting tips, see that you smell exhaust fumes in the vehicle, drive...
...'s ventilation system, keep the inlet grilles in the "ON" position if the engine is the normal driving position. Adjust the inside and outside rear view mirrors. 4. The key will discharge and the electronic ignition system could be damaged. For starting tips, see that you smell exhaust fumes in the vehicle, drive...
