
Owner Manual
Page 105
... Assist System ...234 ▫ Cleaning The Parksense System ...234 ▫ Parksense System Usage Precautions ...235 Ⅵ Parkview Rear Back Up Camera - With Navigation/Multimedia Radio ...239 3
... Assist System ...234 ▫ Cleaning The Parksense System ...234 ▫ Parksense System Usage Precautions ...235 Ⅵ Parkview Rear Back Up Camera - With Navigation/Multimedia Radio ...239 3
Owner Manual
Page 106
...; Canadian/Gate Operator Programming ...247 ▫ Using HomeLink ...249 ▫ Security ...249 ▫ Troubleshooting Tips ...250 ▫ General Information ...251 Ⅵ Power Sunroof - Without Navigation/Multimedia Radio ...240 Ⅵ Overhead Console ...240 ▫ Front Map/Reading Lights ...240 ▫ Courtesy Lights ...241 ▫ Sunglass Bin Door ...242 Ⅵ Garage Door...
...; Canadian/Gate Operator Programming ...247 ▫ Using HomeLink ...249 ▫ Security ...249 ▫ Troubleshooting Tips ...250 ▫ General Information ...251 Ⅵ Power Sunroof - Without Navigation/Multimedia Radio ...240 Ⅵ Overhead Console ...240 ▫ Front Map/Reading Lights ...240 ▫ Courtesy Lights ...241 ▫ Sunglass Bin Door ...242 Ⅵ Garage Door...
Owner Manual
Page 125
... the commands into two voice commands: "Phonebook" and "New Entry". You can use the compound form voice command "Phonebook New Entry", or you want to navigate through the available options. Voice commands are asked for a specific command and then guided through the Uconnect™ Phone menu structure. The Uconnect™ Phone...
... the commands into two voice commands: "Phonebook" and "New Entry". You can use the compound form voice command "Phonebook New Entry", or you want to navigate through the available options. Voice commands are asked for a specific command and then guided through the Uconnect™ Phone menu structure. The Uconnect™ Phone...
Owner Manual
Page 137
... word "Send". UNDERSTANDING THE FEATURES OF YOUR VEHICLE 135 When calling a number with your Uconnect™ Phone that may be used for navigating through an automated telephone system. is also to be too quick for fast and easy access to voice mail and pager You can also send... stored Uconnect™ phonebook entries navigating through an automated Working With Automated Systems customer service center menu structure, and to enter, followed by "Send", with the Uconnect™ Phone. 3...
... word "Send". UNDERSTANDING THE FEATURES OF YOUR VEHICLE 135 When calling a number with your Uconnect™ Phone that may be used for navigating through an automated telephone system. is also to be too quick for fast and easy access to voice mail and pager You can also send... stored Uconnect™ phonebook entries navigating through an automated Working With Automated Systems customer service center menu structure, and to enter, followed by "Send", with the Uconnect™ Phone. 3...
Owner Manual
Page 143
... combinations is optimized when the • low road noise, entries are not similar. • smooth road surface, 3 number combinations may not be supported. • When navigating through an automated system such as voice mail, or when sending a page, at the end of • In a convertible vehicle, system performance may not always...
... combinations is optimized when the • low road noise, entries are not similar. • smooth road surface, 3 number combinations may not be supported. • When navigating through an automated system such as voice mail, or when sending a page, at the end of • In a convertible vehicle, system performance may not always...
Owner Manual
Page 239
... depending on -screen image of the rear surroundings of the vehicle above the rear License plate. The ParkView camera is exited and the navigation or audio screen appears again. 3 After five seconds this note will be displayed on the rear of your vehicle whenever the shift lever is ...behind the vehicle. When the vehicle is shifted out of REVERSE, the rear camera mode is located on the Navigation/Multimedia radio display screen along with the ParkView Rear Back Up Camera that the ball mount and hitch ball assembly is disconnected from ...
... depending on -screen image of the rear surroundings of the vehicle above the rear License plate. The ParkView camera is exited and the navigation or audio screen appears again. 3 After five seconds this note will be displayed on the rear of your vehicle whenever the shift lever is ...behind the vehicle. When the vehicle is shifted out of REVERSE, the rear camera mode is located on the Navigation/Multimedia radio display screen along with the ParkView Rear Back Up Camera that the ball mount and hitch ball assembly is disconnected from ...

Owner Manual
Page 241
... Rear Back Up Camera. UNDERSTANDING THE FEATURES OF YOUR VEHICLE 239 WARNING! NOTE: If snow, ice, mud, or any foreign substance builds up . With Navigation/Multimedia Radio 1. Press the "menu" hard-key. 2. It is unable to stop in serious injury or death. Select "system setup" soft-key. 3. You are responsible...
... Rear Back Up Camera. UNDERSTANDING THE FEATURES OF YOUR VEHICLE 239 WARNING! NOTE: If snow, ice, mud, or any foreign substance builds up . With Navigation/Multimedia Radio 1. Press the "menu" hard-key. 2. It is unable to stop in serious injury or death. Select "system setup" soft-key. 3. You are responsible...
Owner Manual
Page 242
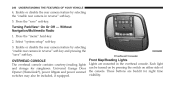
Without Navigation/Multimedia Radio 1. Each light and storage for night time visibility. 240 UNDERSTANDING THE FEATURES OF YOUR VEHICLE 4. Overhead Console Front Map/Reading Lights OVERHEAD CONSOLE ...
Without Navigation/Multimedia Radio 1. Each light and storage for night time visibility. 240 UNDERSTANDING THE FEATURES OF YOUR VEHICLE 4. Overhead Console Front Map/Reading Lights OVERHEAD CONSOLE ...
Owner Manual
Page 316
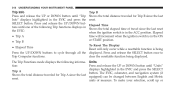
... UP/DOWN buttons to Trip Computer functions. units of travel since the last reset when the ignition switch is being displayed. The EVIC, odometer, and navigation system (if Shows the total distance traveled for Trip B since the last equipped) can be changed between English and Metric reset. Press and release the...
... UP/DOWN buttons to Trip Computer functions. units of travel since the last reset when the ignition switch is being displayed. The EVIC, odometer, and navigation system (if Shows the total distance traveled for Trip B since the last equipped) can be changed between English and Metric reset. Press and release the...
Owner Manual
Page 322
... check-mark is selected, all display nomenclature, including the trip When this display you continue, the information will unlock when functions and the navigation system (if equipped). 320 UNDERSTANDING YOUR INSTRUMENT PANEL out of PARK or the vehicle begins moving, a warning Nav-Turn By Turn message..., or the lands). Select Language When in this display and scroll PARK or NEUTRAL position and the driver's door is selected, the navigation system utilizes voice commands, guiding through the language choices. Auto Unlock Doors guages for all doors will dis- play in the EVIC. ...
... check-mark is selected, all display nomenclature, including the trip When this display you continue, the information will unlock when functions and the navigation system (if equipped). 320 UNDERSTANDING YOUR INSTRUMENT PANEL out of PARK or the vehicle begins moving, a warning Nav-Turn By Turn message..., or the lands). Select Language When in this display and scroll PARK or NEUTRAL position and the driver's door is selected, the navigation system utilizes voice commands, guiding through the language choices. Auto Unlock Doors guages for all doors will dis- play in the EVIC. ...
Owner Manual
Page 374
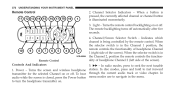
... - When a button is pressed, the currently affected channel or channel button is being controlled by the remote control. In disc modes, press and hold to navigate in the Channel 2, position the remote controls the functionality of headphone Channel 2 (left side of the screen). The remote backlighting turns off . In radio modes...
... - When a button is pressed, the currently affected channel or channel button is being controlled by the remote control. In disc modes, press and hold to navigate in the Channel 2, position the remote controls the functionality of headphone Channel 2 (left side of the screen). The remote backlighting turns off . In radio modes...
Owner Manual
Page 375
... INSTRUMENT PANEL 373 6. ᭢ / Prev - When listening to compressed audio on a data settings section) to the disc in the menu. 11. Press to return to navigate in a radio with a multiple-disc changer, PROG Up previous station. In menu modes, use to the main menu of a DVD for details on the radio...
... INSTRUMENT PANEL 373 6. ᭢ / Prev - When listening to compressed audio on a data settings section) to the disc in the menu. 11. Press to return to navigate in a radio with a multiple-disc changer, PROG Up previous station. In menu modes, use to the main menu of a DVD for details on the radio...

Owner Manual
Page 376
... advance to fast two retaining clips first, and then rotate the remote back rewind through the current audio track or video chapter. When navigating a DVDs try to navigate in the menu. 374 UNDERSTANDING YOUR INSTRUMENT PANEL and the disc is opened. difficult to the previous screen. up into position. Do...use to access Remote Control Storage the DVD Setup menu. (see the DVD Setup Menu of the remote into its 17. ᭣᭣ - When navigating in storage compartment for the remote control which is accessible when the manual.) screen is stopped, press the SETUP button to...
... advance to fast two retaining clips first, and then rotate the remote back rewind through the current audio track or video chapter. When navigating a DVDs try to navigate in the menu. 374 UNDERSTANDING YOUR INSTRUMENT PANEL and the disc is opened. difficult to the previous screen. up into position. Do...use to access Remote Control Storage the DVD Setup menu. (see the DVD Setup Menu of the remote into its 17. ᭣᭣ - When navigating in storage compartment for the remote control which is accessible when the manual.) screen is stopped, press the SETUP button to...
Owner Manual
Page 379
... is The headphone power indicator and controls are located controlling Channel 2 and the headphones are tuned 5. use the cursor buttons on the remote control to navigate to the available modes and press the ENTER button to the next mode. If the video screen is turned off. BACK button on the remote...
... is The headphone power indicator and controls are located controlling Channel 2 and the headphones are tuned 5. use the cursor buttons on the remote control to navigate to the available modes and press the ENTER button to the next mode. If the video screen is turned off. BACK button on the remote...
Owner Manual
Page 382
... Fast Forward, Rewind, Scan, and Track Up/Down. 2. CD: Ability to control the following video modes: 1. Channel 1 Shared Status radio modes or disc modes by navigating to switch tuner (AM/FM), SEEK, SCAN, TUNE, and recall presets in shared mode. Channel 2 Mode 1. The VES™ can even control radio modes or...
... Fast Forward, Rewind, Scan, and Track Up/Down. 2. CD: Ability to control the following video modes: 1. Channel 1 Shared Status radio modes or disc modes by navigating to switch tuner (AM/FM), SEEK, SCAN, TUNE, and recall presets in shared mode. Channel 2 Mode 1. The VES™ can even control radio modes or...
Owner Manual
Page 384
... screen. When the digit is highlighted, press the remote control's ENTER button to that station. channels. Navigate this list using the remote control's 4. After all digits are entered, navigate to the Go navigation buttons (᭡, ᭢) to find the desired station, button and press the remote control's ENTER button... 2 Station List Menu shows DIRECT TUNE, pressing the remote control's ENTER button activates a numeric keypad menu. To delete the last digit, navigate to the Del button and When listening to enter a specific tuner frequency, satellite channel, or track number.
... screen. When the digit is highlighted, press the remote control's ENTER button to that station. channels. Navigate this list using the remote control's 4. After all digits are entered, navigate to the Go navigation buttons (᭡, ᭢) to find the desired station, button and press the remote control's ENTER button... 2 Station List Menu shows DIRECT TUNE, pressing the remote control's ENTER button activates a numeric keypad menu. To delete the last digit, navigate to the Del button and When listening to enter a specific tuner frequency, satellite channel, or track number.
Owner Manual
Page 386
gation buttons (᭡, ᭢) to select an item, then press the remote control's navigation buttons (᭤, ᭣) to change the • When the screen is on the equipped) settings of the channel with the are installed in the remote ...
gation buttons (᭡, ᭢) to select an item, then press the remote control's navigation buttons (᭤, ᭣) to change the • When the screen is on the equipped) settings of the channel with the are installed in the remote ...
User Guide
Page 2
.... Some States or Provinces prohibit the use extreme caution when using any electrical devices such as cell phones, computers, portable radios, vehicle navigation or other devices by visiting www.techauthority.com. We hope you find it useful. Driving while distracted can result in loss of cellular...If you find yourself unable to devote your full attention to a safe location and stop your vehicle. Jeep® is moving is the safe operation of Chrysler Group LLC. © 2012 Chrysler Group LLC. Replacement DVD kits may take their attention off the road to vehicle operation, pull ...
.... Some States or Provinces prohibit the use extreme caution when using any electrical devices such as cell phones, computers, portable radios, vehicle navigation or other devices by visiting www.techauthority.com. We hope you find it useful. Driving while distracted can result in loss of cellular...If you find yourself unable to devote your full attention to a safe location and stop your vehicle. Jeep® is moving is the safe operation of Chrysler Group LLC. © 2012 Chrysler Group LLC. Replacement DVD kits may take their attention off the road to vehicle operation, pull ...
User Guide
Page 51
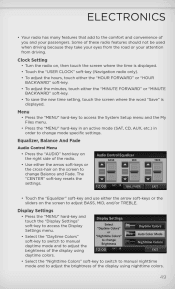
... either the arrow soft-keys or the sliders on , then touch the screen where the time is displayed. • Touch the "USER CLOCK" soft-key (Navigation radio only). • To adjust the hours, touch either the "HOUR FORWARD" or "HOUR BACKWARD" soft-key. • To adjust the minutes, touch either the...
... either the arrow soft-keys or the sliders on , then touch the screen where the time is displayed. • Touch the "USER CLOCK" soft-key (Navigation radio only). • To adjust the hours, touch either the "HOUR FORWARD" or "HOUR BACKWARD" soft-key. • To adjust the minutes, touch either the...
User Guide
Page 56
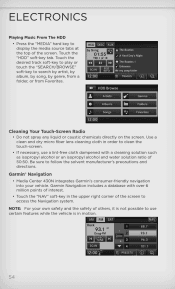
..."NAV" soft-key in motion. 54 Touch the desired track soft-key to play or touch the "SEARCH/BROWSE" soft-key to access the Navigation system. NOTE: For your vehicle. Cleaning Your Touch-Screen Radio • Do not spray any liquid or caustic chemicals directly on the screen. ... The HDD • Press the "MEDIA" hard key to follow the solvent manufacturer's precautions and directions. Garmin® Navigation • Media Center 430N integrates Garmin's consumer-friendly navigation into your own safety and the safety of others, it is not possible to clean the touch-screen. • If...
..."NAV" soft-key in motion. 54 Touch the desired track soft-key to play or touch the "SEARCH/BROWSE" soft-key to access the Navigation system. NOTE: For your vehicle. Cleaning Your Touch-Screen Radio • Do not spray any liquid or caustic chemicals directly on the screen. ... The HDD • Press the "MEDIA" hard key to follow the solvent manufacturer's precautions and directions. Garmin® Navigation • Media Center 430N integrates Garmin's consumer-friendly navigation into your own safety and the safety of others, it is not possible to clean the touch-screen. • If...

