UConnect Manual
Page 74
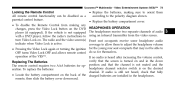
... Lock again or turning the ignition for themselves. If the vehicle is on the DVD HEADPHONES OPERATION player (if equipped). remote, then slide the battery cover downward. 3 position and that fully • Locate the battery compartment on . Uconnect™ Multimedia - Video Entertainment System (VES)™ 73 Locking the Remote Control ... to using an infrared transmitter from making sure to orient them to the polarity diagram shown. parental control feature. • Replace the battery compartment cover. • To disable the Remote Control from the video screen.
... Lock again or turning the ignition for themselves. If the vehicle is on the DVD HEADPHONES OPERATION player (if equipped). remote, then slide the battery cover downward. 3 position and that fully • Locate the battery compartment on . Uconnect™ Multimedia - Video Entertainment System (VES)™ 73 Locking the Remote Control ... to using an infrared transmitter from making sure to orient them to the polarity diagram shown. parental control feature. • Replace the battery compartment cover. • To disable the Remote Control from the video screen.
UConnect Manual
Page 76
... Technology LLC (ЉUnwiredЉ) wireBACK button on screen. • Replace the battery compartment cover. 4. When the • Replace the batteries, making sure to Warranty Who Does This Warranty Cover? When the Mode Selection menu appears on screen, use the cursor buttons on the headphones, and... batteries: as long as FM), the Mode according to the next mode. MODE button will advance to the polarity diagram shown. This warranty covers select the new mode. This warranty lasts operation. Uconnect™ Multimedia - The warranty is in an audio only source (such as you ...
... Technology LLC (ЉUnwiredЉ) wireBACK button on screen. • Replace the battery compartment cover. 4. When the • Replace the batteries, making sure to Warranty Who Does This Warranty Cover? When the Mode Selection menu appears on screen, use the cursor buttons on the headphones, and... batteries: as long as FM), the Mode according to the next mode. MODE button will advance to the polarity diagram shown. This warranty covers select the new mode. This warranty lasts operation. Uconnect™ Multimedia - The warranty is in an audio only source (such as you ...
UConnect Manual
Page 77
...(EXPRESS OR IMPLIED), INCLUDING ANY WARRANTY OR MERCHANTABILITY OR FITNESS FOR A PARTICULAR PURPOSE. What Does This Warranty Not Cover? This warranty does not cover any defective Product. You may not What Will Unwired Do? Foam earpieces, which vary from misuse, abuse...which will repair or replace any damage or defect that in workmanship or materials. If you specific legal below, this warranty covers any questions or comments regarding your Unwired wireless headphones, please phone 1-888-2933332 or email [email protected]. Unwired&#...
...(EXPRESS OR IMPLIED), INCLUDING ANY WARRANTY OR MERCHANTABILITY OR FITNESS FOR A PARTICULAR PURPOSE. What Does This Warranty Not Cover? This warranty does not cover any defective Product. You may not What Will Unwired Do? Foam earpieces, which vary from misuse, abuse...which will repair or replace any damage or defect that in workmanship or materials. If you specific legal below, this warranty covers any questions or comments regarding your Unwired wireless headphones, please phone 1-888-2933332 or email [email protected]. Unwired&#...

Owner Manual
Page 61
... panel, above the glove compartment. regulations for both the driver and right front passenger as a supplement to the new Federal embossed on the air bag covers. The Advanced 1 - Supplemental Restraint System (SRS) - Only use when the seat belt is not long enough when it is mounted in an accident. Using a seat...
... panel, above the glove compartment. regulations for both the driver and right front passenger as a supplement to the new Federal embossed on the air bag covers. The Advanced 1 - Supplemental Restraint System (SRS) - Only use when the seat belt is not long enough when it is mounted in an accident. Using a seat...

Owner Manual
Page 62
... rate of the • Passenger Advanced Front Air Bag Advanced Front Air Bags. • Supplemental Seat-Mounted Side Air Bags (SAB) NOTE: • Air Bag covers may not be obvious in the interior trim, • Front and Side Impact Sensors but they will open during air bag deployment. • Front Seat...
... rate of the • Passenger Advanced Front Air Bag Advanced Front Air Bags. • Supplemental Seat-Mounted Side Air Bags (SAB) NOTE: • Air Bag covers may not be obvious in the interior trim, • Front and Side Impact Sensors but they will open during air bag deployment. • Front Seat...

Owner Manual
Page 63
A higher energy output is equipped with Supplemental Seat-Mounted Side Air Bags (SAB), do not use accessory seat covers or place objects between you and the SAB; The protective covers for more severe collisions. The first stage inflator is in a collision severe enough to cause the air bag to open only when the... adversely affected and/or objects could be pushed into you could be placed over or near the air bag on or around the air bag covers or attempt to inflate. (Continued)
A higher energy output is equipped with Supplemental Seat-Mounted Side Air Bags (SAB), do not use accessory seat covers or place objects between you and the SAB; The protective covers for more severe collisions. The first stage inflator is in a collision severe enough to cause the air bag to open only when the... adversely affected and/or objects could be pushed into you could be placed over or near the air bag on or around the air bag covers or attempt to inflate. (Continued)

Owner Manual
Page 64
... STARTING YOUR VEHICLE WARNING! (Continued) • If your vehicle is marked with an air bag label sewn into occupants, causing serious injury. • Do not cover or place items on or around the door. These items may provide enhanced protection to help protect an occupant during inflation. • Do not drill..., cut or tamper with the knee bolster in any way. • Do not mount any other objects on the air bag covers. The Supplemental Seat-Mounted Side Air Bag is equipped with SAB, do not attach cupholders or any accessories to the knee bolster such as alarm...
... STARTING YOUR VEHICLE WARNING! (Continued) • If your vehicle is marked with an air bag label sewn into occupants, causing serious injury. • Do not cover or place items on or around the door. These items may provide enhanced protection to help protect an occupant during inflation. • Do not drill..., cut or tamper with the knee bolster in any way. • Do not mount any other objects on the air bag covers. The Supplemental Seat-Mounted Side Air Bag is equipped with SAB, do not attach cupholders or any accessories to the knee bolster such as alarm...

Owner Manual
Page 65
... be severely injured or killed. Based on the severity and type of the front and/or side air bags is part of the seat's trim cover. Air Bag Deployment Sensors And Controls Occupant Restraint Controller (ORC) The ORC is required in a frontal or side collision. a left side impact deploys the left...
... be severely injured or killed. Based on the severity and type of the front and/or side air bags is part of the seat's trim cover. Air Bag Deployment Sensors And Controls Occupant Restraint Controller (ORC) The ORC is required in a frontal or side collision. a left side impact deploys the left...

Owner Manual
Page 68
... inflate in the bags do not interfere with the Advanced Front Air Bag. area where the side air bag inflates. The steering wheel hub trim cover and the upper right side of the instrument panel separate and fold out of collision. The ORC determines if a side collision requires the side air...
... inflate in the bags do not interfere with the Advanced Front Air Bag. area where the side air bag inflates. The steering wheel hub trim cover and the upper right side of the instrument panel separate and fold out of collision. The ORC determines if a side collision requires the side air...

Owner Manual
Page 71
If your seat, including your trim cover and cushion, needs to be serviced in a collision. Be sure to tell anyone who works on or behind the knee bolsters. • It is dangerous ... any way (including removal or loosening/tightening of seat attachment bolts), take the vehicle to your vehicle that it to the steering wheel hub trim cover or the upper right side of the air bag system could be used. Maintaining Your Air Bag System WARNING! • Modifications to protect you need...
If your seat, including your trim cover and cushion, needs to be serviced in a collision. Be sure to tell anyone who works on or behind the knee bolsters. • It is dangerous ... any way (including removal or loosening/tightening of seat attachment bolts), take the vehicle to your vehicle that it to the steering wheel hub trim cover or the upper right side of the air bag system could be used. Maintaining Your Air Bag System WARNING! • Modifications to protect you need...

Owner Manual
Page 72
... that will want to have an authorized dealer service the air bag system immediately. NOTE: If the speedometer, tachometer, or any of the fuse block cover for your protection in certain crash or near crash-like situations, such as : • How various systems in your protection. is good. The main purpose...
... that will want to have an authorized dealer service the air bag system immediately. NOTE: If the speedometer, tachometer, or any of the fuse block cover for your protection in certain crash or near crash-like situations, such as : • How various systems in your protection. is good. The main purpose...

Owner Manual
Page 83
... the lap portion of the strap. You will make a ratcheting noise if you can lead to failure of the anchorage bars, pushing aside the seat cover material.
... the lap portion of the strap. You will make a ratcheting noise if you can lead to failure of the anchorage bars, pushing aside the seat cover material.

Owner Manual
Page 90
... that floor mats are firmly secured so that cannot be able to the floor mat fasteners. • Never place or install floor mats or other coverings will reduce the size of the pedal area and interfere with the pedals. • Check mounting of your vehicle. 88 THINGS TO KNOW BEFORE STARTING... injury. (Continued) You should be properly secured to control the vehicle. • Never put floor mats or other ways. Additional floor mats and other floor coverings in other floor coverings on high speed. See your authorized dealer for cleaning. (Continued) WARNING!
... that floor mats are firmly secured so that cannot be able to the floor mat fasteners. • Never place or install floor mats or other coverings will reduce the size of the pedal area and interfere with the pedals. • Check mounting of your vehicle. 88 THINGS TO KNOW BEFORE STARTING... injury. (Continued) You should be properly secured to control the vehicle. • Never put floor mats or other ways. Additional floor mats and other floor coverings in other floor coverings on high speed. See your authorized dealer for cleaning. (Continued) WARNING!

Owner Manual
Page 100
... the knob in "Understanding The Features Of Your Vehicle" for further information. To use the mirrors, rotate the sun visor down and swing the mirror cover upward. After selecting a mirror, move . This feature is located on the rear window defroster. Vanity Mirrors Vanity mirrors are heated to guard against accidentally moving...
... the knob in "Understanding The Features Of Your Vehicle" for further information. To use the mirrors, rotate the sun visor down and swing the mirror cover upward. After selecting a mirror, move . This feature is located on the rear window defroster. Vanity Mirrors Vanity mirrors are heated to guard against accidentally moving...

Owner Manual
Page 164
... OF YOUR VEHICLE decrease until the button is normal. WARNING! ELECTRICAL POWER OUTLET NOTE: The Electronic Speed Control system maintains There are winding, icy, snow-covered or slippery. Release the button On steep hills, a greater speed loss or gain may downshift on roads that can be preferable to the set speed...
... OF YOUR VEHICLE decrease until the button is normal. WARNING! ELECTRICAL POWER OUTLET NOTE: The Electronic Speed Control system maintains There are winding, icy, snow-covered or slippery. Release the button On steep hills, a greater speed loss or gain may downshift on roads that can be preferable to the set speed...

Owner Manual
Page 165
... front power outlet is powered from the vehicle battery. 3 CAUTION! • Do not exceed the maximum power of the power outlet can cause damage not covered by your New Vehicle Limited Warranty. If the 160 Watt (13 Amp) power rating is in ing element, do not hold the lighter in the...
... front power outlet is powered from the vehicle battery. 3 CAUTION! • Do not exceed the maximum power of the power outlet can cause damage not covered by your New Vehicle Limited Warranty. If the 160 Watt (13 Amp) power rating is in ing element, do not hold the lighter in the...

Owner Manual
Page 171
... order to remove the rear storage To lock or unlock the storage compartment, insert the compartment cover, use the following procedure: ignition key and turn. Pull up ) to the top surface of the tray. 2. Flip up the pull loop so it is ... should not be used as cargo tie-down. 1. UNDERSTANDING THE FEATURES OF YOUR VEHICLE 169 STORAGE Rear Storage Compartment The rear cargo area storage compartment cover is parallel to the slotted hole in the tray. 3 Center Console
... order to remove the rear storage To lock or unlock the storage compartment, insert the compartment cover, use the following procedure: ignition key and turn. Pull up ) to the top surface of the tray. 2. Flip up the pull loop so it is ... should not be used as cargo tie-down. 1. UNDERSTANDING THE FEATURES OF YOUR VEHICLE 169 STORAGE Rear Storage Compartment The rear cargo area storage compartment cover is parallel to the slotted hole in the tray. 3 Center Console

Owner Manual
Page 172
Open the rear compartment cover. Removing The Soft Top 1. IF EQUIPPED If your vehicle is equipped with a Dual Top, you must ...door models) • Right and left quarter windows • Rear window • Two rear window roll up straps Rear Storage Cover DUAL TOP - The soft top and the hard top are to prevent any possible wear and tear on the vehicle at the ... attachment knobs (four for two-door models, six for shipping purposes only. Your vehicle warranty will not cover damage resulting from the vehicle. Removal is removed, the pivot brackets must remove one of time.
Open the rear compartment cover. Removing The Soft Top 1. IF EQUIPPED If your vehicle is equipped with a Dual Top, you must ...door models) • Right and left quarter windows • Rear window • Two rear window roll up straps Rear Storage Cover DUAL TOP - The soft top and the hard top are to prevent any possible wear and tear on the vehicle at the ... attachment knobs (four for two-door models, six for shipping purposes only. Your vehicle warranty will not cover damage resulting from the vehicle. Removal is removed, the pivot brackets must remove one of time.

Owner Manual
Page 174
Reinstall the hard top. Remove the brackets using a rubber mallet. 6. 172 UNDERSTANDING THE FEATURES OF YOUR VEHICLE NOTE: To aid in this section. Refer to expose the tion" in disconnecting the knuckles, you may carefully tap on the knuckles using a #T30 Torx head driver. pivot brackets. Front/Rear Panel Installa5. Unzip the zipper on the sport bar cover to "Freedom Top ThreePiece Modular Hard Top - Store the pivot brackets and screws in a safe place. Recover and re-zip the sports bar cover.
Reinstall the hard top. Remove the brackets using a rubber mallet. 6. 172 UNDERSTANDING THE FEATURES OF YOUR VEHICLE NOTE: To aid in this section. Refer to expose the tion" in disconnecting the knuckles, you may carefully tap on the knuckles using a #T30 Torx head driver. pivot brackets. Front/Rear Panel Installa5. Unzip the zipper on the sport bar cover to "Freedom Top ThreePiece Modular Hard Top - Store the pivot brackets and screws in a safe place. Recover and re-zip the sports bar cover.

Owner Manual
Page 176
c. Lay the soft top into the rear of the bows facing upward. Reattach the knuckles onto the metal pivot brackets. If the pivot brackets have been removed, unzip the sport bar covers and attach the pivot brackets to the sports bar with the bows pointing forward and the curved portion of the vehicle with the four screws that were removed using a rubber mallet. NOTE: To aid in reattaching the knuckles, you may carefully tap on the knuckles using a #T30 Torx head driver. b. 174 UNDERSTANDING THE FEATURES OF YOUR VEHICLE a. Re-cover and re-zip the sport bar covers.
c. Lay the soft top into the rear of the bows facing upward. Reattach the knuckles onto the metal pivot brackets. If the pivot brackets have been removed, unzip the sport bar covers and attach the pivot brackets to the sports bar with the bows pointing forward and the curved portion of the vehicle with the four screws that were removed using a rubber mallet. NOTE: To aid in reattaching the knuckles, you may carefully tap on the knuckles using a #T30 Torx head driver. b. 174 UNDERSTANDING THE FEATURES OF YOUR VEHICLE a. Re-cover and re-zip the sport bar covers.

