
Owner's Manual
Page 6
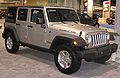
...when some extra protection, it is no structural integrated top and it has low sides and a folding windshield. Although your vehicle has a sport bar and side bars for convenient reference and remain with a soft top or optional hard top to give the occupants protection from the weather, these... vehicles do not have fully enclosed hard doors. 1 Even though your vehicle may not. Also, failure to use standard seat ...
...when some extra protection, it is no structural integrated top and it has low sides and a folding windshield. Although your vehicle has a sport bar and side bars for convenient reference and remain with a soft top or optional hard top to give the occupants protection from the weather, these... vehicles do not have fully enclosed hard doors. 1 Even though your vehicle may not. Also, failure to use standard seat ...

Owner's Manual
Page 40
You and your vehicle. Keep the flip-up window open can allow poisonous exhaust gases into your passengers could be injured by these fumes. THINGS TO KNOW BEFORE STARTING YOUR VEHICLE 39 CAUTION! Do not press on rear wiper blade when closing the rear flip-up window before attempting to the blade will result. 2 WARNING! Gate Handle NOTE: Close the rear flip-up window, as damage to close the swing gate (hard top models only). Driving with the flip-up window closed when you are operating the vehicle.
You and your vehicle. Keep the flip-up window open can allow poisonous exhaust gases into your passengers could be injured by these fumes. THINGS TO KNOW BEFORE STARTING YOUR VEHICLE 39 CAUTION! Do not press on rear wiper blade when closing the rear flip-up window before attempting to the blade will result. 2 WARNING! Gate Handle NOTE: Close the rear flip-up window, as damage to close the swing gate (hard top models only). Driving with the flip-up window closed when you are operating the vehicle.

Owner's Manual
Page 82
... ▫ Rear Cupholders ...118 Storage ...118 ▫ Console Storage Compartment ...118 ▫ Rear Storage Compartment ...119 Dual Top - If Equipped ...120 ▫ Removing The Soft Top ...120 ▫ Installing The Soft Top ...122 Freedom Top Three-Piece Modular Hard Top ...125 ▫ Front Panel(s) Removal ...126 ▫ Front Panel(s) Installation ...128 ▫ Front Panel(s) Installation Only...
... ▫ Rear Cupholders ...118 Storage ...118 ▫ Console Storage Compartment ...118 ▫ Rear Storage Compartment ...119 Dual Top - If Equipped ...120 ▫ Removing The Soft Top ...120 ▫ Installing The Soft Top ...122 Freedom Top Three-Piece Modular Hard Top ...125 ▫ Front Panel(s) Removal ...126 ▫ Front Panel(s) Installation ...128 ▫ Front Panel(s) Installation Only...

Owner's Manual
Page 83
...Removal (Four-Door Models) ...135 ▫ Door Frame Installation (Four-Door Models) . . 138 Soft Top (Two-Door Models) ...141 ▫ Folding Down The Soft Top ...143 ▫ Putting Up The Soft Top ...152 Sunrider (Two-Door Models) - If Equipped ...161 Sunrider (Four-Door Models) - If Equipped ...168 ▫ Folding Down The Soft Top ...170 ▫ Putting Up The Soft Top ...180 Folding Windshield ...191 ▫ Lowering The Windshield And Removing Side Bars ...193 ▫ Raising The Windshield And Replacing Side Bars ...196 Rear Window Features - Hard Top Only ...197 ▫ Rear Window ...
...Removal (Four-Door Models) ...135 ▫ Door Frame Installation (Four-Door Models) . . 138 Soft Top (Two-Door Models) ...141 ▫ Folding Down The Soft Top ...143 ▫ Putting Up The Soft Top ...152 Sunrider (Two-Door Models) - If Equipped ...161 Sunrider (Four-Door Models) - If Equipped ...168 ▫ Folding Down The Soft Top ...170 ▫ Putting Up The Soft Top ...180 Folding Windshield ...191 ▫ Lowering The Windshield And Removing Side Bars ...193 ▫ Raising The Windshield And Replacing Side Bars ...196 Rear Window Features - Hard Top Only ...197 ▫ Rear Window ...

Owner's Manual
Page 121
...Two Sunrider secure straps (If Equipped) • Two rear swing gate brackets 2. The soft top and the hard top are to be removed from the sport bar. If the soft top is mandatory to "Freedom Top ThreePiece Modular Hard Top - Front/Rear Panel Removal" later in this section. Locate and remove the two boxes ...; Right and left door frames • Door frame attachment knobs (four for two-door models, six for shipping purposes only. Remove the hard top. The soft top was installed at the same time for extended periods of time. Removal is removed, the pivot brackets must remove one of the...
...Two Sunrider secure straps (If Equipped) • Two rear swing gate brackets 2. The soft top and the hard top are to be removed from the sport bar. If the soft top is mandatory to "Freedom Top ThreePiece Modular Hard Top - Front/Rear Panel Removal" later in this section. Locate and remove the two boxes ...; Right and left door frames • Door frame attachment knobs (four for two-door models, six for shipping purposes only. Remove the hard top. The soft top was installed at the same time for extended periods of time. Removal is removed, the pivot brackets must remove one of the...

Owner's Manual
Page 123
... this section. 6. Remove the brackets using a #T30 Torx head driver. For future soft top procedures, refer to "Freedom Top ThreePiece Modular Hard Top - Front/Rear Panel Removal" later in this section. Remove the hard top. Refer to expose the pivot brackets. Reinstall the hard top. Store pivot brackets and screws in this section. 1. Locate and remove the following...
... this section. 6. Remove the brackets using a #T30 Torx head driver. For future soft top procedures, refer to "Freedom Top ThreePiece Modular Hard Top - Front/Rear Panel Removal" later in this section. Remove the hard top. Refer to expose the pivot brackets. Reinstall the hard top. Store pivot brackets and screws in this section. 1. Locate and remove the following...

Owner's Manual
Page 126
This cover should be discarded. FREEDOM TOP THREE-PIECE MODULAR HARD TOP CAUTION! • The hard top is not tangled in the left rear corner is not designed to carry any additional loads other than environmental (rain, snow, etc.). 3 CAUTION! UNDERSTANDING THE ... to the windshield frame and bodyside, or fully removed. NOTE: Be sure the wire harness in the soft top bows before you lift the top. 7. Also, it was intended as a structural member of rear window) and set aside. Remove the swing gate bar (black metal bar for shipping only. NOTE: A ...
This cover should be discarded. FREEDOM TOP THREE-PIECE MODULAR HARD TOP CAUTION! • The hard top is not tangled in the left rear corner is not designed to carry any additional loads other than environmental (rain, snow, etc.). 3 CAUTION! UNDERSTANDING THE ... to the windshield frame and bodyside, or fully removed. NOTE: Be sure the wire harness in the soft top bows before you lift the top. 7. Also, it was intended as a structural member of rear window) and set aside. Remove the swing gate bar (black metal bar for shipping only. NOTE: A ...

Owner's Manual
Page 129
... be positioned properly to ensure sealing. Set the panels on the windshield frame so that there is no overhang. Front Panel(s) Installation Only (With Rear Hard Top Removed) 1. Set the panels on the windshield frame so that there is no overhang. Turn left panel. Also, make sure that the panels are sitting...
... be positioned properly to ensure sealing. Set the panels on the windshield frame so that there is no overhang. Front Panel(s) Installation Only (With Rear Hard Top Removed) 1. Set the panels on the windshield frame so that there is no overhang. Turn left panel. Also, make sure that the panels are sitting...

Owner's Manual
Page 130
... panels. Lift rear window glass. 3 Reinstall panel(s) using a #40 Torx head driver (4-Door Only). 4. Remove the six Torx head screws that secure the hard top at the B-pillar (near top of the rear window glass. Refer to ensure clearance of door) using the same steps for removal in this section. 2. Open swing gate...
... panels. Lift rear window glass. 3 Reinstall panel(s) using a #40 Torx head driver (4-Door Only). 4. Remove the six Torx head screws that secure the hard top at the B-pillar (near top of the rear window glass. Refer to ensure clearance of door) using the same steps for removal in this section. 2. Open swing gate...

Owner's Manual
Page 131
Disconnect the wire harness from the hard top. 7. NOTE: If the red latch on the connector is installed to prevent foreign materials from entering washer tube and clogging system, and also to the ...right until you can only see the latch on the left rear inside corner of the connector and pulling to be disconnected from the hard top by pressing the tab at the side of the vehicle. Make sure storage cap is locked, push the red latch to prevent fluid from being...
Disconnect the wire harness from the hard top. 7. NOTE: If the red latch on the connector is installed to prevent foreign materials from entering washer tube and clogging system, and also to the ...right until you can only see the latch on the left rear inside corner of the connector and pulling to be disconnected from the hard top by pressing the tab at the side of the vehicle. Make sure storage cap is locked, push the red latch to prevent fluid from being...

Owner's Manual
Page 132
... the same steps for damage and replace if necessary. 2. NOTE: The hard top must be positioned properly to installation of the hard top. 1. Close the swing gate. 10. Also, make sure that there is a uniform gap between the lift glass and hard top. 3 9. Remove the hard top from soft top usage, they must be removed prior to ensure sealing.
... the same steps for damage and replace if necessary. 2. NOTE: The hard top must be positioned properly to installation of the hard top. 1. Close the swing gate. 10. Also, make sure that there is a uniform gap between the lift glass and hard top. 3 9. Remove the hard top from soft top usage, they must be removed prior to ensure sealing.

Owner's Manual
Page 150
To remove the swing gate brackets, pull the front of the bracket forward while rolling the entire bracket back in towards the vehicle to Step 16. 3 Completely release the latches from the loops on the windshield frame. If your vehicle is being installed. The swing gate brackets do not need to be removed unless the hard top is not equipped with the Sunrider package, proceed to disengage. 13. UNDERSTANDING THE FEATURES OF YOUR VEHICLE 149 12.
To remove the swing gate brackets, pull the front of the bracket forward while rolling the entire bracket back in towards the vehicle to Step 16. 3 Completely release the latches from the loops on the windshield frame. If your vehicle is being installed. The swing gate brackets do not need to be removed unless the hard top is not equipped with the Sunrider package, proceed to disengage. 13. UNDERSTANDING THE FEATURES OF YOUR VEHICLE 149 12.

Owner's Manual
Page 177
The swing gate brackets do not need to disengage. 13. Grasp the front side bow behind the header, and lift the top. To remove the swing gate brackets, pull the front of the bracket forward while rolling the entire bracket back in towards the vehicle to be removed unless the hard top is being installed. 176 UNDERSTANDING THE FEATURES OF YOUR VEHICLE 12.
The swing gate brackets do not need to disengage. 13. Grasp the front side bow behind the header, and lift the top. To remove the swing gate brackets, pull the front of the bracket forward while rolling the entire bracket back in towards the vehicle to be removed unless the hard top is being installed. 176 UNDERSTANDING THE FEATURES OF YOUR VEHICLE 12.

Owner's Manual
Page 194
Open sport bar Velcro covering. 4. Lower the fabric top or remove the hard top following the instructions in properly reinstalling side bars, mark the original locations prior to removing. 2. NOTE: To assist in this manual. Remove the two top hex bolts (13 mm), and the one side hex bolt (13 mm) visible through the plastic... bottom side of side bar, one hex bolt (13 mm) on the side of the side bar. 3 Remove the one hex bolt (13 mm) on top of the side bar, and one hex bolt (13 mm) visible through the trim (Do not remove plastic corner trim, sun visor bolts, or sport...
Open sport bar Velcro covering. 4. Lower the fabric top or remove the hard top following the instructions in properly reinstalling side bars, mark the original locations prior to removing. 2. NOTE: To assist in this manual. Remove the two top hex bolts (13 mm), and the one side hex bolt (13 mm) visible through the plastic... bottom side of side bar, one hex bolt (13 mm) on the side of the side bar. 3 Remove the one hex bolt (13 mm) on top of the side bar, and one hex bolt (13 mm) visible through the trim (Do not remove plastic corner trim, sun visor bolts, or sport...

Owner's Manual
Page 198
... release, the wipers will activate the rear washer. The wash pump will activate the wiper. UNDERSTANDING THE FEATURES OF YOUR VEHICLE 197 5. REAR WINDOW FEATURES - HARD TOP ONLY Rear Window Wiper/Washer - If Equipped A rotary ring switch on the control lever (located on each side of the base of the rear wiper...
... release, the wipers will activate the rear washer. The wash pump will activate the wiper. UNDERSTANDING THE FEATURES OF YOUR VEHICLE 197 5. REAR WINDOW FEATURES - HARD TOP ONLY Rear Window Wiper/Washer - If Equipped A rotary ring switch on the control lever (located on each side of the base of the rear wiper...

Owner's Manual
Page 302
...and down. Is the trail straight up on an angle. Do not attempted to cross a log with the vehicle and your brakes. Depending on top and the other side? Hill Climbing Hill climbing requires good judgment and a good understanding of your abilities and your tires. Never attempt to climb ...steep. Are there ruts, rocks, CAUTION! Getting High-Centered If you approach a hill consider its grade or steepness. Then ease the vehicle off hard objects increases the risk of underbody damage. Before Climbing A Steep Hill As you get out of the vehicle and try rocking the vehicle or ...
...and down. Is the trail straight up on an angle. Do not attempted to cross a log with the vehicle and your brakes. Depending on top and the other side? Hill Climbing Hill climbing requires good judgment and a good understanding of your abilities and your tires. Never attempt to climb ...steep. Are there ruts, rocks, CAUTION! Getting High-Centered If you approach a hill consider its grade or steepness. Then ease the vehicle off hard objects increases the risk of underbody damage. Before Climbing A Steep Hill As you get out of the vehicle and try rocking the vehicle or ...

Owner's Manual
Page 414
...engine compartment near the battery. Several applications may damage the windows. Adhesives are hard to the windows. This center contains cartridge fuses, mini fuses and relays. Aggressively work the MOPAR Soft Top Zipper Cleaner and Lubricant into the zipper teeth. FUSES (TOTALLY INTEGRATED POWER MODULE...) The Totally Integrated Power Module (TIPM) is experienced, work the MOPAR Soft Top Zipper Cleaner and Lubricant into the zipper slide. MAINTAINING YOUR VEHICLE 413 zipper halves with fresh water and allow to dry. Integrated ...
...engine compartment near the battery. Several applications may damage the windows. Adhesives are hard to the windows. This center contains cartridge fuses, mini fuses and relays. Aggressively work the MOPAR Soft Top Zipper Cleaner and Lubricant into the zipper teeth. FUSES (TOTALLY INTEGRATED POWER MODULE...) The Totally Integrated Power Module (TIPM) is experienced, work the MOPAR Soft Top Zipper Cleaner and Lubricant into the zipper slide. MAINTAINING YOUR VEHICLE 413 zipper halves with fresh water and allow to dry. Integrated ...

Owner's Manual
Page 453
... ...17,335 Glass Cleaning ...410 Gross Axle Weight Rating ...342,345 Gross Vehicle Weight Rating ...342,345 GVWR ...342 Hands-Free Phone (UConnect™) Hard Drive (HDD) ...Hard Top ...Hard Top, Modular ...Hard Top Removal ...85,250,251 ...250 ...125 ...125 ...129 Hazard Warning Flasher ...364 Head Restraints ...89 Head Rests ...89 Headlights Bulb Replacement ...420 Dimmer...
... ...17,335 Glass Cleaning ...410 Gross Axle Weight Rating ...342,345 Gross Vehicle Weight Rating ...342,345 GVWR ...342 Hands-Free Phone (UConnect™) Hard Drive (HDD) ...Hard Top ...Hard Top, Modular ...Hard Top Removal ...85,250,251 ...250 ...125 ...125 ...129 Hazard Warning Flasher ...364 Head Restraints ...89 Head Rests ...89 Headlights Bulb Replacement ...420 Dimmer...

Owner's Manual
Page 456
... ...404 Lubricant Selection ...403 Shift Speeds ...276 Master Cylinder (Brakes) ...400 Mini-Trip Computer ...215 Mirrors ...83 Outside ...84 Rearview ...83 Modifications/Alterations, Vehicle ...8 Modular Hard Top ...125 Monitor, Tire Pressure System ...330 Mopar Parts ...382,440 MP3 Player ...250 Multi-Function Control Lever ...97 Navigation Radio ...250 Navigation System ...250 New...
... ...404 Lubricant Selection ...403 Shift Speeds ...276 Master Cylinder (Brakes) ...400 Mini-Trip Computer ...215 Mirrors ...83 Outside ...84 Rearview ...83 Modifications/Alterations, Vehicle ...8 Modular Hard Top ...125 Monitor, Tire Pressure System ...330 Mopar Parts ...382,440 MP3 Player ...250 Multi-Function Control Lever ...97 Navigation Radio ...250 Navigation System ...250 New...

Owner's Manual
Page 465
... - IF EQUIPPED Removing The Soft TopInstalling the Soft TopFREEDOM TOP THREE-PIECE MODULAR HARD TOP Front Panel(s) RemovalFront Panel(s) InstallationFront Panel(s) Installation Only (With Rear Hard Top Removed)Rear Hard Top RemovalRear Hard Top InstallationDOOR FRAME Door Frame Removal (Two-Door Models)Door Frame...YOUR ENGINE OVERHEATS JACKING AND TIRE CHANGING Jack LocationSpare Tire StowagePreparations For JackingJacking Instructions JUMP STARTING EMERGENCY TOW HOOKS - HARD TOP ONLY Rear Window Wiper/Washer - RUBICON MODELS REAR AXLE LOCK - 4WD NON-RUBICON MODELS (IF EQUIPPED) ELECTRONIC...
... - IF EQUIPPED Removing The Soft TopInstalling the Soft TopFREEDOM TOP THREE-PIECE MODULAR HARD TOP Front Panel(s) RemovalFront Panel(s) InstallationFront Panel(s) Installation Only (With Rear Hard Top Removed)Rear Hard Top RemovalRear Hard Top InstallationDOOR FRAME Door Frame Removal (Two-Door Models)Door Frame...YOUR ENGINE OVERHEATS JACKING AND TIRE CHANGING Jack LocationSpare Tire StowagePreparations For JackingJacking Instructions JUMP STARTING EMERGENCY TOW HOOKS - HARD TOP ONLY Rear Window Wiper/Washer - RUBICON MODELS REAR AXLE LOCK - 4WD NON-RUBICON MODELS (IF EQUIPPED) ELECTRONIC...


