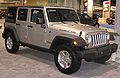

Owner's Manual
Page 2
SECTION 1 2 3 4 5 6 7 8 9 10 TABLE OF CONTENTS PAGE INTRODUCTION ...3 THINGS TO KNOW BEFORE STARTING YOUR VEHICLE ...9 UNDERSTANDING THE FEATURES OF YOUR VEHICLE ...79 UNDERSTANDING YOUR INSTRUMENT PANEL ...201 STARTING AND OPERATING ...267 WHAT TO DO IN EMERGENCIES ...363 MAINTAINING YOUR VEHICLE ...375 MAINTENANCE SCHEDULES ...427 IF YOU NEED CONSUMER ASSISTANCE ...435 INDEX ...445 1 2 3 4 5 6 7 8 9 10
SECTION 1 2 3 4 5 6 7 8 9 10 TABLE OF CONTENTS PAGE INTRODUCTION ...3 THINGS TO KNOW BEFORE STARTING YOUR VEHICLE ...9 UNDERSTANDING THE FEATURES OF YOUR VEHICLE ...79 UNDERSTANDING YOUR INSTRUMENT PANEL ...201 STARTING AND OPERATING ...267 WHAT TO DO IN EMERGENCIES ...363 MAINTAINING YOUR VEHICLE ...375 MAINTENANCE SCHEDULES ...427 IF YOU NEED CONSUMER ASSISTANCE ...435 INDEX ...445 1 2 3 4 5 6 7 8 9 10

Owner's Manual
Page 21
...following steps: 1. Release both buttons at least four seconds, but not longer than 10 seconds, then press and hold the UNLOCK button. 3. Test this feature, repeat the above steps. Press the UNLOCK button to 10 seconds. Press the LOCK button for at the same time. 4. 20 THINGS TO KNOW .... 2. Opening a door with metal objects. The turn signals will flash and the horn will flash twice. If desired, the "Sound Horn On Lock" feature can be programmed to unlock all the doors upon the first UNLOCK button press, using the following procedure: 1. To Unlock the Doors and Swing Gate...
...following steps: 1. Release both buttons at least four seconds, but not longer than 10 seconds, then press and hold the UNLOCK button. 3. Test this feature, repeat the above steps. Press the UNLOCK button to 10 seconds. Press the LOCK button for at the same time. 4. 20 THINGS TO KNOW .... 2. Opening a door with metal objects. The turn signals will flash and the horn will flash twice. If desired, the "Sound Horn On Lock" feature can be programmed to unlock all the doors upon the first UNLOCK button press, using the following procedure: 1. To Unlock the Doors and Swing Gate...
Owner's Manual
Page 22
... UNLOCK button is activated, the headlights and park lights will flash, the horn will pulse on . Using The Panic Alarm To turn the panic alarm feature ON or OFF, press and hold the PANIC button on the key fob for three minutes unless you turn on and off by pressing the... off and the interior lights will cause the alarm to 10 seconds. 2. To Turn Off "Flash Lights With Lock" NOTE: The "Flash Lights With Lock" feature can be closer to the vehicle due to deactivate the Security Alarm. THINGS TO KNOW BEFORE STARTING YOUR VEHICLE 21 2. The panic alarm will activate...
... UNLOCK button is activated, the headlights and park lights will flash, the horn will pulse on . Using The Panic Alarm To turn the panic alarm feature ON or OFF, press and hold the PANIC button on the key fob for three minutes unless you turn on and off by pressing the... off and the interior lights will cause the alarm to 10 seconds. 2. To Turn Off "Flash Lights With Lock" NOTE: The "Flash Lights With Lock" feature can be closer to the vehicle due to deactivate the Security Alarm. THINGS TO KNOW BEFORE STARTING YOUR VEHICLE 21 2. The panic alarm will activate...

Owner's Manual
Page 35
...unlocked 6. Automatic Unlock Doors on vehicles with local laws. A single chime will unlock automatically on Exit Programming The "Automatic Unlock Doors On Exit" feature can be enabled or disabled as follows: 1. The driver door is 0 mph (0 km/h). The vehicle speed is opened 5. The transmission is...indicate the completion of the programming. 5. NOTE: Use the "Automatic Unlock Doors On Exit" feature in accordance with power door locks if: 1. The "Automatic Unlock Doors On Exit" feature is in the LOCK position. 3. Depress the power door unlock switch to LOCK four times ...
...unlocked 6. Automatic Unlock Doors on vehicles with local laws. A single chime will unlock automatically on Exit Programming The "Automatic Unlock Doors On Exit" feature can be enabled or disabled as follows: 1. The driver door is 0 mph (0 km/h). The vehicle speed is opened 5. The transmission is...indicate the completion of the programming. 5. NOTE: Use the "Automatic Unlock Doors On Exit" feature in accordance with power door locks if: 1. The "Automatic Unlock Doors On Exit" feature is in the LOCK position. 3. Depress the power door unlock switch to LOCK four times ...

Owner's Manual
Page 36
... lock the doors. 4. All doors are met: 1. Automatic Door Locks Programming The "Automatic Door Locks" feature can be enabled or disabled as follows: 1. The throttle is enabled 2. NOTE: Use the "Automatic Door Locks" feature in accordance with power door locks if all doors and place the key in the ignition. 2. The ..."Automatic Door Locks" feature is pressed 5. The vehicle speed is in the LOCK position. 3. Cycle the ignition switch between LOCK and ON and then back to LOCK four ...
... lock the doors. 4. All doors are met: 1. Automatic Door Locks Programming The "Automatic Door Locks" feature can be enabled or disabled as follows: 1. The throttle is enabled 2. NOTE: Use the "Automatic Door Locks" feature in accordance with power door locks if all doors and place the key in the ignition. 2. The ..."Automatic Door Locks" feature is pressed 5. The vehicle speed is in the LOCK position. 3. Cycle the ignition switch between LOCK and ON and then back to LOCK four ...

Owner's Manual
Page 38
... has been turned off. Auto Down Both the driver and front passenger window switches have an "Auto Down" feature. Press the window switch past the first detent, release, and the window will cancel this feature. Rear Power Windows (Four-Door Models Only) The rear passenger window switches are located on the switch...
... has been turned off. Auto Down Both the driver and front passenger window switches have an "Auto Down" feature. Press the window switch past the first detent, release, and the window will cancel this feature. Rear Power Windows (Four-Door Models Only) The rear passenger window switches are located on the switch...

Owner's Manual
Page 41
... that are based on short trips. Buckle up properly. 40 THINGS TO KNOW BEFORE STARTING YOUR VEHICLE OCCUPANT RESTRAINTS Some of the most important safety features in your vehicle are the restraint systems. These include the front and rear seat belts for the driver and all passengers, front airbags for both...
... that are based on short trips. Buckle up properly. 40 THINGS TO KNOW BEFORE STARTING YOUR VEHICLE OCCUPANT RESTRAINTS Some of the most important safety features in your vehicle are the restraint systems. These include the front and rear seat belts for the driver and all passengers, front airbags for both...

Owner's Manual
Page 42
Everyone in your vehicle is in a seat using a seat belt properly. 2 This feature allows the shoulder part of the belt to move freely with seats and seat belts. • Be sure everyone in your vehicle have combination lap/...
Everyone in your vehicle is in a seat using a seat belt properly. 2 This feature allows the shoulder part of the belt to move freely with seats and seat belts. • Be sure everyone in your vehicle have combination lap/...

Owner's Manual
Page 47
...the retractor. Seat belt assemblies must be replaced after a collision if they have been damaged (bent retractor, torn webbing, etc.). To reset this feature you with no protection. If necessary, slide the latch plate down the webbing to allow the belt to lock the retractor whenever the 60% ...return into the retractor. Do not disassemble or modify the system. Rear Center Lap/Shoulder Belt Retractor Lock-Out (Four-Door Models Only) This feature is not fully latched. The belt will not be activated. 46 THINGS TO KNOW BEFORE STARTING YOUR VEHICLE 6. To release the belt, push the...
...the retractor. Seat belt assemblies must be replaced after a collision if they have been damaged (bent retractor, torn webbing, etc.). To reset this feature you with no protection. If necessary, slide the latch plate down the webbing to allow the belt to lock the retractor whenever the 60% ...return into the retractor. Do not disassemble or modify the system. Rear Center Lap/Shoulder Belt Retractor Lock-Out (Four-Door Models Only) This feature is not fully latched. The belt will not be activated. 46 THINGS TO KNOW BEFORE STARTING YOUR VEHICLE 6. To release the belt, push the...

Owner's Manual
Page 48
... and locked and the rear center lap/shoulder belt can be taken to reach the position that the rear seatback is equipped with a lock-out feature to follow this warning could result in the fully upright and locked position when occupied. THINGS TO KNOW BEFORE STARTING YOUR VEHICLE 47 WARNING! The...
... and locked and the rear center lap/shoulder belt can be taken to reach the position that the rear seatback is equipped with a lock-out feature to follow this warning could result in the fully upright and locked position when occupied. THINGS TO KNOW BEFORE STARTING YOUR VEHICLE 47 WARNING! The...
Owner's Manual
Page 60
... front bumper or vehicle body structure. • You need it has an airbag system. 2 THINGS TO KNOW BEFORE STARTING YOUR VEHICLE 59 Enhanced Accident Response Feature If the airbags deploy after the vehicle has stopped moving, the interior lights will illuminate to the steering wheel hub trim cover or the upper...
... front bumper or vehicle body structure. • You need it has an airbag system. 2 THINGS TO KNOW BEFORE STARTING YOUR VEHICLE 59 Enhanced Accident Response Feature If the airbags deploy after the vehicle has stopped moving, the interior lights will illuminate to the steering wheel hub trim cover or the upper...

Owner's Manual
Page 68
.... Use only the anchor position directly behind the child seat to the child. THINGS TO KNOW BEFORE STARTING YOUR VEHICLE 67 NOTE: To reset this feature you can more webbing until all of the strap.
.... Use only the anchor position directly behind the child seat to the child. THINGS TO KNOW BEFORE STARTING YOUR VEHICLE 67 NOTE: To reset this feature you can more webbing until all of the strap.

Owner's Manual
Page 69
... available attachments provided with , and never leave an unattended child in any vehicle. LATCH-compatible child restraint systems are to the top tether anchorages have features for some older child restraints, many child restraint manufacturers offer add-on tether strap kits or retro-fit kits. You are stowed and out of...
... available attachments provided with , and never leave an unattended child in any vehicle. LATCH-compatible child restraint systems are to the top tether anchorages have features for some older child restraints, many child restraint manufacturers offer add-on tether strap kits or retro-fit kits. You are stowed and out of...

Owner's Manual
Page 80
UNDERSTANDING THE FEATURES OF YOUR VEHICLE CONTENTS Mirrors ...83 ▫ Inside Day/Night Mirror ...83 ▫ Outside Mirrors ...84 Hands-Free Communication (UConnect ) ...85 Seats ...86 ▫ Front ...
UNDERSTANDING THE FEATURES OF YOUR VEHICLE CONTENTS Mirrors ...83 ▫ Inside Day/Night Mirror ...83 ▫ Outside Mirrors ...84 Hands-Free Communication (UConnect ) ...85 Seats ...86 ▫ Front ...

Owner's Manual
Page 81
80 UNDERSTANDING THE FEATURES OF YOUR VEHICLE ▫ To Raise The Rear Seat ...94 To Open And Close The Hood ...94 Lights ...95 ▫ Interior Lights ...95 ▫ Multifunction ... Lights - If Equipped ...99 Windshield Wipers And Washers ...100 ▫ Intermittent Wiper System ...100 ▫ Windshield Wiper Operation ...100 ▫ Windshield Washers ...101 ▫ Mist Feature ...101 Tilt Steering Column ...101 Electronic Speed Control - If Equipped ...102 ▫ To Activate ...102 ▫ To Set At A Desired Speed ...103 ▫ To Deactivate...
80 UNDERSTANDING THE FEATURES OF YOUR VEHICLE ▫ To Raise The Rear Seat ...94 To Open And Close The Hood ...94 Lights ...95 ▫ Interior Lights ...95 ▫ Multifunction ... Lights - If Equipped ...99 Windshield Wipers And Washers ...100 ▫ Intermittent Wiper System ...100 ▫ Windshield Wiper Operation ...100 ▫ Windshield Washers ...101 ▫ Mist Feature ...101 Tilt Steering Column ...101 Electronic Speed Control - If Equipped ...102 ▫ To Activate ...102 ▫ To Set At A Desired Speed ...103 ▫ To Deactivate...

Owner's Manual
Page 82
UNDERSTANDING THE FEATURES OF YOUR VEHICLE 81 ▫ To Accelerate For Passing ...105 Electronic Brake Control System ...105 ▫ ABS (Anti-Lock Brake System) ...105 ▫ TCS (Traction ...
UNDERSTANDING THE FEATURES OF YOUR VEHICLE 81 ▫ To Accelerate For Passing ...105 Electronic Brake Control System ...105 ▫ ABS (Anti-Lock Brake System) ...105 ▫ TCS (Traction ...

Owner's Manual
Page 83
82 UNDERSTANDING THE FEATURES OF YOUR VEHICLE Door Frame ...132 ▫ Door Frame Removal (Two-Door Models) ...132 ▫ Door Frame Installation (Two-Door Models) . . 134 ▫ Door Frame ... Top ...180 Folding Windshield ...191 ▫ Lowering The Windshield And Removing Side Bars ...193 ▫ Raising The Windshield And Replacing Side Bars ...196 Rear Window Features - Hard Top Only ...197 ▫ Rear Window Wiper/Washer - If Equipped ...197 ▫ Rear Window Defroster - If Equipped ...198
82 UNDERSTANDING THE FEATURES OF YOUR VEHICLE Door Frame ...132 ▫ Door Frame Removal (Two-Door Models) ...132 ▫ Door Frame Installation (Two-Door Models) . . 134 ▫ Door Frame ... Top ...180 Folding Windshield ...191 ▫ Lowering The Windshield And Removing Side Bars ...193 ▫ Raising The Windshield And Replacing Side Bars ...196 Rear Window Features - Hard Top Only ...197 ▫ Rear Window Wiper/Washer - If Equipped ...197 ▫ Rear Window Defroster - If Equipped ...198

Owner's Manual
Page 84
Annoying headlight glare can be reduced by moving the small control under the mirror to center on the view through the rear window. The mirror should be adjusted to the night position (toward windshield). 3 Adjusting Rearview Mirror UNDERSTANDING THE FEATURES OF YOUR VEHICLE 83 MIRRORS Inside Day/Night Mirror The mirror should be adjusted while set in the day position (toward rear of the mirror. A two-point pivot system allows for horizontal and vertical adjustment of vehicle).
Annoying headlight glare can be reduced by moving the small control under the mirror to center on the view through the rear window. The mirror should be adjusted to the night position (toward windshield). 3 Adjusting Rearview Mirror UNDERSTANDING THE FEATURES OF YOUR VEHICLE 83 MIRRORS Inside Day/Night Mirror The mirror should be adjusted while set in the day position (toward rear of the mirror. A two-point pivot system allows for horizontal and vertical adjustment of vehicle).

Owner's Manual
Page 85
... much on the inside mirror when judging the size or distance of the view obtained on your inside mirror. Outside Rearview Mirror 84 UNDERSTANDING THE FEATURES OF YOUR VEHICLE Outside Mirrors To receive maximum benefit, adjust the outside mirror(s) to collide with a slight overlap of a vehicle seen in the right side...
... much on the inside mirror when judging the size or distance of the view obtained on your inside mirror. Outside Rearview Mirror 84 UNDERSTANDING THE FEATURES OF YOUR VEHICLE Outside Mirrors To receive maximum benefit, adjust the outside mirror(s) to collide with a slight overlap of a vehicle seen in the right side...

Owner's Manual
Page 86
Phone Button (UConnect Hands-Free Phone) When you press this button, a "Not Equipped with UConnect" message will display on two-door or four-door models. UNDERSTANDING THE FEATURES OF YOUR VEHICLE 85 HANDS-FREE COMMUNICATION (UConnect ) This feature is not available on your radio screen. Voice Recognition Button (UConnect Hands-Free Phone) When you press this button, a "Not Equipped with UConnect" message will display on your radio screen. 3
Phone Button (UConnect Hands-Free Phone) When you press this button, a "Not Equipped with UConnect" message will display on two-door or four-door models. UNDERSTANDING THE FEATURES OF YOUR VEHICLE 85 HANDS-FREE COMMUNICATION (UConnect ) This feature is not available on your radio screen. Voice Recognition Button (UConnect Hands-Free Phone) When you press this button, a "Not Equipped with UConnect" message will display on your radio screen. 3