

Owner's Manual
Page 69
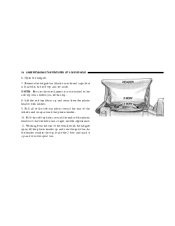
... dual top wrap. 3 UNDERSTANDING THE FEATURES OF YOUR VEHICLE 69 c. Secure them to crossthread the screws. This cover should be discarded. Unsnap and remove the black boot cover. Tap the knuckles on the side with the curved portion of the bows facing upward. Lay the soft top back into place.
... dual top wrap. 3 UNDERSTANDING THE FEATURES OF YOUR VEHICLE 69 c. Secure them to crossthread the screws. This cover should be discarded. Unsnap and remove the black boot cover. Tap the knuckles on the side with the curved portion of the bows facing upward. Lay the soft top back into place.
Owner's Manual
Page 70
... soft top and set aside. Working from the plastic header with end caps) that the fabric has a tight, smooth appearance. 11. Remove the tailgate bar (black bar with latches. 9. 70 UNDERSTANDING THE FEATURES OF YOUR VEHICLE 6.
... soft top and set aside. Working from the plastic header with end caps) that the fabric has a tight, smooth appearance. 11. Remove the tailgate bar (black bar with latches. 9. 70 UNDERSTANDING THE FEATURES OF YOUR VEHICLE 6.

Owner's Manual
Page 75
Repeat this step for the other side. 21. Tuck in the bottom retainers on the quarter windows into the bodyside retainer, beginning from you. 3 Remove and discard the end caps. UNDERSTANDING THE FEATURES OF YOUR VEHICLE 75 20. Locate the black retainer bar that was set aside. Slide the retainer bar over the receiver at the bottom inside, with the bulky seal away from the rear and working to the front of the vehicle.
Repeat this step for the other side. 21. Tuck in the bottom retainers on the quarter windows into the bodyside retainer, beginning from you. 3 Remove and discard the end caps. UNDERSTANDING THE FEATURES OF YOUR VEHICLE 75 20. Locate the black retainer bar that was set aside. Slide the retainer bar over the receiver at the bottom inside, with the bulky seal away from the rear and working to the front of the vehicle.

Owner's Manual
Page 107
Lower the windshield gently until it contacts the rubber hood bumpers. 3 UNDERSTANDING THE FEATURES OF YOUR VEHICLE 107 7. Remove the black round headed windshield Torx head screw on each side of the base of the windshield. 8.
Lower the windshield gently until it contacts the rubber hood bumpers. 3 UNDERSTANDING THE FEATURES OF YOUR VEHICLE 107 7. Remove the black round headed windshield Torx head screw on each side of the base of the windshield. 8.

Owner's Manual
Page 187
... it on one side. Look for highway use. Department of Transportation tire safety standards, and is approved for the TIN on the outboard side of black sidewall tires as mounted on the vehicle. STARTING AND OPERATING 187 Tire Identification Number (TIN) The TIN may be found on the outboard side then...
... it on one side. Look for highway use. Department of Transportation tire safety standards, and is approved for the TIN on the outboard side of black sidewall tires as mounted on the vehicle. STARTING AND OPERATING 187 Tire Identification Number (TIN) The TIN may be found on the outboard side then...
