
Owner's Manual
Page 14
... the center of both the second row 60/40 split bench seat and the second row bucket seat has an easy entry/exit feature. Extended Models The passenger's side of the seat where the seatback and the seat cushion meet. Rear Seats Rear Seat Operation Entering or Exiting the Third Row... Seats Regular Models If your vehicle has the 60/40 Split Bench seat in the second row, you must flip and fold the second row seat following...
... the center of both the second row 60/40 split bench seat and the second row bucket seat has an easy entry/exit feature. Extended Models The passenger's side of the seat where the seatback and the seat cushion meet. Rear Seats Rear Seat Operation Entering or Exiting the Third Row... Seats Regular Models If your vehicle has the 60/40 Split Bench seat in the second row, you must flip and fold the second row seat following...

Owner's Manual
Page 16
Flip and Fold Feature To flip and fold the seat, do this, push the button at the rear of the seat. 2. On extended models, the headrests need to be flipped and folded for additional cargo space. 60/40 Split Bench Seat (Second Row) If your vehicle has a 60/... at the base of the seat cushion. 3. Make sure that there is being folded forward, the head rest will automatically fold rearward. 1-10 On regular models, the rear seatbacks may be equipped with rearward folding headrests. Pull up on the top of the head rest, and pull the head rest out...
Flip and Fold Feature To flip and fold the seat, do this, push the button at the rear of the seat. 2. On extended models, the headrests need to be flipped and folded for additional cargo space. 60/40 Split Bench Seat (Second Row) If your vehicle has a 60/... at the base of the seat cushion. 3. Make sure that there is being folded forward, the head rest will automatically fold rearward. 1-10 On regular models, the rear seatbacks may be equipped with rearward folding headrests. Pull up on the top of the head rest, and pull the head rest out...

Owner's Manual
Page 17
... moving the front seat forward and/or bring the front seatback more upright. 1. Release the panels from the seatbacks by pushing forward on extended models only, the rear seat footwell area will be exposed and will have to be covered by the load floor panels. Fold the panels ... to release the seatback. Once the seatbacks are folded forward, on the latches. 2. 4. Regular models: Push the seatback forward until it is flat . To create a load floor, do the following: Extended models: On the passenger side, lift the lever at because it is flat . If the ...
... moving the front seat forward and/or bring the front seatback more upright. 1. Release the panels from the seatbacks by pushing forward on extended models only, the rear seat footwell area will be exposed and will have to be covered by the load floor panels. Fold the panels ... to release the seatback. Once the seatbacks are folded forward, on the latches. 2. 4. Regular models: Push the seatback forward until it is flat . To create a load floor, do the following: Extended models: On the passenger side, lift the lever at because it is flat . If the ...

Owner's Manual
Page 18
... the load floor panels and latch them into position. On regular models, return the headrests to be sure that the safety belts are properly routed and attached, and are not twisted. 5. After raising the rear seatback, always ... is locked. 2. Pull up and push it is improperly routed, not properly attached, or twisted will not provide the protection needed in a crash. On extended models, return the headrests from the stored position to be seriously injured. The person wearing the belt could cause injury to the normal seating position, do...
... the load floor panels and latch them into position. On regular models, return the headrests to be sure that the safety belts are properly routed and attached, and are not twisted. 5. After raising the rear seatback, always ... is locked. 2. Pull up and push it is improperly routed, not properly attached, or twisted will not provide the protection needed in a crash. On extended models, return the headrests from the stored position to be seriously injured. The person wearing the belt could cause injury to the normal seating position, do...

Owner's Manual
Page 29
... forward in place. Pull up on the lever without applying pressure to the seatback and the seatback will return to the upright position. Regular Model Lever shown, Extended Model Lever similar 1-23 Bucket Seats (Second Row) If your vehicle has bucket seats, the seatbacks can be reclined, and the seats can be...
... forward in place. Pull up on the lever without applying pressure to the seatback and the seatback will return to the upright position. Regular Model Lever shown, Extended Model Lever similar 1-23 Bucket Seats (Second Row) If your vehicle has bucket seats, the seatbacks can be reclined, and the seats can be...

Owner's Manual
Page 30
Slide the headrest pins into the holes on the top of the seat cushion to give you more cargo space. Extended Model Only Push the button at the rear of the seat cushion and pull the seat cushion up and fold it on the top of the ...headrest and pull the headrest out from the seatback. To flip and fold the bucket seats, do the following: 1. On the extended models, remove the headrest and store it forward. Flip and Fold Feature The seat cushions on the bucket seats can be flipped forward and the...
Slide the headrest pins into the holes on the top of the seat cushion to give you more cargo space. Extended Model Only Push the button at the rear of the seat cushion and pull the seat cushion up and fold it on the top of the ...headrest and pull the headrest out from the seatback. To flip and fold the bucket seats, do the following: 1. On the extended models, remove the headrest and store it forward. Flip and Fold Feature The seat cushions on the bucket seats can be flipped forward and the...

Owner's Manual
Page 31
..., try moving the front seat forward and/or bringing the front seatback more upright. 1. Release the panels from the seatbacks by pushing forward on extended models only, the rear seat footwell area will be exposed and will have to cover the rear seat footwell area. 1-25 Once the seatbacks are folded... the latches. 2. Then fold the panels back to be covered by the load floor panel. 3. To create a load floor, do the following: Regular Model Lever shown, Extended Model Lever similar If the seatback cannot fold flat .
..., try moving the front seat forward and/or bringing the front seatback more upright. 1. Release the panels from the seatbacks by pushing forward on extended models only, the rear seat footwell area will be exposed and will have to cover the rear seat footwell area. 1-25 Once the seatbacks are folded... the latches. 2. Then fold the panels back to be covered by the load floor panel. 3. To create a load floor, do the following: Regular Model Lever shown, Extended Model Lever similar If the seatback cannot fold flat .

Owner's Manual
Page 32
...it could cause injury to the upright position. {CAUTION: Do not let anyone ride where he or she cannot wear a safety belt properly. On extended models, lift the load floor panels and latch them into position. Pull up on the seatback to make sure it latches into the seatback. It... also tells you some things you are buckled up and push it rearward all the way. On extended models, return the headrest from it is locked. 5. Returning the Seats to the Normal Seating Position To return the seats to use safety belts properly. ...
...it could cause injury to the upright position. {CAUTION: Do not let anyone ride where he or she cannot wear a safety belt properly. On extended models, lift the load floor panels and latch them into position. Pull up on the seatback to make sure it latches into the seatback. It... also tells you some things you are buckled up and push it rearward all the way. On extended models, return the headrest from it is locked. 5. Returning the Seats to the Normal Seating Position To return the seats to use safety belts properly. ...

Owner's Manual
Page 58
... the child's abdomen. This alone could cause serious or fatal injuries. Infants always should be secured in a motor vehicle. In addition, there are many different models available. Young children always should be secured in a rear-facing seat settles into the restraint, so the crash forces can be sure it meets federal...
... the child's abdomen. This alone could cause serious or fatal injuries. Infants always should be secured in a motor vehicle. In addition, there are many different models available. Young children always should be secured in a rear-facing seat settles into the restraint, so the crash forces can be sure it meets federal...

Owner's Manual
Page 66
Third Row - Extended Model Second Row - Bucket 1-60 Seating positions with two lower anchors. j (Lower Anchor): Seating positions with top tether anchors. i (Top Tether Anchor): Seating positions with two lower anchors. j (Lower Anchor): Seating positions with top tether anchors. Lower Anchor and Top Tether Anchor Locations i (Top Tether Anchor): Seating positions with top tether anchors. Third Row - Regular Model Second Row - Bench i (Top Tether Anchor): i (Top Tether Anchor): Seating positions with top tether anchors.
Third Row - Extended Model Second Row - Bucket 1-60 Seating positions with two lower anchors. j (Lower Anchor): Seating positions with top tether anchors. i (Top Tether Anchor): Seating positions with two lower anchors. j (Lower Anchor): Seating positions with top tether anchors. Lower Anchor and Top Tether Anchor Locations i (Top Tether Anchor): Seating positions with top tether anchors. Third Row - Regular Model Second Row - Bench i (Top Tether Anchor): i (Top Tether Anchor): Seating positions with top tether anchors.

Owner's Manual
Page 67
... vehicle as the seating position where the child restraint will be placed. Never install two top tethers using the same top tether anchor. For models with a second row bench seat, the rear right side passenger and center seating positions have exposed metal anchors located in the crease between the... seatback and the seat cushion. Second Row Seat - Regular Models For Extended models with a top tether in the third row, if you vehicle has one. Be sure to use an anchor located on the same side...
... vehicle as the seating position where the child restraint will be placed. Never install two top tethers using the same top tether anchor. For models with a second row bench seat, the rear right side passenger and center seating positions have exposed metal anchors located in the crease between the... seatback and the seat cushion. Second Row Seat - Regular Models For Extended models with a top tether in the third row, if you vehicle has one. Be sure to use an anchor located on the same side...

Owner's Manual
Page 68
Never install two top tethers using the same top tether anchor. 1-62 Third Row Seat - Regular Models For Extended models with third row seating, there is located at the bottom rear of the seat cushion for both. Second Row Seat (Bucket Similar) - Extended Models For Regular models with third row seating, the top tether anchor is one top tether anchor located at the bottom rear of the seat cushion that can be used for either the center or passenger side seating position in the third row, but not for the center seating position in the third row.
Never install two top tethers using the same top tether anchor. 1-62 Third Row Seat - Regular Models For Extended models with third row seating, there is located at the bottom rear of the seat cushion for both. Second Row Seat (Bucket Similar) - Extended Models For Regular models with third row seating, the top tether anchor is one top tether anchor located at the bottom rear of the seat cushion that can be used for either the center or passenger side seating position in the third row, but not for the center seating position in the third row.

Owner's Manual
Page 69
There is no place to attach the top tether in the rear rather than the front seat. Third Row Bench - Extended Models For Regular models, do not secure a child restraint in the right front passenger's position or the third row outboard seating positions if a national or local law requires... the top tether be attached, or if the instructions that come with the child restraint say that the top tether must be attached. For Extended models, do not secure a child restraint in the right front passenger's position or the third row driver's side seating position if a national or local ...
There is no place to attach the top tether in the rear rather than the front seat. Third Row Bench - Extended Models For Regular models, do not secure a child restraint in the right front passenger's position or the third row outboard seating positions if a national or local law requires... the top tether be attached, or if the instructions that come with the child restraint say that the top tether must be attached. For Extended models, do not secure a child restraint in the right front passenger's position or the third row driver's side seating position if a national or local ...

Owner's Manual
Page 149
If you have a newer garage door opener with any garage door opener model manufactured before attempting to three channels: 1. Because of the steps involved, it is advised to park outside Universal Home Remote buttons, releasing only when the ...
If you have a newer garage door opener with any garage door opener model manufactured before attempting to three channels: 1. Because of the steps involved, it is advised to park outside Universal Home Remote buttons, releasing only when the ...
Owner's Manual
Page 153
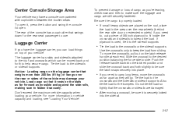
... is used, tie it , press the button and swing the console lid open it to carry long items, move the crossrails, pull out on extended models). If you 're leaving, check now and then to the bumpers. Push the release handle back into the latched position and slide the crossrail back...
... is used, tie it , press the button and swing the console lid open it to carry long items, move the crossrails, pull out on extended models). If you 're leaving, check now and then to the bumpers. Push the release handle back into the latched position and slide the crossrail back...

Owner's Manual
Page 154
... utility compartment, press in the rear cargo area of your vehicle's luggage carrier has a roller crossrail at each end. 2. If items are loaded on extended models, pull the latch to desired position. 3.
... utility compartment, press in the rear cargo area of your vehicle's luggage carrier has a roller crossrail at each end. 2. If items are loaded on extended models, pull the latch to desired position. 3.

Owner's Manual
Page 156
... to be equipped with the round surface facing down. 2. This will allow the cover to strap cargo in the driver's side trim panel. 3. On some models there are two slots. Lightly pull on top of the cover forward and hold the cover at an angle and place the cover holder tab...
... to be equipped with the round surface facing down. 2. This will allow the cover to strap cargo in the driver's side trim panel. 3. On some models there are two slots. Lightly pull on top of the cover forward and hold the cover at an angle and place the cover holder tab...
Owner's Manual
Page 238
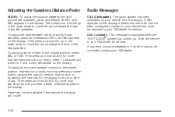
... FAD. L (balance) and a zero or F and a zero will appear on the display. CEN will appear on the display. LOC (Locked): This message is a regular cab model. Then press and hold AUDIO for your GM dealer for the display to return to move the sound toward the front or the rear speakers...
... FAD. L (balance) and a zero or F and a zero will appear on the display. CEN will appear on the display. LOC (Locked): This message is a regular cab model. Then press and hold AUDIO for your GM dealer for the display to return to move the sound toward the front or the rear speakers...

Owner's Manual
Page 359
Vehicle* C-1500 (2WD)* 4800 V8 5300 V8 5300 V8 (Extended Models) Vehicle* K-1500 (4WD)* 4800 V8 5300 V8 5300 V8 (Extended Models) 3.42 4.10 3.42 4.10 3.42 4.10 6,500 lbs. (2 948 kg) 7,500 lbs. (3 402 kg) 7,500 lbs. (3 402 kg) 7,700 lbs. (3 493 kg) 7,200 lbs. (3 265 ... Axle Ratio Maximum Trailer Weight GCWR 4-63 Use one of the following charts to determine how much your vehicle can weigh, based upon your vehicle model and options.
Vehicle* C-1500 (2WD)* 4800 V8 5300 V8 5300 V8 (Extended Models) Vehicle* K-1500 (4WD)* 4800 V8 5300 V8 5300 V8 (Extended Models) 3.42 4.10 3.42 4.10 3.42 4.10 6,500 lbs. (2 948 kg) 7,500 lbs. (3 402 kg) 7,500 lbs. (3 402 kg) 7,700 lbs. (3 493 kg) 7,200 lbs. (3 265 ... Axle Ratio Maximum Trailer Weight GCWR 4-63 Use one of the following charts to determine how much your vehicle can weigh, based upon your vehicle model and options.

Owner's Manual
Page 360
... Motors of the completely loaded vehicle and trailer including any passengers, cargo, equipment and conversions. Vehicle* C-2500 (2WD)* 6000 V8 (Extended Models) 8100 V8 (Extended Models) Vehicle* K-2500 (4WD)* 6000 V8 (Extended Models) 8100 V8 Axle Ratio Maximum Trailer Weight GCWR 3.73 4.10 3.73 4.10 Axle Ratio 7,900 lbs. (3 583 kg) 9,900 lbs...
... Motors of the completely loaded vehicle and trailer including any passengers, cargo, equipment and conversions. Vehicle* C-2500 (2WD)* 6000 V8 (Extended Models) 8100 V8 (Extended Models) Vehicle* K-2500 (4WD)* 6000 V8 (Extended Models) 8100 V8 Axle Ratio Maximum Trailer Weight GCWR 3.73 4.10 3.73 4.10 Axle Ratio 7,900 lbs. (3 583 kg) 9,900 lbs...

