
Owner's Manual
Page 383
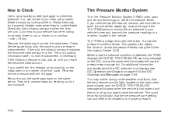
... require more information. {CAUTION: If a fire starts while you . When replacing the fuel cap, turn as possible. See Malfunction Indicator Lamp on the Driver Information Center (DIC) if the fuel cap is fully installed. Do not top off the pump or by notifying the station attendant. Clean fuel... from painted surfaces as soon as you need a new fuel cap, be displayed on page 3-46. 5-9 Shut off...
... require more information. {CAUTION: If a fire starts while you . When replacing the fuel cap, turn as possible. See Malfunction Indicator Lamp on the Driver Information Center (DIC) if the fuel cap is fully installed. Do not top off the pump or by notifying the station attendant. Clean fuel... from painted surfaces as soon as you need a new fuel cap, be displayed on page 3-46. 5-9 Shut off...

Owner's Manual
Page 385
Hood Release To open the hood do the following: 1. Then go to the lower left of the grille. 3. Then pull down the hood and close it . Lift the hood. Before closing the hood, be sure all the filler caps are on the secondary hood release located near the center of the steering wheel. 2. It is located inside the vehicle to the front of the vehicle and pull up on properly. Pull the handle with this symbol on it firmly. 5-11
Hood Release To open the hood do the following: 1. Then go to the lower left of the grille. 3. Then pull down the hood and close it . Lift the hood. Before closing the hood, be sure all the filler caps are on the secondary hood release located near the center of the steering wheel. 2. It is located inside the vehicle to the front of the vehicle and pull up on properly. Pull the handle with this symbol on it firmly. 5-11
Owner's Manual
Page 438
If the cold tire in the center of the tire valve. Recheck the tire pressure with the tire gage. Be sure to put the valve caps back on the valve stems. They help prevent leaks ... in flated to drive the vehicle. Check the tire's in the vehicle. Remove the valve cap from the tire valve stem. The TPMS sensors monitor the air pressure in your vehicle has been sitting... Press the tire gage firmly onto the valve to check tire pressure levels using the Driver Information Center (DIC). You may look properly in flation pressure is detected, the TPMS displays the CHECK TIRE ...
If the cold tire in the center of the tire valve. Recheck the tire pressure with the tire gage. Be sure to put the valve caps back on the valve stems. They help prevent leaks ... in flated to drive the vehicle. Check the tire's in the vehicle. Remove the valve cap from the tire valve stem. The TPMS sensors monitor the air pressure in your vehicle has been sitting... Press the tire gage firmly onto the valve to check tire pressure levels using the Driver Information Center (DIC). You may look properly in flation pressure is detected, the TPMS displays the CHECK TIRE ...
Owner's Manual
Page 440
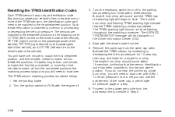
... 5-66 The sensors are matched to the new tire/wheel position. Set the parking brake. 2. Turn the headlamp switch from the valve cap stem. Remove the valve cap from off . 3. Resetting the TPMS Identification Codes Each TPMS sensor has a unique identification code. You will have one...switch to match the first tire and wheel, or more of the vehicle), and LR TIRE (left rear tire on the Driver Information Center (DIC). 4. The SERVICE TIRE MONITOR message will need to this tire and wheel position. Start with the engine off to the parking lamps ...
... 5-66 The sensors are matched to the new tire/wheel position. Set the parking brake. 2. Turn the headlamp switch from the valve cap stem. Remove the valve cap from off . 3. Resetting the TPMS Identification Codes Each TPMS sensor has a unique identification code. You will have one...switch to match the first tire and wheel, or more of the vehicle), and LR TIRE (left rear tire on the Driver Information Center (DIC). 4. The SERVICE TIRE MONITOR message will need to this tire and wheel position. Start with the engine off to the parking lamps ...

Owner's Manual
Page 456
If needed, finish loosening them by turning the wheel wrench in the slot on wheel covers, loosen the plastic nut caps by hand. The nut caps will not come off . 2. Using the flat end of the wheel wrench, pry along the edge of the wheel wrench in a counterclockwise direction.... If the wheel has bolt-on the wheel and gently prying the cap out. Use the wheel wrench to loosen the wheel nuts. Turn the wheel wrench counterclockwise to loosen all the wheel nuts. Remove the center cap by placing the chisel end of the cover until it comes off . Do...
If needed, finish loosening them by turning the wheel wrench in the slot on wheel covers, loosen the plastic nut caps by hand. The nut caps will not come off . 2. Using the flat end of the wheel wrench, pry along the edge of the wheel wrench in a counterclockwise direction.... If the wheel has bolt-on the wheel and gently prying the cap out. Use the wheel wrench to loosen the wheel nuts. Turn the wheel wrench counterclockwise to loosen all the wheel nuts. Remove the center cap by placing the chisel end of the cover until it comes off . Do...

Owner's Manual
Page 461
... somewhere as soon as shown by hand. Notice: Improperly tightened wheel nuts can cause the wheel to come loose and even come off. For center caps, place the cap on page 5-114 for the wheel nut torque specification. 9. Then use the correct wheel nuts. Be sure to use the wheel wrench... nuts and then tighten by turning the wheel wrench clockwise. For bolt-on the wheel. If you must also reinstall the either the center cap, or bolt-on hub cap, depending on page 5-114 for wheel nut torque specification. Be sure to an accident. This could lead to line up...
... somewhere as soon as shown by hand. Notice: Improperly tightened wheel nuts can cause the wheel to come loose and even come off. For center caps, place the cap on page 5-114 for the wheel nut torque specification. 9. Then use the correct wheel nuts. Be sure to use the wheel wrench... nuts and then tighten by turning the wheel wrench clockwise. For bolt-on the wheel. If you must also reinstall the either the center cap, or bolt-on hub cap, depending on page 5-114 for wheel nut torque specification. Be sure to an accident. This could lead to line up...

Owner's Manual
Page 530
...17 Control of a Vehicle ...4-5 Convenience Net ...2-58 Coolant Engine Temperature Gage ...3-43 Heater, Engine ...2-22 Surge Tank Pressure Cap ...5-27 Cooling System ...5-30 Cruise Control ...3-11 Cruise Control Light ...3-49 Cupholder(s) ...2-56 Customer Assistance Information Courtesy Transportation ...7-7 ... Door Locks ...2-9 Programmable Automatic Door Locks ...2-10 Rear Door Security Locks ...2-12 Driver Position, Safety Belt ...1-32 Driver Information Center (DIC) ...3-52 DIC Operation and Displays ...3-53 DIC Vehicle Customization ...3-67 DIC Warnings and Messages ...3-56 Driving At Night ...
...17 Control of a Vehicle ...4-5 Convenience Net ...2-58 Coolant Engine Temperature Gage ...3-43 Heater, Engine ...2-22 Surge Tank Pressure Cap ...5-27 Cooling System ...5-30 Cruise Control ...3-11 Cruise Control Light ...3-49 Cupholder(s) ...2-56 Customer Assistance Information Courtesy Transportation ...7-7 ... Door Locks ...2-9 Programmable Automatic Door Locks ...2-10 Rear Door Security Locks ...2-12 Driver Position, Safety Belt ...1-32 Driver Information Center (DIC) ...3-52 DIC Operation and Displays ...3-53 DIC Vehicle Customization ...3-67 DIC Warnings and Messages ...3-56 Driving At Night ...


