
Safety Advice Card 1st Printing
Page 1
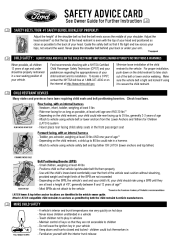
Adjust the head restraint* so that it to anchors as permitted by both the child restraint & vehicle manufacturers. Ford recommends checking with a NHTSA Certified Child Passenger Safety Technician (CPST) and your pediatrician regarding the appropriateness of your child could ride rear... Academy of Pediatrics recommendations LATCH lower & top tether anchor locations are at least a height of 4'9", generally between 8 and 12 years of your head. Teach children not to vehicle using a BPB until they are not exceeded - Maintain control of keys so that the belt rests across your child...
Adjust the head restraint* so that it to anchors as permitted by both the child restraint & vehicle manufacturers. Ford recommends checking with a NHTSA Certified Child Passenger Safety Technician (CPST) and your pediatrician regarding the appropriateness of your child could ride rear... Academy of Pediatrics recommendations LATCH lower & top tether anchor locations are at least a height of 4'9", generally between 8 and 12 years of your head. Teach children not to vehicle using a BPB until they are not exceeded - Maintain control of keys so that the belt rests across your child...
Warranty Guide 4th Printing
Page 15
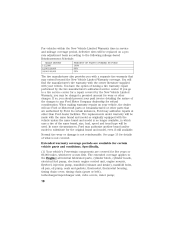
.... You will find the manufacturer's tire warranty with the owner literature supplied with a separate tire warranty that are authorized by Ford. The extended coverage applies to the following mileage-based Reimbursement Schedule: MILES DRIVEN 1-12,000 12,001-24,000 24,001...not reimbursable. When making warranty repairs on a pro rata adjustment basis according to the Engine: all internal lubricated parts, cylinder block, cylinder heads, electrical fuel pump, electronic engine control unit, engine mounts, flywheel, injection pump, manifold (exhaust and intake), manifold bolts, oil pan,...
.... You will find the manufacturer's tire warranty with the owner literature supplied with a separate tire warranty that are authorized by Ford. The extended coverage applies to the following mileage-based Reimbursement Schedule: MILES DRIVEN 1-12,000 12,001-24,000 24,001...not reimbursable. When making warranty repairs on a pro rata adjustment basis according to the Engine: all internal lubricated parts, cylinder block, cylinder heads, electrical fuel pump, electronic engine control unit, engine mounts, flywheel, injection pump, manifold (exhaust and intake), manifold bolts, oil pan,...
Warranty Guide 4th Printing
Page 16
... years or 60,000 miles, whichever occurs first. (3) Your vehicle's body sheet metal panels are covered during this extended coverage period: the engine, cylinder block, heads and all internal parts), hubs-automatic front locking (four-wheel drive), locking rings (four-wheel drive), seals and gaskets, universal and constant velocity joints; Front...
... years or 60,000 miles, whichever occurs first. (3) Your vehicle's body sheet metal panels are covered during this extended coverage period: the engine, cylinder block, heads and all internal parts), hubs-automatic front locking (four-wheel drive), locking rings (four-wheel drive), seals and gaskets, universal and constant velocity joints; Front...
Owner Guide 3rd Printing
Page 22
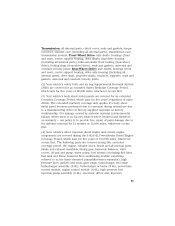
...RESET to Compass zone/calibration adjustment. A correct zone setting will prompt you to press RESET to calibrate or press INFO to display compass heading. Do the following to complete calibration. 4. Magnetic or metallic objects placed in a circle (less than 3 mph [5 km/h]) until the...calibration may take up to three circles to set the proper zone: Compass zone/calibration adjustment 1. Instrument Cluster COMPASS The compass heading is four degrees between adjacent zones and will become noticeable as the vehicle crosses multiple zones. This may be calibrated. Slowly ...
...RESET to Compass zone/calibration adjustment. A correct zone setting will prompt you to press RESET to calibrate or press INFO to display compass heading. Do the following to complete calibration. 4. Magnetic or metallic objects placed in a circle (less than 3 mph [5 km/h]) until the...calibration may take up to three circles to set the proper zone: Compass zone/calibration adjustment 1. Instrument Cluster COMPASS The compass heading is four degrees between adjacent zones and will become noticeable as the vehicle crosses multiple zones. This may be calibrated. Slowly ...

Owner Guide 3rd Printing
Page 88
... from the HomeLink button you to the accessory position for security purposes, refer to a rapidly blinking light. At the garage door opener receiver (motor-head unit) in the garage, locate the "learn" or "smart" button (usually near where the hanging antenna wire is also suggested that a new battery be erased...
... from the HomeLink button you to the accessory position for security purposes, refer to a rapidly blinking light. At the garage door opener receiver (motor-head unit) in the garage, locate the "learn" or "smart" button (usually near where the hanging antenna wire is also suggested that a new battery be erased...
Owner Guide 3rd Printing
Page 120
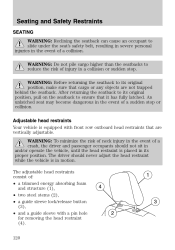
... and structure (1), • two steel stems (2), • a guide sleeve lock/release button (3), • and a guide sleeve with front row outboard head restraints that are not trapped behind the seatback. After returning the seatback to its original position, pull on the seatback to ensure that cargo or... any objects are vertically adjustable. The adjustable head restraints consist of a sudden stop . WARNING: Before returning the seatback to its original position, make sure that it has fully ...
... and structure (1), • two steel stems (2), • a guide sleeve lock/release button (3), • and a guide sleeve with front row outboard head restraints that are not trapped behind the seatback. After returning the seatback to its original position, pull on the seatback to ensure that cargo or... any objects are vertically adjustable. The adjustable head restraints consist of a sudden stop . WARNING: Before returning the seatback to its original position, make sure that it has fully ...
Owner Guide 3rd Printing
Page 121
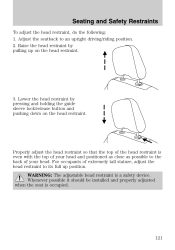
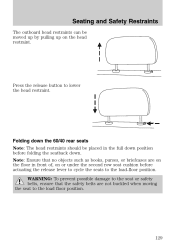
...lock/release button and pushing down on the head restraint. 3. WARNING: The adjustable head restraint is occupied. 121 Lower the head restraint by pulling up position. Adjust the seatback to its full up on the head restraint. For occupants of your head and positioned as close as possible to ...the back of extremely tall stature, adjust the head restraint to an upright driving/riding position. 2. Whenever possible it should ...
...lock/release button and pushing down on the head restraint. 3. WARNING: The adjustable head restraint is occupied. 121 Lower the head restraint by pulling up position. Adjust the seatback to its full up on the head restraint. For occupants of your head and positioned as close as possible to ...the back of extremely tall stature, adjust the head restraint to an upright driving/riding position. 2. Whenever possible it should ...
Owner Guide 3rd Printing
Page 122
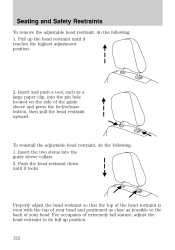
...possible to its full up the head restraint until it reaches the highest adjustment position. 2. Insert the two stems into the pin hole located on the side of extremely tall stature, adjust the head restraint to the back of your head. Push the head restraint down until it locks. Properly... adjust the head restraint so that the top of the head restraint is even with the top of your head and positioned as close as a large paper...
...possible to its full up the head restraint until it reaches the highest adjustment position. 2. Insert the two stems into the pin hole located on the side of extremely tall stature, adjust the head restraint to the back of your head. Push the head restraint down until it locks. Properly... adjust the head restraint so that the top of the head restraint is even with the top of your head and positioned as close as a large paper...
Owner Guide 3rd Printing
Page 123
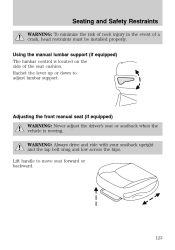
.... Adjusting the front manual seat (if equipped) WARNING: Never adjust the driver's seat or seatback when the vehicle is located on the side of a crash, head restraints must be installed properly. Seating and Safety Restraints WARNING: To minimize the risk of neck injury in the event of the seat cushion. Lift...
.... Adjusting the front manual seat (if equipped) WARNING: Never adjust the driver's seat or seatback when the vehicle is located on the side of a crash, head restraints must be installed properly. Seating and Safety Restraints WARNING: To minimize the risk of neck injury in the event of the seat cushion. Lift...

Owner Guide 3rd Printing
Page 124
... on the recliner handle located on the outboard side of the seat to make room for a long load. Folding down . 3. Push the head restraint release button and move the head restraint fully down the front passenger seatback (if equipped) The front passenger seatback can be folded to a horizontal position to fold the...
... on the recliner handle located on the outboard side of the seat to make room for a long load. Folding down . 3. Push the head restraint release button and move the head restraint fully down the front passenger seatback (if equipped) The front passenger seatback can be folded to a horizontal position to fold the...

Owner Guide 3rd Printing
Page 128
... on the seat. The heated seats will illuminate when activated. Allow the seat to dry thoroughly. REAR SEATS Head restraints Lift the head restraint so that insulates against heat, such as possible behind your head. 128 To operate the heated seats: • Press the control located on position. Seating and Safety Restraints Heated...
... on the seat. The heated seats will illuminate when activated. Allow the seat to dry thoroughly. REAR SEATS Head restraints Lift the head restraint so that insulates against heat, such as possible behind your head. 128 To operate the heated seats: • Press the control located on position. Seating and Safety Restraints Heated...
Owner Guide 3rd Printing
Page 129
..., or briefcases are not buckled when moving the seat to the load floor position. 129 Seating and Safety Restraints The outboard head restraints can be placed in front of, on the head restraint. Note: Ensure that the safety belts are on the floor in the full down position before folding the seatback... down the 60/40 rear seats Note: The head restraints should be moved up by pulling up on or under the second row seat cushion before actuating the release lever to cycle the seats...
..., or briefcases are not buckled when moving the seat to the load floor position. 129 Seating and Safety Restraints The outboard head restraints can be placed in front of, on the head restraint. Note: Ensure that the safety belts are on the floor in the full down position before folding the seatback... down the 60/40 rear seats Note: The head restraints should be moved up by pulling up on or under the second row seat cushion before actuating the release lever to cycle the seats...
Owner Guide 3rd Printing
Page 138
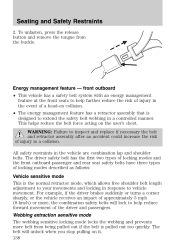
... driver safety belt has the first two types of locking modes and the front outboard passenger and rear seat safety belts have three types of a head-on collision. • The energy management feature has a retractor assembly that is designed to help reduce forward movement of injury in a controlled manner. Seating and...
... driver safety belt has the first two types of locking modes and the front outboard passenger and rear seat safety belts have three types of a head-on collision. • The energy management feature has a retractor assembly that is designed to help reduce forward movement of injury in a controlled manner. Seating and...
Owner Guide 3rd Printing
Page 141
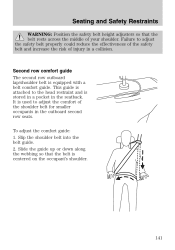
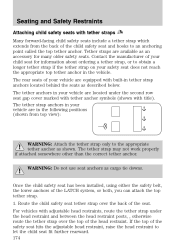
This guide is attached to the head restraint and is stored in a pocket in the outboard second row seats. To adjust the comfort guide: 1. Slip the shoulder belt into the belt guide. 2. ...
This guide is attached to the head restraint and is stored in a pocket in the outboard second row seats. To adjust the comfort guide: 1. Slip the shoulder belt into the belt guide. 2. ...
Owner Guide 3rd Printing
Page 156
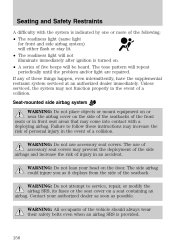
... system may prevent the deployment of the side airbags and increase the risk of injury in an accident. The use accessory seat covers. Contact your head on the side of the seatbacks of the front seats or in front seat areas that may increase the risk of personal injury in the...
... system may prevent the deployment of the side airbags and increase the risk of injury in an accident. The use accessory seat covers. Contact your head on the side of the seatbacks of the front seats or in front seat areas that may increase the risk of personal injury in the...
Owner Guide 3rd Printing
Page 159
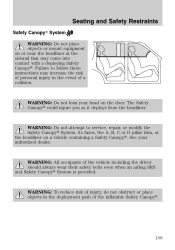
... on a vehicle containing a Safety Canopy. WARNING: Do not attempt to follow these instructions may come into contact with a deploying Safety Canopy. See your head on the door. WARNING: To reduce risk of injury, do not obstruct or place objects in the event of the vehicle including the driver should...
... on a vehicle containing a Safety Canopy. WARNING: Do not attempt to follow these instructions may come into contact with a deploying Safety Canopy. See your head on the door. WARNING: To reduce risk of injury, do not obstruct or place objects in the event of the vehicle including the driver should...
Owner Guide 3rd Printing
Page 174
... vehicle are located under the second row seat gap cover marked with tether anchor symbols (shown with adjustable head restraints, route the tether strap under the head restraint and between the head restraint posts, , otherwise route the tether strap over the back of your safety seat does not reach ...Once the child safety seat has been installed, using either the safety belt, the lower anchors of the safety seat hits the adjustable head restraint, raise the head restraint to obtain a longer tether strap if the tether strap on your vehicle are available as shown. If the top of the...
... vehicle are located under the second row seat gap cover marked with tether anchor symbols (shown with adjustable head restraints, route the tether strap under the head restraint and between the head restraint posts, , otherwise route the tether strap over the back of your safety seat does not reach ...Once the child safety seat has been installed, using either the safety belt, the lower anchors of the safety seat hits the adjustable head restraint, raise the head restraint to obtain a longer tether strap if the tether strap on your vehicle are available as shown. If the top of the...
Owner Guide 3rd Printing
Page 177
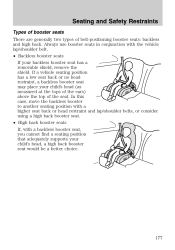
...booster seat has a removable shield, remove the shield. In this case, move the backless booster to another seating position with a higher seat back or head restraint and lap/shoulder belts, or consider using a high back booster seat. • High back booster seats If, with the vehicle lap/shoulder belt.... • Backless booster seats If your child's head (as measured at the tops of the ears) above the top of belt-positioning booster seats: backless and high back. Seating and Safety Restraints ...
...booster seat has a removable shield, remove the shield. In this case, move the backless booster to another seating position with a higher seat back or head restraint and lap/shoulder belts, or consider using a high back booster seat. • High back booster seats If, with the vehicle lap/shoulder belt.... • Backless booster seats If your child's head (as measured at the tops of the ears) above the top of belt-positioning booster seats: backless and high back. Seating and Safety Restraints ...
Owner Guide 3rd Printing
Page 178
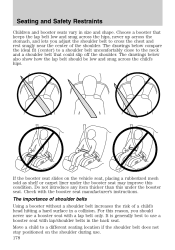
... under the booster seat may improve this reason, you adjust the shoulder belt to cross the chest and rest snugly near the center of a child's head hitting a hard surface in size and shape. Choose a booster that could slip off the shoulder. The importance of shoulder belts Using a booster without a shoulder belt...
... under the booster seat may improve this reason, you adjust the shoulder belt to cross the chest and rest snugly near the center of a child's head hitting a hard surface in size and shape. Choose a booster that could slip off the shoulder. The importance of shoulder belts Using a booster without a shoulder belt...
Owner Guide 3rd Printing
Page 323
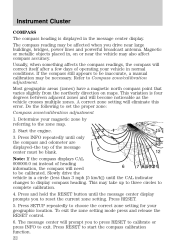
... ...293 Fuses ...243-244 G Garage door opener ...86 Gas cap (see Fuel cap) ...296 Gas mileage (see Fuel economy) ...299 Gauges ...17 H Hazard flashers ...242 Head restraints ...129 Headlamps ...63 aiming ...65 autolamp system ...63 bulb specifications ...69 daytime running lights ...64 flash to pass ...64 high beam ...64 replacing bulbs...
... ...293 Fuses ...243-244 G Garage door opener ...86 Gas cap (see Fuel cap) ...296 Gas mileage (see Fuel economy) ...299 Gauges ...17 H Hazard flashers ...242 Head restraints ...129 Headlamps ...63 aiming ...65 autolamp system ...63 bulb specifications ...69 daytime running lights ...64 flash to pass ...64 high beam ...64 replacing bulbs...