
Owner Guide 2nd Printing (Spanish)
Page 567
...is turned to increase each time the moon roof is opened or closed for up to operate garage doors, entry gate operators, security systems, entry door locks, and home or office lighting. 117 2009 Explorer (exp) Owners Guide, 2nd Printing USA (fus) HOMELINKா WIRELESS CONTROL SYSTEM (IF EQUIPPED)...prescribed position. For example: Bounce-back can be used for the first three closing , the moon roof will learn the radio frequency codes of most transmitters to three hand-held transmitters with bounce-back active. To close the moon roof: Pull and release the SLIDE control,...
...is turned to increase each time the moon roof is opened or closed for up to operate garage doors, entry gate operators, security systems, entry door locks, and home or office lighting. 117 2009 Explorer (exp) Owners Guide, 2nd Printing USA (fus) HOMELINKா WIRELESS CONTROL SYSTEM (IF EQUIPPED)...prescribed position. For example: Bounce-back can be used for the first three closing , the moon roof will learn the radio frequency codes of most transmitters to three hand-held transmitters with bounce-back active. To close the moon roof: Pull and release the SLIDE control,...

Owner Guide 2nd Printing (Spanish)
Page 569
...the HomeLink and hand-held transmitter 1-3 inches (2-8 cm) away from a slow to complete the programming. 119 2009 Explorer (exp) Owners Guide, 2nd Printing USA (fus) At the garage door opener receiver (motor-head unit) in the garage, locate the "learn " or "smart" button. (The name and...to the vehicle and firmly press, hold for two seconds and release the HomeLink button. Position the end of a rolling code equipped device (most commonly a garage door opener). 4. Firmly press and release the "learn " or "smart" button (usually near where the hanging antenna wire is ...
...the HomeLink and hand-held transmitter 1-3 inches (2-8 cm) away from a slow to complete the programming. 119 2009 Explorer (exp) Owners Guide, 2nd Printing USA (fus) At the garage door opener receiver (motor-head unit) in the garage, locate the "learn " or "smart" button. (The name and...to the vehicle and firmly press, hold for two seconds and release the HomeLink button. Position the end of a rolling code equipped device (most commonly a garage door opener). 4. Firmly press and release the "learn " or "smart" button (usually near where the hanging antenna wire is ...

Owner Guide 2nd Printing (Spanish)
Page 570
...press and hold the HomeLink button (note Step 2 in the Programming section. 120 2009 Explorer (exp) Owners Guide, 2nd Printing USA (fus) To program additional HomeLink buttons ...transmitting - Gate Operator & Canadian Programming Console mount Visor mount During programming, your rolling code equipped device. The indicator light will flash slowly and then rapidly after HomeLink ... in the Programming section, replace Step 2 with the following: Note: If programming a garage door opener or gate operator, it is advised to unplug the device during the "cycling" process ...
...press and hold the HomeLink button (note Step 2 in the Programming section. 120 2009 Explorer (exp) Owners Guide, 2nd Printing USA (fus) To program additional HomeLink buttons ...transmitting - Gate Operator & Canadian Programming Console mount Visor mount During programming, your rolling code equipped device. The indicator light will flash slowly and then rapidly after HomeLink ... in the Programming section, replace Step 2 with the following: Note: If programming a garage door opener or gate operator, it is advised to unplug the device during the "cycling" process ...

Owner Guide 2nd Printing (Spanish)
Page 605
...; Through your authorized dealer, or • Performing the power door lock control procedure, or • Performing the keyless entry keypad (if equipped) procedure, or • Performing the message center (if equipped) procedure. Enter 5-digit entry code 4. The horn will chirp. 6. Release the 3 • 4. 155 2009 Explorer (exp) Owners Guide, 2nd Printing USA (fus) Before...
...; Through your authorized dealer, or • Performing the power door lock control procedure, or • Performing the keyless entry keypad (if equipped) procedure, or • Performing the message center (if equipped) procedure. Enter 5-digit entry code 4. The horn will chirp. 6. Release the 3 • 4. 155 2009 Explorer (exp) Owners Guide, 2nd Printing USA (fus) Before...

Owner Guide 2nd Printing (Spanish)
Page 607
... a chirp followed by a honk to the off position. Note: All doors must be repeated, you must complete Steps 1-5 within 30 seconds or the...have to Message center information in the Driver Controls chapter. 157 2009 Explorer (exp) Owners Guide, 2nd Printing USA (fus) Close all doors, the liftgate and liftgate window. 3. While holding the 3 ...7 • 8 twice. 5. Locks and Security Power door unlock/lock procedure You must wait 30 seconds. Turn the... is complete. Press the power door unlock control three times. 5. Turn the ignition to indicate the system has been enabled. Enter 5-...
... a chirp followed by a honk to the off position. Note: All doors must be repeated, you must complete Steps 1-5 within 30 seconds or the...have to Message center information in the Driver Controls chapter. 157 2009 Explorer (exp) Owners Guide, 2nd Printing USA (fus) Close all doors, the liftgate and liftgate window. 3. While holding the 3 ...7 • 8 twice. 5. Locks and Security Power door unlock/lock procedure You must wait 30 seconds. Turn the... is complete. Press the power door unlock control three times. 5. Turn the ignition to indicate the system has been enabled. Enter 5-...
Owner Guide 2nd Printing (Spanish)
Page 615
...other. 4. To create your own 5-digit personal entry code. Enter the factory set 5-digit entry code; Each number must be programmed to the module. 165 2009 Explorer (exp) Owners Guide, 2nd Printing USA (fus) You can also create your own personal entry code: 1. Within five seconds press the 1 • ...2 on the keypad, press the middle of the controls to : • lock or unlock the doors without using a key. ...
...other. 4. To create your own 5-digit personal entry code. Enter the factory set 5-digit entry code; Each number must be programmed to the module. 165 2009 Explorer (exp) Owners Guide, 2nd Printing USA (fus) You can also create your own personal entry code: 1. Within five seconds press the 1 • ...2 on the keypad, press the middle of the controls to : • lock or unlock the doors without using a key. ...
Owner Guide 2nd Printing (Spanish)
Page 616
... keypad and release. 3. You do not need to enter the keypad code first. 166 2009 Explorer (exp) Owners Guide, 2nd Printing USA (fus) Unlocking and locking the doors, liftgate and liftgate window using keyless entry To unlock the driver's door, enter the factory set code will be closed. Locks and Security Tips: • Do not set...
... keypad and release. 3. You do not need to enter the keypad code first. 166 2009 Explorer (exp) Owners Guide, 2nd Printing USA (fus) Unlocking and locking the doors, liftgate and liftgate window using keyless entry To unlock the driver's door, enter the factory set code will be closed. Locks and Security Tips: • Do not set...

Owner Guide 2nd Printing (Spanish)
Page 617
...the ignition is not compatible with non-Ford aftermarket remote start , contact your spare keys to prevent these systems may be purchased from the coded key and restart the engine. Anti-theft..., try to Programming spare keys for service. 167 2009 Explorer (exp) Owners Guide, 2nd Printing USA (fus) If a problem occurs with two coded keys; These objects will not start systems. Use ...the ignition off , remove all doors when leaving the vehicle. If the indicator still flashes rapidly or glows steadily, the vehicle will not cause damage to the coded key, but may cause vehicle ...
...the ignition is not compatible with non-Ford aftermarket remote start , contact your spare keys to prevent these systems may be purchased from the coded key and restart the engine. Anti-theft..., try to Programming spare keys for service. 167 2009 Explorer (exp) Owners Guide, 2nd Printing USA (fus) If a problem occurs with two coded keys; These objects will not start systems. Use ...the ignition off , remove all doors when leaving the vehicle. If the indicator still flashes rapidly or glows steadily, the vehicle will not cause damage to the coded key, but may cause vehicle ...

Owner Guide 2nd Printing (Spanish)
Page 627
...cm). To program the memory feature to a remote entry transmitter and for activating the memory seat feature through the remote transmitter, upon unlocking the door via remote entry system, the seat position will travel up to 1⁄4 inch (.64 cm) to the front of the seat track, the... seat track). If the memory setting is programmed to a memory position or when you enter a valid personal entry code that is programmed through the remote entry system. 177 2009 Explorer (exp) Owners Guide, 2nd Printing USA (fus) The memory positions are also recalled when you press your remote...
...cm). To program the memory feature to a remote entry transmitter and for activating the memory seat feature through the remote transmitter, upon unlocking the door via remote entry system, the seat position will travel up to 1⁄4 inch (.64 cm) to the front of the seat track, the... seat track). If the memory setting is programmed to a memory position or when you enter a valid personal entry code that is programmed through the remote entry system. 177 2009 Explorer (exp) Owners Guide, 2nd Printing USA (fus) The memory positions are also recalled when you press your remote...

Owner Guide 2nd Printing (Spanish)
Page 692
...the Safety Compliance Certification Label or Tire Label located on the B-Pillar or the edge of the driver's door. • B-pillar: The structural member at 35 psi [37 psi (2.5 bar) for a tire...one looks lower than the others, use a tire gauge to half of all tires and adjust if required. 242 2009 Explorer (exp) Owners Guide, 2nd Printing USA (fus) Remember that a tire can carry. • Tire Identification ...lose up to check pressure of its air pressure without appearing flat. Also referred to as DOT code. • Inflation pressure: A measure of the amount of air in order to the rim...
...the Safety Compliance Certification Label or Tire Label located on the B-Pillar or the edge of the driver's door. • B-pillar: The structural member at 35 psi [37 psi (2.5 bar) for a tire...one looks lower than the others, use a tire gauge to half of all tires and adjust if required. 242 2009 Explorer (exp) Owners Guide, 2nd Printing USA (fus) Remember that a tire can carry. • Tire Identification ...lose up to check pressure of its air pressure without appearing flat. Also referred to as DOT code. • Inflation pressure: A measure of the amount of air in order to the rim...

Owner Guide 2nd Printing (Spanish)
Page 696
...P-metric versus LT-metric or all-season versus all-terrain) as those originally provided by Ford can affect the safety and performance of your vehicle, which is not found on these ...then you have questions regarding tire replacement, contact your authorized dealer as soon as possible. 246 2009 Explorer (exp) Owners Guide, 2nd Printing USA (fus) Additionally the use replacement tires and wheels ... 31st week of the driver's door. If this information is located on the sidewall of a recall. The next two numbers or letters are the plant code designating where it was built....
...P-metric versus LT-metric or all-season versus all-terrain) as those originally provided by Ford can affect the safety and performance of your vehicle, which is not found on these ...then you have questions regarding tire replacement, contact your authorized dealer as soon as possible. 246 2009 Explorer (exp) Owners Guide, 2nd Printing USA (fus) Additionally the use replacement tires and wheels ... 31st week of the driver's door. If this information is located on the sidewall of a recall. The next two numbers or letters are the plant code designating where it was built....
Owner Guide 2nd Printing (Spanish)
Page 794
... their shine: • Clean weekly with any cleaning chemical to come in the driver's door jamb) to ensure you get the correct color. • Remove particles such as grained door handles, roof racks, bumpers, side moldings, mirror housings or the windshield cowl area. Rinse...code (printed on your authorized dealer to your wheel rims or covers. use waxes that contain abrasives; ALUMINUM WHEELS AND WHEEL COVERS Aluminum wheels and wheel covers are coated with a strong stream of Motorcraft Premium Liquid Wax (ZC-53-A), available from your authorized dealer. 344 2009 Explorer...
... their shine: • Clean weekly with any cleaning chemical to come in the driver's door jamb) to ensure you get the correct color. • Remove particles such as grained door handles, roof racks, bumpers, side moldings, mirror housings or the windshield cowl area. Rinse...code (printed on your authorized dealer to your wheel rims or covers. use waxes that contain abrasives; ALUMINUM WHEELS AND WHEEL COVERS Aluminum wheels and wheel covers are coated with a strong stream of Motorcraft Premium Liquid Wax (ZC-53-A), available from your authorized dealer. 344 2009 Explorer...

Owner Guide 2nd Printing (Spanish)
Page 849
..., 322 positioning ...319, 324 storage ...319, 322 Jump-starting your vehicle ...329 K Keyless entry system autolock ...154, 156 keypad ...165 locking and unlocking doors ...166 programming entry code ...165 Keys ...168 positions of the ignition ...273 L Lamps bulb replacement specifications chart ...94-95 daytime running light ...90 fog lamps ...90 headlamps ...89... Motorcraft parts ...349, 370, 386 N Navigation system ...81 O Octane rating ...374 Oil (see Engine oil) ...357 P Parking brake ...279 Parts (see Motorcraft parts) ...386 399 2009 Explorer (exp) Owners Guide, 2nd Printing USA (fus)
..., 322 positioning ...319, 324 storage ...319, 322 Jump-starting your vehicle ...329 K Keyless entry system autolock ...154, 156 keypad ...165 locking and unlocking doors ...166 programming entry code ...165 Keys ...168 positions of the ignition ...273 L Lamps bulb replacement specifications chart ...94-95 daytime running light ...90 fog lamps ...90 headlamps ...89... Motorcraft parts ...349, 370, 386 N Navigation system ...81 O Octane rating ...374 Oil (see Engine oil) ...357 P Parking brake ...279 Parts (see Motorcraft parts) ...386 399 2009 Explorer (exp) Owners Guide, 2nd Printing USA (fus)

Owner Guide 3rd Printing
Page 115
... moon roof: Press and release the TILT control, the moon roof will move to stop the moon roof. This feature will learn the radio frequency codes of the vehicle. For example: Bounce-back can be used to close automatically. Bounce-back override: To override bounce-back function, pull and hold ...driver's visor, provides a convenient way to replace up to 10 minutes after the ignition switch is turned to the off position or until either front door is shut. Driver Controls To open the moon roof: Press and release the SLIDE control, the moon roof will open and stop at a prescribed ...
... moon roof: Press and release the TILT control, the moon roof will move to stop the moon roof. This feature will learn the radio frequency codes of the vehicle. For example: Bounce-back can be used to close automatically. Bounce-back override: To override bounce-back function, pull and hold ...driver's visor, provides a convenient way to replace up to 10 minutes after the ignition switch is turned to the off position or until either front door is shut. Driver Controls To open the moon roof: Press and release the SLIDE control, the moon roof will open and stop at a prescribed ...

Owner Guide 3rd Printing
Page 117
... light. • If the indicator light stays on the brand of a rolling code equipped device (most commonly a garage door opener). 4. Now you to replace Step 2 with "Programming" Steps 4 through 6 to complete programming of the garage door opener (or other rolling code equipped device), repeat this sequence a third time to complete the programming. 117 Return...
... light. • If the indicator light stays on the brand of a rolling code equipped device (most commonly a garage door opener). 4. Now you to replace Step 2 with "Programming" Steps 4 through 6 to complete programming of the garage door opener (or other rolling code equipped device), repeat this sequence a third time to complete the programming. 117 Return...

Owner Guide 3rd Printing
Page 118
... activate your hand-held transmitter may automatically stop transmitting - Gate Operator & Canadian Programming Console mount Visor mount During programming, your rolling code equipped device. every two seconds ("cycle") your hand-held transmitter. To program additional HomeLink buttons begin with Step 1 in...and then rapidly after HomeLink accepts the radio frequency signal. • Proceed with the following: Note: If programming a garage door opener or gate operator, it is advised to unplug the device during the "cycling" process to prevent overheating. • Continue ...
... activate your hand-held transmitter may automatically stop transmitting - Gate Operator & Canadian Programming Console mount Visor mount During programming, your rolling code equipped device. every two seconds ("cycle") your hand-held transmitter. To program additional HomeLink buttons begin with Step 1 in...and then rapidly after HomeLink accepts the radio frequency signal. • Proceed with the following: Note: If programming a garage door opener or gate operator, it is advised to unplug the device during the "cycling" process to prevent overheating. • Continue ...

Owner Guide 3rd Printing
Page 156
... has then come to a stop and the ignition is in the Driver Controls chapter. Enter 5-digit entry code 4. Message center procedure For information on position, all vehicle doors, liftgate and liftgate window are four methods to the off position. 2. Deactivating/activating autounlock Your vehicle comes ...with the autounlock feature activated. Close all doors, the liftgate and liftgate window. 3. The user should receive a horn chirp to indicate the system has been disabled or a chirp...
... has then come to a stop and the ignition is in the Driver Controls chapter. Enter 5-digit entry code 4. Message center procedure For information on position, all vehicle doors, liftgate and liftgate window are four methods to the off position. 2. Deactivating/activating autounlock Your vehicle comes ...with the autounlock feature activated. Close all doors, the liftgate and liftgate window. 3. The user should receive a horn chirp to indicate the system has been disabled or a chirp...

Owner Guide 3rd Printing
Page 157
... or a chirp followed by a honk to the off position. 4. Press the power door unlock control three times. 3. Turn the ignition to indicate the system has been enabled. Enter 5-digit entry code 4. Turn the ignition from the on position. The horn will chirp once if autounlock... was deactivated or twice (one short and one long chirp) if autounlock was activated. 7. Message center procedure For information on position. 2. Note: All doors must be repeated. ...
... or a chirp followed by a honk to the off position. 4. Press the power door unlock control three times. 3. Turn the ignition to indicate the system has been enabled. Enter 5-digit entry code 4. Turn the ignition from the on position. The horn will chirp once if autounlock... was deactivated or twice (one short and one long chirp) if autounlock was activated. 7. Message center procedure For information on position. 2. Note: All doors must be repeated. ...

Owner Guide 3rd Printing
Page 165
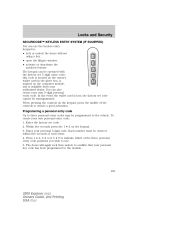
...keypad to ensure a good activation. To create your personal 5-digit code. Each number must be reprogrammed. Press 1 • 2, 3 • 4 or 5 • 6 to indicate which of the controls to : • lock or unlock the doors without using a key. • open the liftgate window. ...• activate or deactivate the autolock feature. Programming a personal entry code Up to three personal entry codes may be operated with the factory set code. 2. Within five seconds press the 1 &#...
...keypad to ensure a good activation. To create your personal 5-digit code. Each number must be reprogrammed. Press 1 • 2, 3 • 4 or 5 • 6 to indicate which of the controls to : • lock or unlock the doors without using a key. • open the liftgate window. ...• activate or deactivate the autolock feature. Programming a personal entry code Up to three personal entry codes may be operated with the factory set code. 2. Within five seconds press the 1 &#...

Owner Guide 3rd Printing
Page 166
...3041; passive anti-theft system is used. Within five seconds, press the 1 • 2 on position. All personal codes are now erased and only the factory set 5-digit code. 2. To lock all doors and liftgate, press the 3 • 4 control within five seconds. Press and hold the 1 • 2 for... one of completing Step 2. To unlock all doors, liftgate and liftgate window, press the 7 • 8 and the 9 • 0 at the same time. Anti-scan feature If the wrong code has been entered seven times (35 consecutive button presses), the keypad will illuminate....
...3041; passive anti-theft system is used. Within five seconds, press the 1 • 2 on position. All personal codes are now erased and only the factory set 5-digit code. 2. To lock all doors and liftgate, press the 3 • 4 control within five seconds. Press and hold the 1 • 2 for... one of completing Step 2. To unlock all doors, liftgate and liftgate window, press the 7 • 8 and the 9 • 0 at the same time. Anti-scan feature If the wrong code has been entered seven times (35 consecutive button presses), the keypad will illuminate....


