
Owner's Manual
Page 163
.... Preparing your vehicle When the battery is disconnected or a new battery is considered normal and will fully update transmission operation to the hood of the disabled vehicle making sure the two vehicles do not have push-start your vehicle. 2. Set the parking brake on in...to push start capability. You could damage the vehicle's electrical system. 3. As a result of the engine cooling fan and other accessories off. 163 2001 U137 (hdw) Owners Guide (owners) USA English (fus) This operation is installed, the transmission must relearn its optimum shift feel. 1. An ...
.... Preparing your vehicle When the battery is disconnected or a new battery is considered normal and will fully update transmission operation to the hood of the disabled vehicle making sure the two vehicles do not have push-start your vehicle. 2. Set the parking brake on in...to push start capability. You could damage the vehicle's electrical system. 3. As a result of the engine cooling fan and other accessories off. 163 2001 U137 (hdw) Owners Guide (owners) USA English (fus) This operation is installed, the transmission must relearn its optimum shift feel. 1. An ...

Owner's Manual
Page 170
Go to release the auxiliary latch. 3. Lift the hood until the lift cylinders hold it while the engine is running. HOOD 2. Maintenance and care Do not start your engine with the air cleaner removed and do not remove it open. 170 OPENING THE HOOD 1. Slide the handle to the front of the vehicle and release the auxiliary latch located under the bottom left corner of the hood. Inside the vehicle, pull the hood release handle located under the right center of the instrument panel.
Go to release the auxiliary latch. 3. Lift the hood until the lift cylinders hold it while the engine is running. HOOD 2. Maintenance and care Do not start your engine with the air cleaner removed and do not remove it open. 170 OPENING THE HOOD 1. Slide the handle to the front of the vehicle and release the auxiliary latch located under the bottom left corner of the hood. Inside the vehicle, pull the hood release handle located under the right center of the instrument panel.

Owner's Manual
Page 172
... the MIN mark, add enough oil to drain into the oil pan. 3. DO NOT ADD OIL. • If the oil level is acceptable. Open the hood. Protect yourself from the engine by a service technician. 7. Put the indicator back in P (Park). 4. Turn the engine off and wait a few minutes for the oil...
... the MIN mark, add enough oil to drain into the oil pan. 3. DO NOT ADD OIL. • If the oil level is acceptable. Open the hood. Protect yourself from the engine by a service technician. 7. Put the indicator back in P (Park). 4. Turn the engine off and wait a few minutes for the oil...

Owner's Manual
Page 207
... by turning it clockwise until the plastic base contacts the rear of the new bulb into the socket by turning it "snaps." 207 Open the hood. 3. Grasp the bulb only by pulling rearward. 4. Install bulb retaining ring over the plastic base and lock the ring into the headlamp assembly...
... by turning it clockwise until the plastic base contacts the rear of the new bulb into the socket by turning it "snaps." 207 Open the hood. 3. Grasp the bulb only by pulling rearward. 4. Install bulb retaining ring over the plastic base and lock the ring into the headlamp assembly...

Owner's Manual
Page 208
Install the bulb socket in the new bulb. 6. Align the lamp assembly on parking lamp/turn signal assembly from lamp assembly. 5. Carefully pull bulb straight out of the socket and push in lamp assembly by turning clockwise. 7. Install two screws on the vehicle. 8. Remove the two screws and carefully disengage parking lamp/turn signal assembly. 208 Maintenance and care Replacing front parking/turn and remove from the vehicle. 4. Open the hood. 3. Rotate bulb socket counterclockwise about 1⁄4 turn signal bulbs 1. Make sure headlamp switch is in OFF position. 2.
Install the bulb socket in the new bulb. 6. Align the lamp assembly on parking lamp/turn signal assembly from lamp assembly. 5. Carefully pull bulb straight out of the socket and push in lamp assembly by turning clockwise. 7. Install two screws on the vehicle. 8. Remove the two screws and carefully disengage parking lamp/turn signal assembly. 208 Maintenance and care Replacing front parking/turn and remove from the vehicle. 4. Open the hood. 3. Rotate bulb socket counterclockwise about 1⁄4 turn signal bulbs 1. Make sure headlamp switch is in OFF position. 2.

Owner's Manual
Page 213
To avoid spots, avoid washing when the hood is still warm, immediately after or during exposure to dry them. Wax when water stops beading on a regular basis will reduce minor scratches and paint ...
To avoid spots, avoid washing when the hood is still warm, immediately after or during exposure to dry them. Wax when water stops beading on a regular basis will reduce minor scratches and paint ...
Owner's Manual
Page 236
... Carpeted cargo mat Door edge guards Truck covers Cargo liners, interior Carpet floor mats Cleaners, waxes and polishes Flat splash guards Front end covers (full) Hood deflectors Locking gas cap Lubricants and oils Molded splash guards Molded vinyl floor mats Rear air deflectors Side window air deflectors Stainless grill insert Step...
... Carpeted cargo mat Door edge guards Truck covers Cargo liners, interior Carpet floor mats Cleaners, waxes and polishes Flat splash guards Front end covers (full) Hood deflectors Locking gas cap Lubricants and oils Molded splash guards Molded vinyl floor mats Rear air deflectors Side window air deflectors Stainless grill insert Step...
Owner's Manual
Page 243
... pass ...18 high beam ...11, 18 replacing bulbs ...207 turning on and off ...17 warning chime ...13 Heating ...23 heating and air conditioning system ...23 Hood ...170 I Ignition ...55, 223 Infant seats (see Safety seats) ...114 Inspection/ maintenance (I/M) testing ...206 Instrument panel cleaning ...216 cluster ...8, 216 lighting up panel and interior...
... pass ...18 high beam ...11, 18 replacing bulbs ...207 turning on and off ...17 warning chime ...13 Heating ...23 heating and air conditioning system ...23 Hood ...170 I Ignition ...55, 223 Infant seats (see Safety seats) ...114 Inspection/ maintenance (I/M) testing ...206 Instrument panel cleaning ...216 cluster ...8, 216 lighting up panel and interior...
Owner's Manual
Page 247
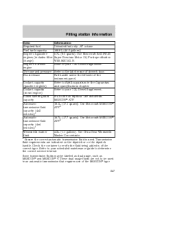
Use Motorcraft SAE 5W-20 Super Premium Motor Oil, Ford specification WSS-M2C153-H. Use Motorcraft MERCON ATF.2 16.7L (17.7 quarts). Check the container to be labeled as dual usage, such as MERCON and MERCON ... panel. Filling station information Item Required fuel Fuel tank capacity Engine oil-gasoline engines (includes filter change) Engine oil -diesel engine Tire size and pressure Hood release Coolant capacity (gasoline engines) Coolant capacity (diesel engine) Power steering fluid capacity Automatic transmission fluid capacity (4x2 vehicles)1 Automatic transmission fluid capacity (4x4 ...
Use Motorcraft SAE 5W-20 Super Premium Motor Oil, Ford specification WSS-M2C153-H. Use Motorcraft MERCON ATF.2 16.7L (17.7 quarts). Check the container to be labeled as dual usage, such as MERCON and MERCON ... panel. Filling station information Item Required fuel Fuel tank capacity Engine oil-gasoline engines (includes filter change) Engine oil -diesel engine Tire size and pressure Hood release Coolant capacity (gasoline engines) Coolant capacity (diesel engine) Power steering fluid capacity Automatic transmission fluid capacity (4x2 vehicles)1 Automatic transmission fluid capacity (4x4 ...

7.3L Diesel Supplement 2nd Printing
Page 21
... dipstick and use highest level (reading) for fuel. Do not overfill. Read oil level on a level surface, then turn off the engine and open the hood. 3. To check the engine oil level consistently and accurately, the following procedure is normal to the oil pan. 4. Park the vehicle on both sides of...
... dipstick and use highest level (reading) for fuel. Do not overfill. Read oil level on a level surface, then turn off the engine and open the hood. 3. To check the engine oil level consistently and accurately, the following procedure is normal to the oil pan. 4. Park the vehicle on both sides of...

7.3L Diesel Supplement 2nd Printing
Page 26
Open the hood. Place an appropriate container under the filter drain under the vehicle. 3. On F-Series and Excursion models, open fuel filter drain valve by turning counterclockwise until clean fuel is observed. Close filter drain valve by turning clockwise. If necessary, remove the engine appearance cover. Allow to "Engine Compartment" in the Service points chapter. 4. DR AIN SE CLO 26 Locate the fuel filter drain valve. General maintenance information 2. Refer to drain for approximately 25 seconds or until firmly seated.
Open the hood. Place an appropriate container under the filter drain under the vehicle. 3. On F-Series and Excursion models, open fuel filter drain valve by turning counterclockwise until clean fuel is observed. Close filter drain valve by turning clockwise. If necessary, remove the engine appearance cover. Allow to "Engine Compartment" in the Service points chapter. 4. DR AIN SE CLO 26 Locate the fuel filter drain valve. General maintenance information 2. Refer to drain for approximately 25 seconds or until firmly seated.

7.3L Diesel Supplement 2nd Printing
Page 27
Close the hood and remove the container from under the vehicle. 7. Allow to drain for approximately 25 seconds or until clean fuel is closed. Verify that the fuel ...
Close the hood and remove the container from under the vehicle. 7. Allow to drain for approximately 25 seconds or until clean fuel is closed. Verify that the fuel ...

7.3L Diesel Supplement 2nd Printing
Page 31
... concerning prohibited tampering acts and maintenance, and the noise warranty found in use, or (2) the use of the vehicle after such device or element of hood blanket, fender apron absorbers, fender apron barriers, underbody noise shields or acoustically absorptive material. • Tampering or rendering inoperative the engine speed governor, so as...
... concerning prohibited tampering acts and maintenance, and the noise warranty found in use, or (2) the use of the vehicle after such device or element of hood blanket, fender apron absorbers, fender apron barriers, underbody noise shields or acoustically absorptive material. • Tampering or rendering inoperative the engine speed governor, so as...
