Owner's Manual
Page 14
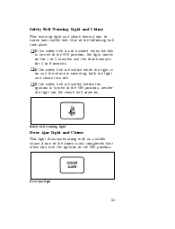
... not completely shut when you to fasten your safety belt. Safety belt warning light Door Ajar Light and Chime This light illuminates along with an audible chime if one of the following will come on for 1 to 2 minutes and the ... light and chime turn the ignition to the ON position. Safety Belt Warning Light and Chime This warning light and chime remind you turn off. Door ajar light 11 on and the chime is turned to the ON position, the light comes on .
... not completely shut when you to fasten your safety belt. Safety belt warning light Door Ajar Light and Chime This light illuminates along with an audible chime if one of the following will come on for 1 to 2 minutes and the ... light and chime turn the ignition to the ON position. Safety Belt Warning Light and Chime This warning light and chime remind you turn off. Door ajar light 11 on and the chime is turned to the ON position, the light comes on .
Owner's Manual
Page 17
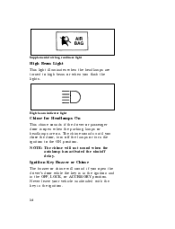
... in the OFF, LOCK, or ACCESSORY position. High beam indicator light Chime for Headlamps On This chime sounds if the driver or passenger door is open the driver's door while the key is in the ignition and in the ignition. 14 NOTE: The chime will sound if you flash the lights. Ignition... bag readiness light High Beam Light This light illuminates when the headlamps are turned to the ON position. The chime sounds until you close the door, turn off the lamps or turn the ignition to high beam or when you open when the parking lamps or headlamps are on.
... in the OFF, LOCK, or ACCESSORY position. High beam indicator light Chime for Headlamps On This chime sounds if the driver or passenger door is open the driver's door while the key is in the ignition and in the ignition. 14 NOTE: The chime will sound if you flash the lights. Ignition... bag readiness light High Beam Light This light illuminates when the headlamps are turned to the ON position. The chime sounds until you close the door, turn off the lamps or turn the ignition to high beam or when you open when the parking lamps or headlamps are on.
Owner's Manual
Page 54
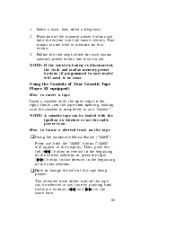
... until the sound returns. Press one of the current selection or press the right (g) button to fast forward to the right) firmly into the tape door opening, making sure the cassette is disconnected, the clock and station memory preset buttons (if programmed in auto mode) will appear in the display). That...
... until the sound returns. Press one of the current selection or press the right (g) button to fast forward to the right) firmly into the tape door opening, making sure the cassette is disconnected, the clock and station memory preset buttons (if programmed in auto mode) will appear in the display). That...

Owner's Manual
Page 75
... result in the OFF position, and u The vehicle is located above the rear window on liftgate models, and on the roof above the rear doors on dual rear door models. 72 RWARNING The Daytime Running Light (DRL) system will not illuminate the tail lamps and parking lamps. Instrument Panel Illumination The instrument...
... result in the OFF position, and u The vehicle is located above the rear window on liftgate models, and on the roof above the rear doors on dual rear door models. 72 RWARNING The Daytime Running Light (DRL) system will not illuminate the tail lamps and parking lamps. Instrument Panel Illumination The instrument...
Owner's Manual
Page 76
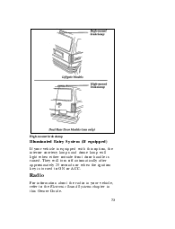
Radio For information about the radio in this option, the interior courtesy lamps and dome lamp will turn off automatically after approximately 25 seconds or when the ignition key is turned to the Electronic Sound Systems chapter in your vehicle is equipped with this Owner Guide. 73 High-mount brakelamp Illuminated Entry System (If equipped) If your vehicle, refer to ON or ACC. They will light when either outside front door handle is raised.
Radio For information about the radio in this option, the interior courtesy lamps and dome lamp will turn off automatically after approximately 25 seconds or when the ignition key is turned to the Electronic Sound Systems chapter in your vehicle is equipped with this Owner Guide. 73 High-mount brakelamp Illuminated Entry System (If equipped) If your vehicle, refer to ON or ACC. They will light when either outside front door handle is raised.
Owner's Manual
Page 86
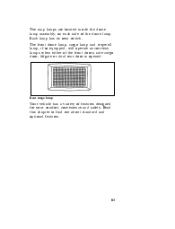
Rear cargo lamp Your vehicle has a variety of the dome lamp. The map lamps are located inside the dome lamp assembly, on each side of features designed for your comfort, convenience and safety. The front dome lamp, cargo lamp and stepwell lamp, if so equipped, will operate as courtesy lamps when either of the front doors, side cargo door, liftgate or dual rear door is opened. Read this chapter to find out about standard and optional features. 83 Each lamp has its own switch.
Rear cargo lamp Your vehicle has a variety of the dome lamp. The map lamps are located inside the dome lamp assembly, on each side of features designed for your comfort, convenience and safety. The front dome lamp, cargo lamp and stepwell lamp, if so equipped, will operate as courtesy lamps when either of the front doors, side cargo door, liftgate or dual rear door is opened. Read this chapter to find out about standard and optional features. 83 Each lamp has its own switch.

Owner's Manual
Page 87
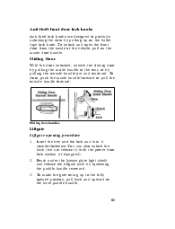
Doors Door Handles and Locks Inside handles Outside handles and locks 84
Doors Door Handles and Locks Inside handles Outside handles and locks 84
Owner's Manual
Page 88
... Liftgate Liftgate opening procedure 1. You can also unlock the latch (but not release it counterclockwise. To unlock and open the front door from the inside door handle. To close, push the inside handle to the rear, or by pulling the inside handle forward or pull the outside handle out and rearward. .... 2. 3. 85 To make the gate swing up on the bullet type lock knob. Insert the key into the lock and turn it ) with the power door lock system (if equipped). Anti-theft front door lock knobs Anti-theft lock knobs are designed to preclude unlocking the...
... Liftgate Liftgate opening procedure 1. You can also unlock the latch (but not release it counterclockwise. To unlock and open the front door from the inside door handle. To close, push the inside handle to the rear, or by pulling the inside handle forward or pull the outside handle out and rearward. .... 2. 3. 85 To make the gate swing up on the bullet type lock knob. Insert the key into the lock and turn it ) with the power door lock system (if equipped). Anti-theft front door lock knobs Anti-theft lock knobs are designed to preclude unlocking the...

Owner's Manual
Page 89
.... This will also prevent passengers and cargo from being drawn into the vehicle. If you do not, possible damage may occur to close the liftgate door and window before driving your vehicle. At this option) and pull downward. If you must drive with this point, the latch is not locked. 2. 86... downward, reach up and pull the lower edge of the liftgate (or the loop handle on the inner trim panel of vehicles with the liftgate door or window open, keep the vents open so outside air comes into the vehicle. RWARNING Make sure that you can reach the license plate light...
.... This will also prevent passengers and cargo from being drawn into the vehicle. If you do not, possible damage may occur to close the liftgate door and window before driving your vehicle. At this option) and pull downward. If you must drive with this point, the latch is not locked. 2. 86... downward, reach up and pull the lower edge of the liftgate (or the loop handle on the inner trim panel of vehicles with the liftgate door or window open, keep the vents open so outside air comes into the vehicle. RWARNING Make sure that you can reach the license plate light...
Owner's Manual
Page 90
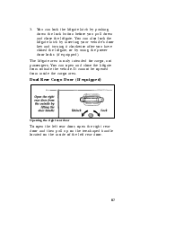
...inserting your vehicle's door key and turning it clockwise after you pull down the lock button before you have closed the liftgate, or by pushing down and close the liftgate from inside of the left rear door. 87 Dual Rear Cargo Door (If equipped) Opening the right rear door To open the left... rear door, open and close the liftgate. You can open the right rear door and then pull up on the tee-shaped handle located on ...
...inserting your vehicle's door key and turning it clockwise after you pull down the lock button before you have closed the liftgate, or by pushing down and close the liftgate from inside of the left rear door. 87 Dual Rear Cargo Door (If equipped) Opening the right rear door To open the left... rear door, open and close the liftgate. You can open the right rear door and then pull up on the tee-shaped handle located on ...
Owner's Manual
Page 91
... switches are located in the front doors. Memory lock (sliding door) Your vehicle has a sliding door memory lock feature that does not require the sliding door to close the left rear door first. To lock all doors push the switch marked UNLOCK. The manual door locks will activate after the door is closed before using the power locks...
... switches are located in the front doors. Memory lock (sliding door) Your vehicle has a sliding door memory lock feature that does not require the sliding door to close the left rear door first. To lock all doors push the switch marked UNLOCK. The manual door locks will activate after the door is closed before using the power locks...
Owner's Manual
Page 92
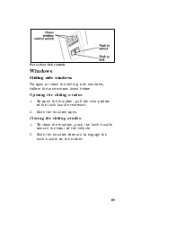
To open . To close the sliding side windows, follow the instructions listed below. Slide the window forward to engage the latch handle on the striker. Closing the sliding window 89 Slide the window open the window, pull the rear portion of the vehicle. Opening the sliding window 1. 2. 1. 2. Power door lock controls Windows Sliding side windows To open or close the window, push the latch handle toward the front of the latch handle rearward.
To open . To close the sliding side windows, follow the instructions listed below. Slide the window forward to engage the latch handle on the striker. Closing the sliding window 89 Slide the window open the window, pull the rear portion of the vehicle. Opening the sliding window 1. 2. 1. 2. Power door lock controls Windows Sliding side windows To open or close the window, push the latch handle toward the front of the latch handle rearward.

Owner's Manual
Page 93
...being drawn into the vehicle. Opening the sliding side window Using the Power Windows (If equipped) Each front door has a power control that opens and closes the window on that operates both front door windows. If you must place the ignition switch in the ON or ACC position to prevent exhaust fumes... from falling out. RWARNING Do not let children play with the liftgate door or window open, keep the vents open so outside air comes into the vehicle. You must drive with the power windows. 90 RWARNING Make ...
...being drawn into the vehicle. Opening the sliding side window Using the Power Windows (If equipped) Each front door has a power control that opens and closes the window on that operates both front door windows. If you must place the ignition switch in the ON or ACC position to prevent exhaust fumes... from falling out. RWARNING Do not let children play with the liftgate door or window open, keep the vents open so outside air comes into the vehicle. You must drive with the power windows. 90 RWARNING Make ...
Owner's Manual
Page 94
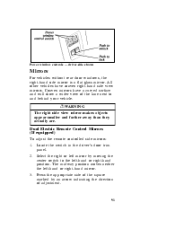
... mirrors: 1. 2. Select the right or left mirror by an arrow indicating the direction of adjustment. 3. 91 Locate the switch in the driver's door trim panel. RWARNING The right side view mirror makes objects appear smaller and farther away than they actually are. Press the appropriate side of the... lane next to the left -hand or right-hand mirror. Power window controls - driver-side shown Mirrors For vehicles without rear door windows, the right-hand side mirror is a flat glass mirror. All other vehicles have a curved surface and will show a wider view of ...
... mirrors: 1. 2. Select the right or left mirror by an arrow indicating the direction of adjustment. 3. 91 Locate the switch in the driver's door trim panel. RWARNING The right side view mirror makes objects appear smaller and farther away than they actually are. Press the appropriate side of the... lane next to the left -hand or right-hand mirror. Power window controls - driver-side shown Mirrors For vehicles without rear door windows, the right-hand side mirror is a flat glass mirror. All other vehicles have a curved surface and will show a wider view of ...

Owner's Manual
Page 96
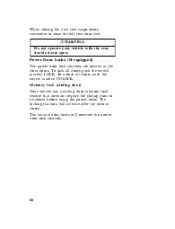
Open door by pressing on the compartment door. Push down on latch. In its stored position, the transmitter can be activated by moving hand towards front of a garage door opener transmitter. The features on the console Garage Door Opener Storage At the center of the console, a compartment is provided for storage of vehicle while maintaining pressure on latch (Figure 1). 93 To install the transmitter: 1. 2.
Open door by pressing on the compartment door. Push down on latch. In its stored position, the transmitter can be activated by moving hand towards front of a garage door opener transmitter. The features on the console Garage Door Opener Storage At the center of the console, a compartment is provided for storage of vehicle while maintaining pressure on latch (Figure 1). 93 To install the transmitter: 1. 2.

Owner's Manual
Page 97
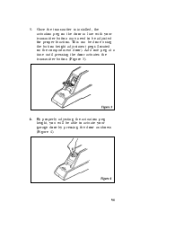
3. Install your transmitter into the compartment, making sure the actuator button of your transmitter. Remove the backing from the self-adhesive side of the VelcroTM (supplied with one of your transmitter is in line with the console) and apply it to the back of the pegs on the door when the door is closed (Figure 2). 4. 94
3. Install your transmitter into the compartment, making sure the actuator button of your transmitter. Remove the backing from the self-adhesive side of the VelcroTM (supplied with one of your transmitter is in line with the console) and apply it to the back of the pegs on the door when the door is closed (Figure 2). 4. 94
Owner's Manual
Page 98
Add one peg at a time until pressing the door actuates the transmitter button (Figure 3). 6. 5. This can be adjusted for proper function. Once the transmitter is installed, the actuation peg on the compartment door). By properly adjusting the actuation peg height, you will be able to be done using the button height adjustment pegs (located on the door in line with your transmitter button may need to actuate your garage door by pressing the door as shown (Figure 4). 95
Add one peg at a time until pressing the door actuates the transmitter button (Figure 3). 6. 5. This can be adjusted for proper function. Once the transmitter is installed, the actuation peg on the compartment door). By properly adjusting the actuation peg height, you will be able to be done using the button height adjustment pegs (located on the door in line with your transmitter button may need to actuate your garage door by pressing the door as shown (Figure 4). 95

Owner's Manual
Page 112
... you best. Insert the belt tongue into your vehicle is moving. Combination Lap and Shoulder Belts While your vehicle, close the door and lock it. RWARNING Lock the doors of the door coming open in a collision. Then adjust the seat to the buckle by pulling on his or her lap while the vehicle...
... you best. Insert the belt tongue into your vehicle is moving. Combination Lap and Shoulder Belts While your vehicle, close the door and lock it. RWARNING Lock the doors of the door coming open in a collision. Then adjust the seat to the buckle by pulling on his or her lap while the vehicle...
Owner's Manual
Page 154
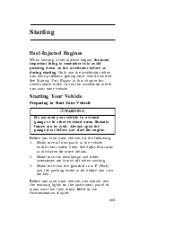
... the following: 1. See Safety Restraints in the vehicle buckle their safety belts. Starting Your Vehicle Preparing to the Instrumentation chapter. 153 Always open the garage door before or during starting . 3. Only use the accelerator when you start your vehicle in a closed garage or in this chapter for more details. 2. See Starting...
... the following: 1. See Safety Restraints in the vehicle buckle their safety belts. Starting Your Vehicle Preparing to the Instrumentation chapter. 153 Always open the garage door before or during starting . 3. Only use the accelerator when you start your vehicle in a closed garage or in this chapter for more details. 2. See Starting...
Owner's Manual
Page 160
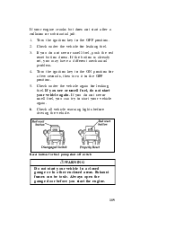
... fuel, do not see or smell fuel, you may have a different mechanical problem. If you do not start your vehicle again. Always open the garage door before driving the vehicle. 4. 5. 6. If your engine cranks but does not start your vehicle in a closed garage or in other enclosed areas.
... fuel, do not see or smell fuel, you may have a different mechanical problem. If you do not start your vehicle again. Always open the garage door before driving the vehicle. 4. 5. 6. If your engine cranks but does not start your vehicle in a closed garage or in other enclosed areas.


