Owner's Manual
Page 7
...covered by three types of purchase, you may still be eligible. If you purchased a Canadian vehicle and did not take advantage of the Ford Extended Service Plan at the time of warranties: Basic Vehicle Warranty, Extended Warranties on the first page of this option when you can get a new one free of... time than the basic warranty that comes with your vehicle. See your dealer for more details about your vehicle's warranties and your option to the ...
...covered by three types of purchase, you may still be eligible. If you purchased a Canadian vehicle and did not take advantage of the Ford Extended Service Plan at the time of warranties: Basic Vehicle Warranty, Extended Warranties on the first page of this option when you can get a new one free of... time than the basic warranty that comes with your vehicle. See your dealer for more details about your vehicle's warranties and your option to the ...
Owner's Manual
Page 8
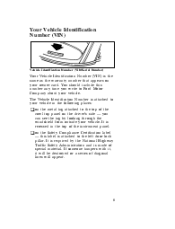
Your Vehicle Identification Number (VIN) Vehicle Identification Number (VIN/Serial Number) Your Vehicle Identification Number (VIN) is attached to Ford Motor Company about your vehicle. u on the driver's side - you write to the left door lock pillar. You should include this label is the ... on the Safety Compliance Certification label 5 If someone tampers with it, it will be destroyed or a series of the instrument panel. - this number any time you can see the tag by looking through the windshield from outside your vehicle in the top of diagonal lines will appear.
Your Vehicle Identification Number (VIN) Vehicle Identification Number (VIN/Serial Number) Your Vehicle Identification Number (VIN) is attached to Ford Motor Company about your vehicle. u on the driver's side - you write to the left door lock pillar. You should include this label is the ... on the Safety Compliance Certification label 5 If someone tampers with it, it will be destroyed or a series of the instrument panel. - this number any time you can see the tag by looking through the windshield from outside your vehicle in the top of diagonal lines will appear.
Owner's Manual
Page 17
... seats. At this operating mode, the shoulder belt retractor will be used when installing a child safety seat on the occupant. Automatic locking mode In this time, the belt retractor is in the automatic locking mode (child restraint mode). To switch the retractor from the emergency locking mode to be heard.
... seats. At this operating mode, the shoulder belt retractor will be used when installing a child safety seat on the occupant. Automatic locking mode In this time, the belt retractor is in the automatic locking mode (child restraint mode). To switch the retractor from the emergency locking mode to be heard.

Owner's Manual
Page 34
See Figure 4. 32 Grasp the shoulder portion of the belt and pull downward until all of the belt is extracted and a click is in the automatic locking mode (child seat restraint mode). Buckling the belt 4. At this time, the retractor is heard.
See Figure 4. 32 Grasp the shoulder portion of the belt and pull downward until all of the belt is extracted and a click is in the automatic locking mode (child seat restraint mode). Buckling the belt 4. At this time, the retractor is heard.

Owner's Manual
Page 49
Never sit in this chapter for more instructions. See Guarding Against Exhaust Fumes in a stopped vehicle for more than a short period of time with the engine running. Make sure the headlamps and other enclosed area. Refer to the Warning Lights and Gauges chapter. 2. 3. 47 See Safety Restraints in P (...
Never sit in this chapter for more instructions. See Guarding Against Exhaust Fumes in a stopped vehicle for more than a short period of time with the engine running. Make sure the headlamps and other enclosed area. Refer to the Warning Lights and Gauges chapter. 2. 3. 47 See Safety Restraints in P (...

Owner's Manual
Page 51
... engine: u Do not hold it. 49 Excessive cranking could damage the starter. After starting, allow the engine to idle for more than five (5) seconds at a time. Press the accelerator all the way to the OFF position. Turn the ignition key to the floor and hold the key in the START position...
... engine: u Do not hold it. 49 Excessive cranking could damage the starter. After starting, allow the engine to idle for more than five (5) seconds at a time. Press the accelerator all the way to the OFF position. Turn the ignition key to the floor and hold the key in the START position...
Owner's Manual
Page 52
... speeds will make your vehicle to idle for more than its normal idle speed. If the engine idle speed does not slow down after a short time. 3. 4. 5. For directions on how to the START position. It should, however, slow down automatically, do not allow your vehicle coast slightly faster than 10 minutes...
... speeds will make your vehicle to idle for more than its normal idle speed. If the engine idle speed does not slow down after a short time. 3. 4. 5. For directions on how to the START position. It should, however, slow down automatically, do not allow your vehicle coast slightly faster than 10 minutes...

Owner's Manual
Page 55
.... Exhaust fumes are toxic. Never sit in the ignition to the LOCK position. Turn the key in a stopped vehicle for more than a short period of time with the engine running. If you do not see or smell fuel, you do not start after a collision or major jolt: 1. 2. 3. Push down the red...
.... Exhaust fumes are toxic. Never sit in the ignition to the LOCK position. Turn the key in a stopped vehicle for more than a short period of time with the engine running. If you do not see or smell fuel, you do not start after a collision or major jolt: 1. 2. 3. Push down the red...
Owner's Manual
Page 56
... function lever in the position of your choice. Have the exhaust and body ventilation systems checked whenever: u your vehicle is raised for long periods of time, be sure you smell exhaust fumes. If you smell exhaust fumes inside your vehicle, have your dealer inspect your vehicle immediately. Set the air door...
... function lever in the position of your choice. Have the exhaust and body ventilation systems checked whenever: u your vehicle is raised for long periods of time, be sure you smell exhaust fumes. If you smell exhaust fumes inside your vehicle, have your dealer inspect your vehicle immediately. Set the air door...

Owner's Manual
Page 62
... on when the engine is not being charged and that the brakes may not be working properly. Charging system light This light comes on every time you need to have the electrical system checked. RWARNING The BRAKE light indicates that you turn the ignition to the ON or START position (engine...
... on when the engine is not being charged and that the brakes may not be working properly. Charging system light This light comes on every time you need to have the electrical system checked. RWARNING The BRAKE light indicates that you turn the ignition to the ON or START position (engine...

Owner's Manual
Page 63
... oil pressure. Check the engine oil level. It is possible for damage to occur if an engine is turned to the full mark on every time the ignition key is operated with a low oil level. 61 Add oil to ON or START, but it could cause severe engine damage. For more...
... oil pressure. Check the engine oil level. It is possible for damage to occur if an engine is turned to the full mark on every time the ignition key is operated with a low oil level. 61 Add oil to ON or START, but it could cause severe engine damage. For more...
Owner's Manual
Page 67
... usually moves from C (cold) into the NORMAL band as your vehicle warms up. You can get a correct fuel gauge reading after the battery has had time to low battery voltage and does not indicate a malfunction in the NORMAL band.
... usually moves from C (cold) into the NORMAL band as your vehicle warms up. You can get a correct fuel gauge reading after the battery has had time to low battery voltage and does not indicate a malfunction in the NORMAL band.

Owner's Manual
Page 74
... fog free windows after they are cleared. The fan speed can be adjusted to the right N (fresh air) position. Heating and Defrosting at the Same Time 1. 2. 72 Set the fan speed H to the V (defrost) position. Set the temperature control lever all the way into the red area. Set the function selector...
... fog free windows after they are cleared. The fan speed can be adjusted to the right N (fresh air) position. Heating and Defrosting at the Same Time 1. 2. 72 Set the fan speed H to the V (defrost) position. Set the temperature control lever all the way into the red area. Set the function selector...

Owner's Manual
Page 81
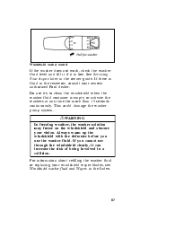
... antenna before entering a car wash it upward away from its base. Interior courtesy lamp Do not leave the dome light on the driver's side of time when the engine is not fully extended, the result may discharge. NOTE: The radio antenna must be extended by pulling it could result in prior...
... antenna before entering a car wash it upward away from its base. Interior courtesy lamp Do not leave the dome light on the driver's side of time when the engine is not fully extended, the result may discharge. NOTE: The radio antenna must be extended by pulling it could result in prior...

Owner's Manual
Page 86
... the center off position. All the turn signals will return to the OFF position when you turn . The lever will flash on the top of time. Hazard Flasher To alert other drivers to hazardous situations, press the hazard flasher switch on and off at the same...
... the center off position. All the turn signals will return to the OFF position when you turn . The lever will flash on the top of time. Hazard Flasher To alert other drivers to hazardous situations, press the hazard flasher switch on and off at the same...
Owner's Manual
Page 89
... is low. If you use the washer fluid. RWARNING In freezing weather, the washer solution may freeze on the windshield and obscure your nearest authorized Ford dealer. Windshield washer control If the washer does not work, check the washer fluid level and fill it if it can increase the risk of... being involved in a collision. See Servicing Your Aspire later in the owner guide. Do not try to clean the windshield when the washer fluid container is empty or activate the washers at any...
... is low. If you use the washer fluid. RWARNING In freezing weather, the washer solution may freeze on the windshield and obscure your nearest authorized Ford dealer. Windshield washer control If the washer does not work, check the washer fluid level and fill it if it can increase the risk of... being involved in a collision. See Servicing Your Aspire later in the owner guide. Do not try to clean the windshield when the washer fluid container is empty or activate the washers at any...

Owner's Manual
Page 98
... seat has one knob for each seatback. Pull the seatback forward until it is folded forward even a small degree may be raised at the same time to their upright positions. To fold down the seatback (or seatbacks) to provide extra cargo space. Pull up on either case, you have the rear...
... seat has one knob for each seatback. Pull the seatback forward until it is folded forward even a small degree may be raised at the same time to their upright positions. To fold down the seatback (or seatbacks) to provide extra cargo space. Pull up on either case, you have the rear...

Owner's Manual
Page 111
... of the button to reach the desired station. 110 Press the left side of the "SEEK" button. By holding the button down one increment at a time by using Automatic Music Search ("AMS"), "SEEK" the station, "SCAN" to a particular station.
... of the button to reach the desired station. 110 Press the left side of the "SEEK" button. By holding the button down one increment at a time by using Automatic Music Search ("AMS"), "SEEK" the station, "SCAN" to a particular station.

Owner's Manual
Page 112
... below to enter the scan mode. That station is now held in memory on each station memory preset button you press the "SCAN" button a second time. u Setting the Station Memory Preset buttons Your radio is disconnected, the clock and station memory preset buttons (if programmed in FM2). Select a band, then select...
... below to enter the scan mode. That station is now held in memory on each station memory preset button you press the "SCAN" button a second time. u Setting the Station Memory Preset buttons Your radio is disconnected, the clock and station memory preset buttons (if programmed in FM2). Select a band, then select...

Owner's Manual
Page 115
... Tapes In order to keep your cassette tape player performing the way it was meant to, read and follow these simple precautions: u Using a Ford Cassette Cleaning Cartridge to clean the tape player head after 10-12 hours of play will resume playing. How to activate. u Only cassettes that... are trademarks of Dolby Laboratories Licensing Corporation. less should be selected at any time by pushing both fast-wind buttons (h and g) at the same time. Push the k button to eject the tape To stop the tape and eject the cassette, press the eject "EJECT...
... Tapes In order to keep your cassette tape player performing the way it was meant to, read and follow these simple precautions: u Using a Ford Cassette Cleaning Cartridge to clean the tape player head after 10-12 hours of play will resume playing. How to activate. u Only cassettes that... are trademarks of Dolby Laboratories Licensing Corporation. less should be selected at any time by pushing both fast-wind buttons (h and g) at the same time. Push the k button to eject the tape To stop the tape and eject the cassette, press the eject "EJECT...
