Owner's Manual
Page 17
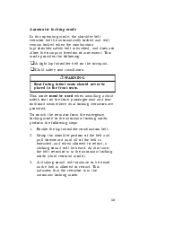
.... Buckle the lap/shoulder combination belt. At this operating mode, the shoulder belt retractor will be heard. A clicking sound will be automatically locked and will remain locked when the combination lap/shoulder safety belt is buckled, and does not allow the occupant freedom of the belt... is extracted, and when allowed to retract, a clicking sound will continue to the automatic locking mode, perform the following : u A tight lap/shoulder belt on the front passenger seat and rear outboard seats where dual locking retractors are...
.... Buckle the lap/shoulder combination belt. At this operating mode, the shoulder belt retractor will be heard. A clicking sound will be automatically locked and will remain locked when the combination lap/shoulder safety belt is buckled, and does not allow the occupant freedom of the belt... is extracted, and when allowed to retract, a clicking sound will continue to the automatic locking mode, perform the following : u A tight lap/shoulder belt on the front passenger seat and rear outboard seats where dual locking retractors are...
Owner's Manual
Page 31
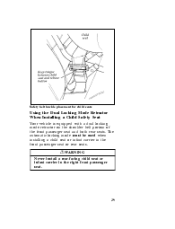
The automatic locking mode must be used when installing a child seat or infant carrier in the right front passenger seat. 29 Safety belt buckle placement for child seats Using the Dual Locking Mode Retractor When Installing a Child Safety Seat Your vehicle is equipped with a dual locking mode retractor on the shoulder belt portoin of the front passenger seat and both rear seats. RWARNING Never install a rear-facing child seat or infant carrier in the front passenger seat or rear seats.
The automatic locking mode must be used when installing a child seat or infant carrier in the right front passenger seat. 29 Safety belt buckle placement for child seats Using the Dual Locking Mode Retractor When Installing a Child Safety Seat Your vehicle is equipped with a dual locking mode retractor on the shoulder belt portoin of the front passenger seat and both rear seats. RWARNING Never install a rear-facing child seat or infant carrier in the front passenger seat or rear seats.

Owner's Manual
Page 34
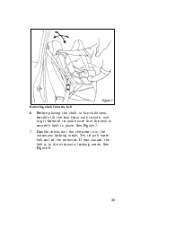
Grasp the shoulder portion of the belt and pull downward until all of the belt is extracted and a click is in the automatic locking mode (child seat restraint mode). See Figure 4. 32 At this time, the retractor is heard. Buckling the belt 4.
Grasp the shoulder portion of the belt and pull downward until all of the belt is extracted and a click is in the automatic locking mode (child seat restraint mode). See Figure 4. 32 At this time, the retractor is heard. Buckling the belt 4.

Owner's Manual
Page 35
A clicking sound will be heard as the belt retracts. Push down on the child seat while you pull up on the belt to remove any slack in the automatic locking mode. See Figures 5 and 6. 33 This indicates the retractor is in the belt. Allow the belt to automatic locking mode 5. Setting the retractor to retract. Pull up on the shoulder webbing.
A clicking sound will be heard as the belt retracts. Push down on the child seat while you pull up on the belt to remove any slack in the automatic locking mode. See Figures 5 and 6. 33 This indicates the retractor is in the belt. Allow the belt to automatic locking mode 5. Setting the retractor to retract. Pull up on the shoulder webbing.
Owner's Manual
Page 37
Double-check that the seat is in the automatic locking mode. Try to make sure that the retractor is in the automatic locking mode. See Figure 8. 7. 35 Removing slack from side to side, and tug it forward to pull more belt out of the retractor. Before placing the child in place. If you cannot, the belt is securely held in the child seat, forcibly tilt the seat from the belt 6. See Figure 7.
Double-check that the seat is in the automatic locking mode. Try to make sure that the retractor is in the automatic locking mode. See Figure 8. 7. 35 Removing slack from side to side, and tug it forward to pull more belt out of the retractor. Before placing the child in place. If you cannot, the belt is securely held in the child seat, forcibly tilt the seat from the belt 6. See Figure 7.

Owner's Manual
Page 38
Check to make sure that retractor is not locked, repeat steps 4 through 7. NOTE: To remove the retractor from the automatic lock mode, allow the seat belt to retract fully to its stowed position and the retractor will automatically switch back to each use. If the retractor is in automatic locking mode 8. Checking that the child seat is properly secured prior to the vehicle sensitive locking mode for normal adult usage. 36
Check to make sure that retractor is not locked, repeat steps 4 through 7. NOTE: To remove the retractor from the automatic lock mode, allow the seat belt to retract fully to its stowed position and the retractor will automatically switch back to each use. If the retractor is in automatic locking mode 8. Checking that the child seat is properly secured prior to the vehicle sensitive locking mode for normal adult usage. 36

Owner's Manual
Page 39
... out of your child safety seat for information about ordering a tether strap. Contact the manufacturer of the rear seat retractor to switch the retractor to automatic locking mode. Front Seats To install a tether from the lap/shoulder belt. Refer to an anchoring point. Other manufacturers offer the tether strap as an...
... out of your child safety seat for information about ordering a tether strap. Contact the manufacturer of the rear seat retractor to switch the retractor to automatic locking mode. Front Seats To install a tether from the lap/shoulder belt. Refer to an anchoring point. Other manufacturers offer the tether strap as an...
Owner's Manual
Page 43
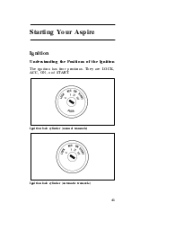
They are: LOCK, ACC, ON, and START. Ignition lock cylinder (manual transaxle) Ignition lock cylinder (automatic transaxle) 41 Starting Your Aspire Ignition Understanding the Positions of the Ignition The ignition has four positions.
They are: LOCK, ACC, ON, and START. Ignition lock cylinder (manual transaxle) Ignition lock cylinder (automatic transaxle) 41 Starting Your Aspire Ignition Understanding the Positions of the Ignition The ignition has four positions.

Owner's Manual
Page 44
... that you release it. START cranks the engine. The key returns to test the brake warning light. 42 LOCK is started and remains in P (Park) (automatic transaxle). ACC (accessory) allows some of your vehicle's warning lights (except the brake system warning light) to the LOCK position. The key should return to...
... that you release it. START cranks the engine. The key returns to test the brake warning light. 42 LOCK is started and remains in P (Park) (automatic transaxle). ACC (accessory) allows some of your vehicle's warning lights (except the brake system warning light) to the LOCK position. The key should return to...

Owner's Manual
Page 45
...) position. This is in the ON position and the selector lever is not a malfunction. Keep the brake pedal depressed while moving your safety, the optional automatic transaxle has a shift-lock system, which prevents shifting the transaxle out of the P (Park) position: 1. 2. 3. 4. If the brake pedal is repeatedly depressed and released when...
...) position. This is in the ON position and the selector lever is not a malfunction. Keep the brake pedal depressed while moving your safety, the optional automatic transaxle has a shift-lock system, which prevents shifting the transaxle out of the P (Park) position: 1. 2. 3. 4. If the brake pedal is repeatedly depressed and released when...
Owner's Manual
Page 47
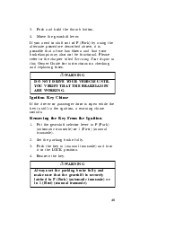
...the LOCK position. Ignition Key Chime If the driver or passenger door is open while the key is securely latched in P (Park) (automatic transaxle) or in the ignition, a warning chime sounds. Push and hold the thumb button. Push the key in (manual transaxle) and... 1 (First) (manual transaxle). 2. 3. 4. 45 3. 4. Removing the Key From the Ignition 1. Please refer to the chapter titled Servicing Your Aspire in P (Park) (automatic transaxle) or 1 (First) (manual transaxle). Put the gearshift selector lever in this Owner Guide for instructions on checking and replacing fuses. Set the...
...the LOCK position. Ignition Key Chime If the driver or passenger door is open while the key is securely latched in P (Park) (automatic transaxle) or in the ignition, a warning chime sounds. Push and hold the thumb button. Push the key in (manual transaxle) and... 1 (First) (manual transaxle). 2. 3. 4. 45 3. 4. Removing the Key From the Ignition 1. Please refer to the chapter titled Servicing Your Aspire in P (Park) (automatic transaxle) or 1 (First) (manual transaxle). Put the gearshift selector lever in this Owner Guide for instructions on checking and replacing fuses. Set the...

Owner's Manual
Page 49
... engine running. Exhaust fumes are turned off when starting. Make sure all the way to the floor.) Before you start your vehicle, you have an automatic transaxle, make sure that the gearshift is in P (Park) and the parking brake is pushed all occupants in the vehicle buckle their safety belts. Refer...
... engine running. Exhaust fumes are turned off when starting. Make sure all the way to the floor.) Before you start your vehicle, you have an automatic transaxle, make sure that the gearshift is in P (Park) and the parking brake is pushed all occupants in the vehicle buckle their safety belts. Refer...

Owner's Manual
Page 51
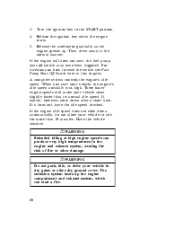
u At temperatures above 10˚F (-12˚C): If the For a warm engine: u Do not hold it. 49 NOTE: Automatic transaxle equipped vehicles have an interlock that prevents you from shifting out of P (Park) unless your vehicle, release the key as soon as the engine ...
u At temperatures above 10˚F (-12˚C): If the For a warm engine: u Do not hold it. 49 NOTE: Automatic transaxle equipped vehicles have an interlock that prevents you from shifting out of P (Park) unless your vehicle, release the key as soon as the engine ...
Owner's Manual
Page 52
.... These faster engine speeds will make your vehicle to the START position. Release the ignition key when the engine starts. It should, however, slow down automatically, do not allow your vehicle coast slightly faster than 10 minutes. If the engine idle speed does not slow down after a short time. Turn the...
.... These faster engine speeds will make your vehicle to the START position. Release the ignition key when the engine starts. It should, however, slow down automatically, do not allow your vehicle coast slightly faster than 10 minutes. If the engine idle speed does not slow down after a short time. Turn the...

Owner's Manual
Page 84
... not use dry paper towel, chemical solvents or abrasive cleaner to be driven with lights illuminated during daytime operation. The Daytime Running Light system (DRL) automatically illuminates when the ignition switch is turned to -pass system is opened while the headlamps or parking lamps are switched on .
... not use dry paper towel, chemical solvents or abrasive cleaner to be driven with lights illuminated during daytime operation. The Daytime Running Light system (DRL) automatically illuminates when the ignition switch is turned to -pass system is opened while the headlamps or parking lamps are switched on .

Owner's Manual
Page 97
... lock.) The lever used to recline the back of the seat Rear Seat Access To gain access to tilt the seatback forward. The seatback should automatically lock when returned to the position you desire. Make sure the seatback is locked in place. 96 Lean forward slightly and lift up on the...
... lock.) The lever used to recline the back of the seat Rear Seat Access To gain access to tilt the seatback forward. The seatback should automatically lock when returned to the position you desire. Make sure the seatback is locked in place. 96 Lean forward slightly and lift up on the...

Owner's Manual
Page 102
... folded rearward to side. The special swivel bracket lets you move the mirror up or down and from side to prevent damage when using an automatic car wash. 101 Move the tab toward you for the night position and away from the headlamps of vehicles behind you for the day position...
... folded rearward to side. The special swivel bracket lets you move the mirror up or down and from side to prevent damage when using an automatic car wash. 101 Move the tab toward you for the night position and away from the headlamps of vehicles behind you for the day position...

Owner's Manual
Page 111
You can manually locate the station by using the memory buttons, which you to automatically select listenable stations up or down the frequency band. To change the frequency up or down either the right a or left b side of the button ... not a station is present on your radio (Stereo Cassette Radio) You can change frequencies quickly, press and hold down one increment at a time by using Automatic Music Search ("AMS"), "SEEK" the station, "SCAN" to the station or select the station by first pressing the "AMS" button (display shows "TUNE") then within...
You can manually locate the station by using the memory buttons, which you to automatically select listenable stations up or down the frequency band. To change the frequency up or down either the right a or left b side of the button ... not a station is present on your radio (Stereo Cassette Radio) You can change frequencies quickly, press and hold down one increment at a time by using Automatic Music Search ("AMS"), "SEEK" the station, "SCAN" to the station or select the station by first pressing the "AMS" button (display shows "TUNE") then within...

Owner's Manual
Page 114
... Tape Player How to indicate when the tape mechanism reverses tracks. u Fast forwarding the tape Push the right g button to volume level set. u Using the Automatic Music Search ("AMS") function with the open edge to the right) firmly into the tape door opening, making sure the cassette is used only to...
... Tape Player How to indicate when the tape mechanism reverses tracks. u Fast forwarding the tape Push the right g button to volume level set. u Using the Automatic Music Search ("AMS") function with the open edge to the right) firmly into the tape door opening, making sure the cassette is used only to...
Owner's Manual
Page 116
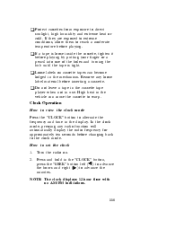
..., press the "SEEK" button left (b) to advance the hours and right (a) to alternate the frequency and time in the display. Remove any radio function will automatically display the radio frequency for approximately ten seconds before changing back to view the clock mode lodged in the vehicle can become u Do not leave...
..., press the "SEEK" button left (b) to advance the hours and right (a) to alternate the frequency and time in the display. Remove any radio function will automatically display the radio frequency for approximately ten seconds before changing back to view the clock mode lodged in the vehicle can become u Do not leave...

