
Owner's Manual
Page 105
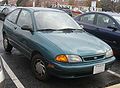
Hatchback Opening and Closing the Hatchback 1. Turn the key to the right until a click is securely latched. 3. 4. 5. 104 Using both hands, shut the hatchback completely. Remove the key before you close the hatchback lid. Pull up on the hatchback lid. Do not slam it is audible and then pull up on the hatchback to make sure it . Put the key into the lock on the handle (above the license plate) until the hatchback lid opens. Unlocking the hatchback lid with the key 2.
Hatchback Opening and Closing the Hatchback 1. Turn the key to the right until a click is securely latched. 3. 4. 5. 104 Using both hands, shut the hatchback completely. Remove the key before you close the hatchback lid. Pull up on the hatchback lid. Do not slam it is audible and then pull up on the hatchback to make sure it . Put the key into the lock on the handle (above the license plate) until the hatchback lid opens. Unlocking the hatchback lid with the key 2.

Owner's Manual
Page 106
Lifting the hatchback lid To prevent premature wear or damage to the hatchback lift cylinders and attaching hardware, the hatchback must drive like this, keep the vents open , you will draw dangerous exhaust fumes into the vehicle. 105 If you must be fully closed before you drive with the hatchback lid open so outside air comes into your vehicle. RWARNING If you drive your vehicle.
Lifting the hatchback lid To prevent premature wear or damage to the hatchback lift cylinders and attaching hardware, the hatchback must drive like this, keep the vents open , you will draw dangerous exhaust fumes into the vehicle. 105 If you must be fully closed before you drive with the hatchback lid open so outside air comes into your vehicle. RWARNING If you drive your vehicle.

Owner's Manual
Page 226
...until you should not need to your Ford dealer or a qualified technician. Attach the rubber boot over the boot and bulb assembly. Slip the bulb retaining ring over the bulb assembly. To remove the high-mount brakelamp: 1. 2. 3. Raise the hatchback. Turn the headlamps on and make sure... into position. Lay the cover aside. Lock the ring into the socket. Use a Phillips screwdriver to remove three attaching screws from the hatchback. Push the electrical connector into the rear of the bulb assembly into the socket by rotating it clockwise until it again. 5. 6. Installing...
...until you should not need to your Ford dealer or a qualified technician. Attach the rubber boot over the boot and bulb assembly. Slip the bulb retaining ring over the bulb assembly. To remove the high-mount brakelamp: 1. 2. 3. Raise the hatchback. Turn the headlamps on and make sure... into position. Lay the cover aside. Lock the ring into the socket. Use a Phillips screwdriver to remove three attaching screws from the hatchback. Push the electrical connector into the rear of the bulb assembly into the socket by rotating it clockwise until it again. 5. 6. Installing...

Owner's Manual
Page 227
... straight from the housing. Install the rear wiper motor cover (if equipped). Carefully remove the bulb by gently pulling it from the socket. Close the hatchback and reconnect the negative battery cable. 7. To install a bulb: 1. 2. 3. 4. 5. 6. 228 Firmly install the replacement bulb into position. Insert the trim panel retaining clips into the... locating holes in the high-mount stoplamp housing and turn clockwise to lock into position. Place the socket assembly in the hatchback and push each clip firmly into the socket. 6.
... straight from the housing. Install the rear wiper motor cover (if equipped). Carefully remove the bulb by gently pulling it from the socket. Close the hatchback and reconnect the negative battery cable. 7. To install a bulb: 1. 2. 3. 4. 5. 6. 228 Firmly install the replacement bulb into position. Insert the trim panel retaining clips into the... locating holes in the high-mount stoplamp housing and turn clockwise to lock into position. Place the socket assembly in the hatchback and push each clip firmly into the socket. 6.

Owner's Manual
Page 250
Hatchback 256
Hatchback 256

