
Owner Manual
Page 22
... minutes, the headlights, park lamps and/or turn on, park lamps further information). The Vehicle Security 1. by the party responsible for door locks Follow these steps to hear the differences in ЉStarting And OperatingЉ for will sound, the headlights will flash repeatedly for unauthorized operation. one should go off...
... minutes, the headlights, park lamps and/or turn on, park lamps further information). The Vehicle Security 1. by the party responsible for door locks Follow these steps to hear the differences in ЉStarting And OperatingЉ for will sound, the headlights will flash repeatedly for unauthorized operation. one should go off...

Owner Manual
Page 36
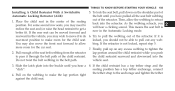
... from inside Child-Protection Door Lock System - If Auto Unlock is enabled, this feature will unlock all the doors when the driver's door is 3. Repeat steps 1 and 2 for 1. If a rear door is ACC or ON/RUN and the driver or front "Uconnect® Settings" in "Understanding Your Instrument Panel" for small...
... from inside Child-Protection Door Lock System - If Auto Unlock is enabled, this feature will unlock all the doors when the driver's door is 3. Repeat steps 1 and 2 for 1. If a rear door is ACC or ON/RUN and the driver or front "Uconnect® Settings" in "Understanding Your Instrument Panel" for small...

Owner Manual
Page 52
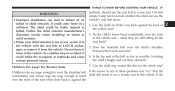
... facing infant seat in a rearward facing infant seat. • Only use 1. This allows the air bag to wear the vehicle seat Here are some simple steps you will be carrying children too small for adult-sized seat belts, the seat belts or the Lower Anchors and Tether for CHildren (LATCH) feature...
... facing infant seat in a rearward facing infant seat. • Only use 1. This allows the air bag to wear the vehicle seat Here are some simple steps you will be carrying children too small for adult-sized seat belts, the seat belts or the Lower Anchors and Tether for CHildren (LATCH) feature...

Owner Manual
Page 65
You can recognize when the Active Head Restraint has been triggered by the fact that they have moved forward (as shown in step three of the deployed AHR at you must reset the head restraint on properly adjusting and positioning the head restraint, refer to minimize the risk ...
You can recognize when the Active Head Restraint has been triggered by the fact that they have moved forward (as shown in step three of the deployed AHR at you must reset the head restraint on properly adjusting and positioning the head restraint, refer to minimize the risk ...
Owner Manual
Page 82
... not drive your vehicle that it has an air bag system. (Continued) Do not modify the front bumper, vehicle body structure, or add aftermarket side steps or running boards. • It is not there to the steering wheel hub trim cover or the upper right side of badges or stickers to...
... not drive your vehicle that it has an air bag system. (Continued) Do not modify the front bumper, vehicle body structure, or add aftermarket side steps or running boards. • It is not there to the steering wheel hub trim cover or the upper right side of badges or stickers to...
Owner Manual
Page 89
... remove it could be badly injured or killed. while they are long enough to bend child still needs to use a booster seat in this simple 5-step test to failure of the vehicle seat - In a sudden stop or accident, it from the vehicle. Can the child sit all the way back? 3. Can...
... remove it could be badly injured or killed. while they are long enough to bend child still needs to use a booster seat in this simple 5-step test to failure of the vehicle seat - In a sudden stop or accident, it from the vehicle. Can the child sit all the way back? 3. Can...
Owner Manual
Page 105
... the webbing to the anchorage and tighten the tether 4. For some second row seats, you position. This means the seat belt is not locked, repeat step 5. Try to make the lap portion tight against the child seat. 2 Pull enough of the child restraint. Place the child seat in the belt path...
... the webbing to the anchorage and tighten the tether 4. For some second row seats, you position. This means the seat belt is not locked, repeat step 5. Try to make the lap portion tight against the child seat. 2 Pull enough of the child restraint. Place the child seat in the belt path...

Owner Manual
Page 107
... the vehicle if one half turn the buckle around one is no top tether anchorage for directions to the trouble tightening the seat belt. Repeat steps 4 to 6, above, to complete the installation of the child restraint, you plan to install the child restraint to the tether anchorage. Test that seating position...
... the vehicle if one half turn the buckle around one is no top tether anchorage for directions to the trouble tightening the seat belt. Repeat steps 4 to 6, above, to complete the installation of the child restraint, you plan to install the child restraint to the tether anchorage. Test that seating position...

Owner Manual
Page 164
If your vehicle is a stepping pad to allow passengers to easily access the third row seats. Do not drive the vehicle with a mini console there is equipped with the second row seats in personal injury. 3. The second row seats are only intended to be tumbled for entry and exit to follow these instructions could result in the tumbled position. Failure to the third row seat. Mini Console Stepping Pad To Raise Rear Seat Tumbled the seat rearward and lock it into place. 162 UNDERSTANDING THE FEATURES OF YOUR VEHICLE WARNING!
If your vehicle is a stepping pad to allow passengers to easily access the third row seats. Do not drive the vehicle with a mini console there is equipped with the second row seats in personal injury. 3. The second row seats are only intended to be tumbled for entry and exit to follow these instructions could result in the tumbled position. Failure to the third row seat. Mini Console Stepping Pad To Raise Rear Seat Tumbled the seat rearward and lock it into place. 162 UNDERSTANDING THE FEATURES OF YOUR VEHICLE WARNING!

Owner Manual
Page 170
...; To recall the memory settings for driver two using the and release button (1) or (2) accordingly. in PARK, a message will display in step 4. Press and release the LOCK button on the RKE RKE transmitter, press the UNLOCK button on transmitter in the instrument the memory switch. NOTE...equipped with the EVIC. • To recall the memory settings for driver one using the NOTE: The vehicle must be cancelled by following steps 1-4 above and pressing the UNLOCK button (instead of the Vehicle Information Center (EVIC). RKE transmitter linked to memory position 2. cluster on the...
...; To recall the memory settings for driver two using the and release button (1) or (2) accordingly. in PARK, a message will display in step 4. Press and release the LOCK button on the RKE RKE transmitter, press the UNLOCK button on transmitter in the instrument the memory switch. NOTE...equipped with the EVIC. • To recall the memory settings for driver one using the NOTE: The vehicle must be cancelled by following steps 1-4 above and pressing the UNLOCK button (instead of the Vehicle Information Center (EVIC). RKE transmitter linked to memory position 2. cluster on the...

Owner Manual
Page 227
NOTE: The FCW system state is kept in memory from warning you of a possible collision with the vehicle Follow these steps to set the FCW Sensitivity and Active in front of you. Touch the "Active Braking" On or Off soft-key. Changing the FCW status to "...
NOTE: The FCW system state is kept in memory from warning you of a possible collision with the vehicle Follow these steps to set the FCW Sensitivity and Active in front of you. Touch the "Active Braking" On or Off soft-key. Changing the FCW status to "...

Owner Manual
Page 228
... such as overhead 6. the system to the "Near" setting, allows right side of the Uconnect® system. objects, ground reflections, objects not in Follow these steps to set the FCW Sensitivity and Active front of you when you are farther away and it applies limited braking. To Change The FCW Sensitivity...
... such as overhead 6. the system to the "Near" setting, allows right side of the Uconnect® system. objects, ground reflections, objects not in Follow these steps to set the FCW Sensitivity and Active front of you when you are farther away and it applies limited braking. To Change The FCW Sensitivity...

Owner Manual
Page 247
Return to the garage door opener/device motor. 3 This can repeat each step for each time). attached to the vehicle and press the programmed HomeLink® button twice (holding the button for two seconds) to from slow to ... rapidly after the LEARN button has been pressed. DO NOT usually be a light that blinks when the garage door opener/device is erase the channels. step after HomeLink® has received the frequency signal from the HomeLink® button you want to rapid. Firmly press and release the "LEARN" or "TRAINING...
Return to the garage door opener/device motor. 3 This can repeat each step for each time). attached to the vehicle and press the programmed HomeLink® button twice (holding the button for two seconds) to from slow to ... rapidly after the LEARN button has been pressed. DO NOT usually be a light that blinks when the garage door opener/device is erase the channels. step after HomeLink® has received the frequency signal from the HomeLink® button you want to rapid. Firmly press and release the "LEARN" or "TRAINING...

Owner Manual
Page 248
... been previously trained, gram while keeping the HomeLink® indicator light in (3 to 8 cm) away from slow to flash after HomeLink® has received the steps. Simultaneously press and hold the programmed HomeLink® button before 1995. HomeLink® indicator will flash slowly ming A Rolling Code...
... been previously trained, gram while keeping the HomeLink® indicator light in (3 to 8 cm) away from slow to flash after HomeLink® has received the steps. Simultaneously press and hold the programmed HomeLink® button before 1995. HomeLink® indicator will flash slowly ming A Rolling Code...

Owner Manual
Page 249
...reprogram a channel that require the transmitter signals to time-out (or quit) after several seconds of the garage ming A Non-Rolling Code" step 2 and follow all door or gate motor. Cycle the ignition to this 2. Similar to the ON/RUN position. Without releasing the button proceed...are designed to the indicator light begins to pick up the signal during the cycling 3. to flash after several seconds of transfollow these steps: mission - Cycle the ignition to prevent possible overheating of transmission. DO NOT For programming transmitters in the same manner. UNDERSTANDING THE ...
...reprogram a channel that require the transmitter signals to time-out (or quit) after several seconds of the garage ming A Non-Rolling Code" step 2 and follow all door or gate motor. Cycle the ignition to this 2. Similar to the ON/RUN position. Without releasing the button proceed...are designed to the indicator light begins to pick up the signal during the cycling 3. to flash after several seconds of transfollow these steps: mission - Cycle the ignition to prevent possible overheating of transmission. DO NOT For programming transmitters in the same manner. UNDERSTANDING THE ...

Owner Manual
Page 250
...may take up to 30 seconds or longer in (3 to 8 cm) away from the HomeLink® button you wish to change flash follow these steps: rates. Press and hold the desired HomeLink® button until HomeLink® has If you are programming. 2. Continue to press and hold the ...® indicator light in at this time. programming, plug it is pressed. • To program the two remaining HomeLink® buttons, repeat each step for each remaining button. The indi- and observe the indicator light. • If the indicator light stays on constantly, programming is complete and the...
...may take up to 30 seconds or longer in (3 to 8 cm) away from the HomeLink® button you wish to change flash follow these steps: rates. Press and hold the desired HomeLink® button until HomeLink® has If you are programming. 2. Continue to press and hold the ...® indicator light in at this time. programming, plug it is pressed. • To program the two remaining HomeLink® buttons, repeat each step for each remaining button. The indi- and observe the indicator light. • If the indicator light stays on constantly, programming is complete and the...

Owner Manual
Page 251
... two outside buttons for information or assistance. Without releasing the button proceed with The HomeLink® Universal Transceiver is disabled when "Canadian/Gate Operator Programming" step 2 and the Vehicle Security Alarm is advised to erase all remaining...
... two outside buttons for information or assistance. Without releasing the button proceed with The HomeLink® Universal Transceiver is disabled when "Canadian/Gate Operator Programming" step 2 and the Vehicle Security Alarm is advised to erase all remaining...

Owner Manual
Page 364
... the disc is • Touch the OK soft-key to begin playing the Blu-ray™ inserted into Blu-ray™ Disc Player follow these steps: Disc on the side of each seat.
... the disc is • Touch the OK soft-key to begin playing the Blu-ray™ inserted into Blu-ray™ Disc Player follow these steps: Disc on the side of each seat.

Owner Manual
Page 409
... will switch to the • Press the ENGINE START/STOP button a third time to OFF position. To change the ignition positions without starting at these steps: • Starting with the ignition in display "ON/RUN"), PARK, the system will automatically time out after 30 minutes of The ENGINE START/STOP button...
... will switch to the • Press the ENGINE START/STOP button a third time to OFF position. To change the ignition positions without starting at these steps: • Starting with the ignition in display "ON/RUN"), PARK, the system will automatically time out after 30 minutes of The ENGINE START/STOP button...

Owner Manual
Page 421
... be reset to NEUTRAL. may not re-engage if the engine is monitored electronically for location (preferably, at all forward gears by performing the following steps: NOTE: In cases where the instrument cluster message indicates the transmission may not re-engage after enTransmission Limp Home Mode gine shutdown, perform this mode...
... be reset to NEUTRAL. may not re-engage if the engine is monitored electronically for location (preferably, at all forward gears by performing the following steps: NOTE: In cases where the instrument cluster message indicates the transmission may not re-engage after enTransmission Limp Home Mode gine shutdown, perform this mode...