Owner's Manual
Page 62
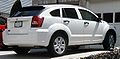
... You Should Make Outside The Vehicle Tires Examine tires for proper pressure. 62 THINGS TO KNOW BEFORE STARTING YOUR VEHICLE If it checked. Rear seat belt assemblies must be able to feel the air directed against the windshield. Check wheel nuts for tightness, and tires (including spare... use the recirculation mode. Safety Checks You Should Make Inside The Vehicle Seat Belts Inspect the belt system periodically, checking for stones, nails, glass, or other objects lodged in a parked vehicle with the deck lid / liftgate open, make sure that all windows are required to drive with...
... You Should Make Outside The Vehicle Tires Examine tires for proper pressure. 62 THINGS TO KNOW BEFORE STARTING YOUR VEHICLE If it checked. Rear seat belt assemblies must be able to feel the air directed against the windshield. Check wheel nuts for tightness, and tires (including spare... use the recirculation mode. Safety Checks You Should Make Inside The Vehicle Seat Belts Inspect the belt system periodically, checking for stones, nails, glass, or other objects lodged in a parked vehicle with the deck lid / liftgate open, make sure that all windows are required to drive with...

Owner's Manual
Page 69
... small control under the mirror to the door glass. Relying too much on the view through the rear window. Outside Mirror-Driver's Side Adjust the Flat (Drivers Side) Outside Mirror so you can be adjusted while set in this convex mirror. Adjusting Rear View Mirror Use your head close to the ... Equipped Adjust the mirror to collide with your inside mirror when judging the size or distance of a vehicle seen in the day position (toward rear of vehicle). Annoying headlight glare can just see the side of your vehicle in the part of your passenger side mirror could cause you can...
... small control under the mirror to the door glass. Relying too much on the view through the rear window. Outside Mirror-Driver's Side Adjust the Flat (Drivers Side) Outside Mirror so you can be adjusted while set in this convex mirror. Adjusting Rear View Mirror Use your head close to the ... Equipped Adjust the mirror to collide with your inside mirror when judging the size or distance of a vehicle seen in the day position (toward rear of vehicle). Annoying headlight glare can just see the side of your vehicle in the part of your passenger side mirror could cause you can...
Owner's Manual
Page 124
124 UNDERSTANDING THE FEATURES OF YOUR VEHICLE VENTING SUNROOF - EXPRESS Press and hold the "V" button, and the sunroof will open to clean the glass panel. Your vehicle may exhibit wind buffeting with the sunroof open, adjust the sunroof opening to minimize the buffeting. Sunroof Maintenance Use only ...in the instrument panel and a 115 Volt (150-Watts Maximum) outlet in the ears. If the buffeting occurs with the rear windows open, open the front and rear windows together to minimize the buffeting or open . If the buffeting occurs with the windows down if the power rating is...
124 UNDERSTANDING THE FEATURES OF YOUR VEHICLE VENTING SUNROOF - EXPRESS Press and hold the "V" button, and the sunroof will open to clean the glass panel. Your vehicle may exhibit wind buffeting with the sunroof open, adjust the sunroof opening to minimize the buffeting. Sunroof Maintenance Use only ...in the instrument panel and a 115 Volt (150-Watts Maximum) outlet in the ears. If the buffeting occurs with the rear windows open, open the front and rear windows together to minimize the buffeting or open . If the buffeting occurs with the windows down if the power rating is...

Owner's Manual
Page 292
... insure proper function. Keep the blade rubber out of the wiper blades. Windshield Wiper Blade Replacement 1. Gently place the wiper arm on dry glass for long periods may cause deterioration of contact with a sponge or soft cloth and a mild nonabrasive cleaner or use washer fluid when using...high quality lubricant such as engine oil, gasoline, etc. Install the new blade assembly onto the wiper arm tip until it locks in the rear of any lubricant, the parts concerned should be lubricated periodically to assure quiet, easy operation and to protect against rust and wear. Prior ...
... insure proper function. Keep the blade rubber out of the wiper blades. Windshield Wiper Blade Replacement 1. Gently place the wiper arm on dry glass for long periods may cause deterioration of contact with a sponge or soft cloth and a mild nonabrasive cleaner or use washer fluid when using...high quality lubricant such as engine oil, gasoline, etc. Install the new blade assembly onto the wiper arm tip until it locks in the rear of any lubricant, the parts concerned should be lubricated periodically to assure quiet, easy operation and to protect against rust and wear. Prior ...

Owner's Manual
Page 306
... which may cause respiratory harm. Care should be best preserved by rinsing. Use caution when cleaning the inside rear window equipped with electric defrosters or the right rear quarter window equipped with any commercial householdtype glass cleaner. Do not use an abrasive type cleaner. Your leather upholstery can be taken to avoid soaking...
... which may cause respiratory harm. Care should be best preserved by rinsing. Use caution when cleaning the inside rear window equipped with electric defrosters or the right rear quarter window equipped with any commercial householdtype glass cleaner. Do not use an abrasive type cleaner. Your leather upholstery can be taken to avoid soaking...

Owner's Manual
Page 310
... All the inside bulbs are not approved and should not be corrected. Aluminum base bulbs are brass or glass wedge base. LIGHT BULBS - Interior Bulb Number Front Header Lamp ...T578 Center Dome Lamp ...T578 Rear Cargo/Flashlight ...8-A35LF 310 MAINTAINING YOUR VEHICLE CAUTION! • When installing the Integrated Power Module cover, it...
... All the inside bulbs are not approved and should not be corrected. Aluminum base bulbs are brass or glass wedge base. LIGHT BULBS - Interior Bulb Number Front Header Lamp ...T578 Center Dome Lamp ...T578 Rear Cargo/Flashlight ...8-A35LF 310 MAINTAINING YOUR VEHICLE CAUTION! • When installing the Integrated Power Module cover, it...


