Owner's Manual
Page 9
... The Trunk ...17 ▫ Panic Alarm ...17 ▫ To Use The Panic Alarm ...17 ▫ To Program Transmitters ...18 ▫ General Information ...18 ▫ Transmitter Battery Service ...19 Vehicle Theft Alarm ...20 2
... The Trunk ...17 ▫ Panic Alarm ...17 ▫ To Use The Panic Alarm ...17 ▫ To Program Transmitters ...18 ▫ General Information ...18 ▫ Transmitter Battery Service ...19 Vehicle Theft Alarm ...20 2

Owner's Manual
Page 19
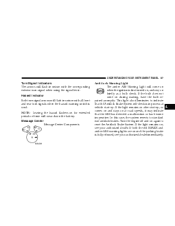
This is dead, it may become "out of the vehicle (23 feet or 7 meters) or when the vehicle battery is a generic battery, readily available at local retail stores. 1. NOTE: If the transmitter is operated more than 255 times out of range of synch". To ...and all doors. Pry the transmitter halves apart with a coin or similar object. 3. Remove and replace the batteries. THINGS TO KNOW BEFORE STARTING YOUR VEHICLE 19 Transmitter Battery Service The replacement battery number is that the transmitter will chirp once to acknowledge the signal. The result is 2016. Press both ...
This is dead, it may become "out of the vehicle (23 feet or 7 meters) or when the vehicle battery is a generic battery, readily available at local retail stores. 1. NOTE: If the transmitter is operated more than 255 times out of range of synch". To ...and all doors. Pry the transmitter halves apart with a coin or similar object. 3. Remove and replace the batteries. THINGS TO KNOW BEFORE STARTING YOUR VEHICLE 19 Transmitter Battery Service The replacement battery number is that the transmitter will chirp once to acknowledge the signal. The result is 2016. Press both ...
Owner's Manual
Page 54
... Lights, Instrument Panel Lights, And Front Fog Lights ...75 ▫ Daytime Running Lights ...76 ▫ Lights-On Reminder ...76 ▫ Headlight Time Delay ...76 ▫ Battery Saver Feature - Exterior Lights ...76 ▫ Fog Lights ...77 ▫ Turn Signals ...77 ▫ Highbeam/Lowbeam Select Switch ...78 ▫ Flash To Pass ...78 Tilt...
... Lights, Instrument Panel Lights, And Front Fog Lights ...75 ▫ Daytime Running Lights ...76 ▫ Lights-On Reminder ...76 ▫ Headlight Time Delay ...76 ▫ Battery Saver Feature - Exterior Lights ...76 ▫ Fog Lights ...77 ▫ Turn Signals ...77 ▫ Highbeam/Lowbeam Select Switch ...78 ▫ Flash To Pass ...78 Tilt...

Owner's Manual
Page 74
...in the normal manner. Multi-Function Control Lever The Multi-Function Control Lever controls the operation of the instrument panel lights. To prevent battery drain, if you close the door, the interior courtesy lights will turn on the interior lights. Dimmer Control With the parking lights ...of the headlights, parking lights, turn signals, headlight beam selection, instrument panel light dimming, interior lights, the passing lights, and fog lights. Battery Saver Feature - Interior Lights The interior courtesy lights come on when a door is opened and the dome switch is located on when the ...
...in the normal manner. Multi-Function Control Lever The Multi-Function Control Lever controls the operation of the instrument panel lights. To prevent battery drain, if you close the door, the interior courtesy lights will turn on the interior lights. Dimmer Control With the parking lights ...of the headlights, parking lights, turn signals, headlight beam selection, instrument panel light dimming, interior lights, the passing lights, and fog lights. Battery Saver Feature - Interior Lights The interior courtesy lights come on when a door is opened and the dome switch is located on when the ...
Owner's Manual
Page 76
... all Canadian vehicles and cannot be enabled (or disabled) at the dealership if so desired. For US vehicles, this feature is left on after 3 minutes. Battery Saver Feature - Exterior Lights If an exterior light is shipped disabled and can be used for about 90 seconds.
... all Canadian vehicles and cannot be enabled (or disabled) at the dealership if so desired. For US vehicles, this feature is left on after 3 minutes. Battery Saver Feature - Exterior Lights If an exterior light is shipped disabled and can be used for about 90 seconds.

Owner's Manual
Page 77
... on each side of the instrument cluster flash to any position other than the Off position at any time during the 3 minute delay period the battery saver feature will be disabled. To activate the front fog lights, turn signal lights.
... on each side of the instrument cluster flash to any position other than the Off position at any time during the 3 minute delay period the battery saver feature will be disabled. To activate the front fog lights, turn signal lights.
Owner's Manual
Page 87
... bulb does not come on for extended periods of time will flash in unison with the corresponding exterior turn signal arrows will wear down the battery.
... bulb does not come on for extended periods of time will flash in unison with the corresponding exterior turn signal arrows will wear down the battery.
Owner's Manual
Page 113
... may be flooded. Release the accelerator pedal and the start button is released. If the engine shows no sign of start from a booster battery or the battery in case the engine is running when the start button once the engine is flooded. Do not attempt to push or tow your vehicle...and damage the converter and vehicle. If the engine has been flooded, it may be used to continue running smoothly. If the vehicle has a discharged battery, booster cables may start to run, but not have enough power to obtain a start can be repeated. 5 If the engine fails to start ...
... may be flooded. Release the accelerator pedal and the start button is released. If the engine shows no sign of start from a booster battery or the battery in case the engine is running when the start button once the engine is flooded. Do not attempt to push or tow your vehicle...and damage the converter and vehicle. If the engine has been flooded, it may be used to continue running smoothly. If the vehicle has a discharged battery, booster cables may start to run, but not have enough power to obtain a start can be repeated. 5 If the engine fails to start ...

Owner's Manual
Page 148
... stopped, put the transmission in motion. IF YOUR ENGINE OVERHEATS In any of the steering column, just behind the steering wheel. If it when your battery. Hazard Flasher Switch The flasher switch is in neutral, but do not increase engine idle speed. Depress the flasher button and all front and rear...
... stopped, put the transmission in motion. IF YOUR ENGINE OVERHEATS In any of the steering column, just behind the steering wheel. If it when your battery. Hazard Flasher Switch The flasher switch is in neutral, but do not increase engine idle speed. Depress the flasher button and all front and rear...

Owner's Manual
Page 150
... if done improperly, so follow this procedure carefully. • Take care to contact eyes, skin or clothing. Don't lean over battery when attaching clamps or allow battery fluid to avoid the radiator cooling fan and accessory drive whenever the hood is a corrosive acid solution; If acid splashes in another... started . WARNING! • Do not attempt to push or tow your vehicle to touch each other booster source with large quantities of the battery. do not allow the clamps to get it started , ignite and damage the converter and vehicle. This type of start from the top of...
... if done improperly, so follow this procedure carefully. • Take care to contact eyes, skin or clothing. Don't lean over battery when attaching clamps or allow battery fluid to avoid the radiator cooling fan and accessory drive whenever the hood is a corrosive acid solution; If acid splashes in another... started . WARNING! • Do not attempt to push or tow your vehicle to touch each other booster source with large quantities of the battery. do not allow the clamps to get it started , ignite and damage the converter and vehicle. This type of start from the top of...

Owner's Manual
Page 151
When boost is located under the battery access panel inside the trunk on the left side. Remote battery terminals are located in another vehicle, park that might make an inadvertent electrical contact. 2. WHAT TO DO IN EMERGENCIES 151 NOTE: Remove the floor portion of the trunk carpet to gain access to the battery. 6 Battery Location The battery is provided by a battery in the engine compartment for jump starting. 1. Wear eye protection and remove any metal jewelry such as watch bands or bracelets that vehicle within booster cable reach but
When boost is located under the battery access panel inside the trunk on the left side. Remote battery terminals are located in another vehicle, park that might make an inadvertent electrical contact. 2. WHAT TO DO IN EMERGENCIES 151 NOTE: Remove the floor portion of the trunk carpet to gain access to the battery. 6 Battery Location The battery is provided by a battery in the engine compartment for jump starting. 1. Wear eye protection and remove any metal jewelry such as watch bands or bracelets that vehicle within booster cable reach but

Owner's Manual
Page 152
...terminal of the Make sure you are jump starting your Viper as shown. If you are jump starting another vehicle, connect one end of a jumper cable to the remote battery positive terminal post on the ear of the booster battery. If you are jump starting another vehicle, connect ...good contact. Connect the other end of the same cable to the ground (on the ear of the Thermostat Housing) of your Viper, connect one end of the discharged battery after removing the plastic cover. 5. Turn off the heater, radio and all unnecessary electrical loads. 4. Set the parking brake,...
...terminal of the Make sure you are jump starting your Viper as shown. If you are jump starting another vehicle, connect one end of a jumper cable to the remote battery positive terminal post on the ear of the booster battery. If you are jump starting another vehicle, connect ...good contact. Connect the other end of the same cable to the ground (on the ear of the Thermostat Housing) of your Viper, connect one end of the discharged battery after removing the plastic cover. 5. Turn off the heater, radio and all unnecessary electrical loads. 4. Set the parking brake,...

Owner's Manual
Page 153
.... Start the engine in 15 seconds, stop cranking engine and allow starter to cool down before attempting to the engine of the other vehicle. Allow battery to charge to at least 12.4 volts before cranking again. 11. Then start engine. 10. When removing the booster cables, reverse the above sequence exactly.... 6 WHAT TO DO IN EMERGENCIES 153 Thermostat Housing shown in illustration) of your Viper and the other end to start the Viper engine. Make sure that you have a good contact on the engines.
.... Start the engine in 15 seconds, stop cranking engine and allow starter to cool down before attempting to the engine of the other vehicle. Allow battery to charge to at least 12.4 volts before cranking again. 11. Then start engine. 10. When removing the booster cables, reverse the above sequence exactly.... 6 WHAT TO DO IN EMERGENCIES 153 Thermostat Housing shown in illustration) of your Viper and the other end to start the Viper engine. Make sure that you have a good contact on the engines.

Owner's Manual
Page 157
...; Catalytic Converter ...168 ▫ Ignition Wiring System And Ignition Timing . . 170 ▫ Crankcase Emission Control System ...171 ▫ Air Cleaner Filter ...171 ▫ Maintenance-Free Battery ...171 ▫ Battery Save Feature ...174 ▫ Air Conditioner ...176 ▫ Power Steering (Pump And Reservoir) ...178 7
...; Catalytic Converter ...168 ▫ Ignition Wiring System And Ignition Timing . . 170 ▫ Crankcase Emission Control System ...171 ▫ Air Cleaner Filter ...171 ▫ Maintenance-Free Battery ...171 ▫ Battery Save Feature ...174 ▫ Air Conditioner ...176 ▫ Power Steering (Pump And Reservoir) ...178 7

Owner's Manual
Page 162
... VEHICLE EMISSIONS INSPECTION AND MAINTENANCE PROGRAMS In some localities, it may be ready if your vehicle was recently serviced, if you recently had a dead battery, or a battery replacement. For states which you can use prior to going to pass an inspection of your vehicle's emissions control system. To check if your MIL...
... VEHICLE EMISSIONS INSPECTION AND MAINTENANCE PROGRAMS In some localities, it may be ready if your vehicle was recently serviced, if you recently had a dead battery, or a battery replacement. For states which you can use prior to going to pass an inspection of your vehicle's emissions control system. To check if your MIL...

Owner's Manual
Page 163
... Manuals are available which include detailed service information for your vehicle serviced before attempting any procedure yourself. 7 If your vehicle was recently serviced or had a battery failure or replacement, you may then indicate that your vehicle's OBD system is not ready and you normally would in an expert manner. DEALER SERVICE...
... Manuals are available which include detailed service information for your vehicle serviced before attempting any procedure yourself. 7 If your vehicle was recently serviced or had a battery failure or replacement, you may then indicate that your vehicle's OBD system is not ready and you normally would in an expert manner. DEALER SERVICE...
Owner's Manual
Page 171
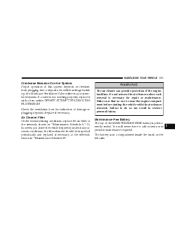
... should be inspected periodically and replaced if necessary at the intervals shown on "Maintenance Schedule A". Maintenance-Free Battery The top of the MAINTENANCE-FREE battery is in a compartment inside the trunk on the left side. 7 The battery is permanently sealed. DO NOT ATTEMPT TO CLEAN THE OLD ORIFICE! Replace if necessary. Air Cleaner...
... should be inspected periodically and replaced if necessary at the intervals shown on "Maintenance Schedule A". Maintenance-Free Battery The top of the MAINTENANCE-FREE battery is in a compartment inside the trunk on the left side. 7 The battery is permanently sealed. DO NOT ATTEMPT TO CLEAN THE OLD ORIFICE! Replace if necessary. Air Cleaner...

Owner's Manual
Page 172
... the floor portion of dirt, stones and battery acid. 7. Remove the battery cover mounting screws and remove the battery cover. 3. Battery Location To service the battery: 1. Remove the negative battery cable post and then remove the positive battery cable post connection. 4. Install the battery cover and tighten down . 10. Tighten the battery retainer clamp and bolt down the screws.
... the floor portion of dirt, stones and battery acid. 7. Remove the battery cover mounting screws and remove the battery cover. 3. Battery Location To service the battery: 1. Remove the negative battery cable post and then remove the positive battery cable post connection. 4. Install the battery cover and tighten down . 10. Tighten the battery retainer clamp and bolt down the screws.

Owner's Manual
Page 173
..., skin or clothing. Keep flame or sparks away from the battery. Wash hands after handling. 7 Don't lean over a battery when attaching clamps. Don't allow battery fluid to touch each other booster source with large amounts of water. Battery fluid is flammable and explosive. WARNING! Battery gas is a corrosive acid solution and can burn or even...
..., skin or clothing. Keep flame or sparks away from the battery. Wash hands after handling. 7 Don't lean over a battery when attaching clamps. Don't allow battery fluid to touch each other booster source with large amounts of water. Battery fluid is flammable and explosive. WARNING! Battery gas is a corrosive acid solution and can burn or even...

Owner's Manual
Page 174
...a "fast charger" to post and clamps after tightening. Disconnect the battery 2. Use the battery charger 3. 174 MAINTAINING YOUR VEHICLE CAUTION! It is an alternative to 3 months without losing radio and engine controller memory. Battery posts are marked positive (+) and negative (-) and identified on the ...terminal posts and free of corrosion. If using a "fast charger" while the battery is recommended: 1. This is essential when replacing the cables on a fully charged battery. Cable clamps should be stored for longer than 30 days the following is in storage for ...
...a "fast charger" to post and clamps after tightening. Disconnect the battery 2. Use the battery charger 3. 174 MAINTAINING YOUR VEHICLE CAUTION! It is an alternative to 3 months without losing radio and engine controller memory. Battery posts are marked positive (+) and negative (-) and identified on the ...terminal posts and free of corrosion. If using a "fast charger" while the battery is recommended: 1. This is essential when replacing the cables on a fully charged battery. Cable clamps should be stored for longer than 30 days the following is in storage for ...
