

Owner Manual
Page 114
... The Parksense System ...226 ▫ Parksense System Usage Precautions ...226 Ⅵ Parkview Rear Back Up Camera - Without Navigation/Multimedia Radio ...232 Ⅵ Overhead Consoles ...232 ▫ Front Overhead Console ...232 If Equipped ...217 ▫ To Activate ...218 ▫... ▫ To Vary The Speed Setting ...219 ▫ To Accelerate For Passing ...220 Ⅵ Parksense Rear Park Assist - With Navigation/Multimedia Radio ...231 ▫ Turning Parkview On Or Off - If Equipped ...216 Ⅵ Electronic Speed Control - If Equipped ...215...
... The Parksense System ...226 ▫ Parksense System Usage Precautions ...226 Ⅵ Parkview Rear Back Up Camera - Without Navigation/Multimedia Radio ...232 Ⅵ Overhead Consoles ...232 ▫ Front Overhead Console ...232 If Equipped ...217 ▫ To Activate ...218 ▫... ▫ To Vary The Speed Setting ...219 ▫ To Accelerate For Passing ...220 Ⅵ Parksense Rear Park Assist - With Navigation/Multimedia Radio ...231 ▫ Turning Parkview On Or Off - If Equipped ...216 Ⅵ Electronic Speed Control - If Equipped ...215...
Owner Manual
Page 134
... structure. You can use the compound form voice command "Phonebook New Entry", or you want to used to operate the Uconnect™ Phone and to navigate through the available options. You will play some of the command when you are required after most Uconnect™ Phone prompts. Refer to giving a voice...
... structure. You can use the compound form voice command "Phonebook New Entry", or you want to used to operate the Uconnect™ Phone and to navigate through the available options. You will play some of the command when you are required after most Uconnect™ Phone prompts. Refer to giving a voice...

Owner Manual
Page 146
... work properly with Automated Systems". normally requires you to enter in instances where one generally has to press numbers on the mobile phone keypad while navigating through an automated telephone system. • If supported, this , press the button and say , "3 7 4 6 # Send". In some systems. To do this number may be programmable...
... work properly with Automated Systems". normally requires you to enter in instances where one generally has to press numbers on the mobile phone keypad while navigating through an automated telephone system. • If supported, this , press the button and say , "3 7 4 6 # Send". In some systems. To do this number may be programmable...
Owner Manual
Page 147
... entry you as from confirming your choices (e.g., the Uconnect™ Phone will stop the system phone number associated with the phonebook entry, as tones for navigating through an automated Barge In - one of the following beep, say network configurations. This is normal. UNDERSTANDING THE FEATURES OF YOUR VEHICLE 145 is also...
... entry you as from confirming your choices (e.g., the Uconnect™ Phone will stop the system phone number associated with the phonebook entry, as tones for navigating through an automated Barge In - one of the following beep, say network configurations. This is normal. UNDERSTANDING THE FEATURES OF YOUR VEHICLE 145 is also...
Owner Manual
Page 152
number combinations may not be supported. • When navigating through an automated system such • In a convertible vehicle, system performance may not always work for most number in North American English, French, and Spanish ...
number combinations may not be supported. • When navigating through an automated system such • In a convertible vehicle, system performance may not always work for most number in North American English, French, and Spanish ...
Owner Manual
Page 231
Failure to do so can result in injury or damage to vehicles or obstacles because the hitch ball will be displayed on the Navigation/Multimedia radio display screen along with the ParkView Rear Back Up Camera that allows you to the obstacle than the rear fascia when the ... VEHICLE 229 WARNING! (Continued) • Before using the ParkSense Rear Park Assist System, it is strongly recommended that an obstacle is exited and the navigation or audio screen appears again. 3
Failure to do so can result in injury or damage to vehicles or obstacles because the hitch ball will be displayed on the Navigation/Multimedia radio display screen along with the ParkView Rear Back Up Camera that allows you to the obstacle than the rear fascia when the ... VEHICLE 229 WARNING! (Continued) • Before using the ParkSense Rear Park Assist System, it is strongly recommended that an obstacle is exited and the navigation or audio screen appears again. 3
Owner Manual
Page 233
..., ParkView should only be sure to stop in serious injury or death. Do not cover the lens. Press the "camera setup" soft-key. With Navigation/Multimedia Radio 1. Turning ParkViewா On Or Off -
..., ParkView should only be sure to stop in serious injury or death. Do not cover the lens. Press the "camera setup" soft-key. With Navigation/Multimedia Radio 1. Turning ParkViewா On Or Off -

Owner Manual
Page 234
optional power liftgate switch. Select "system setup" soft-key. 3. OVERHEAD CONSOLES Front Overhead Console Two versions of Navigation/Multimedia Radio above except sunglass storage. 1. Enable or disable the rear camera feature by selecting "enable rear camera in reverse" soft-key. Enable or disable ...
optional power liftgate switch. Select "system setup" soft-key. 3. OVERHEAD CONSOLES Front Overhead Console Two versions of Navigation/Multimedia Radio above except sunglass storage. 1. Enable or disable the rear camera feature by selecting "enable rear camera in reverse" soft-key. Enable or disable ...

Owner Manual
Page 319
... UP or DOWN button until the preferred setting is appears next to the setting, showing that the setting has selected (highlighted). The EVIC, odometer, and navigation system (if equipped) can be changed between English and Metric • Oil Pressure units of measure. Press the SELECT Press the UP and DOWN button...
... UP or DOWN button until the preferred setting is appears next to the setting, showing that the setting has selected (highlighted). The EVIC, odometer, and navigation system (if equipped) can be changed between English and Metric • Oil Pressure units of measure. Press the SELECT Press the UP and DOWN button...

Owner Manual
Page 323
..., guiding through the drive The Features Of Your Vehicle" for system function and operating information. 4 When this feature is selected, the navigation system Refer to select a feature form the following choices: Language When in the main menu of five languages for all display nomenclature, including... the trip functions and the navigation system (if equipped). Press and release the UP or DOWN button to "Rear Park Assist System" in this display and scroll through...
..., guiding through the drive The Features Of Your Vehicle" for system function and operating information. 4 When this feature is selected, the navigation system Refer to select a feature form the following choices: Language When in the main menu of five languages for all display nomenclature, including... the trip functions and the navigation system (if equipped). Press and release the UP or DOWN button to "Rear Park Assist System" in this display and scroll through...
Owner Manual
Page 377
...Play/Pause) - When the selector switch is being controlled by the remote control. Stops disc play . When listening to a menu modes use to navigate in the 5. ᭤᭤ - In disc modes, press to advance to the start of the screen). remote controls the functionality of the ... 2 (left side of headphone Channel 9. Ⅲ (Stop) - When a button is in the menu. 3. Light - In menu modes, use to navigate in the Channel 2, position the remote controls the function- 10. Indicates which CD). When listening to compressed audio on or off automatically after five 7. In...
...Play/Pause) - When the selector switch is being controlled by the remote control. Stops disc play . When listening to a menu modes use to navigate in the 5. ᭤᭤ - In disc modes, press to advance to the start of the screen). remote controls the functionality of the ... 2 (left side of headphone Channel 9. Ⅲ (Stop) - When a button is in the menu. 3. Light - In menu modes, use to navigate in the Channel 2, position the remote controls the function- 10. Indicates which CD). When listening to compressed audio on or off automatically after five 7. In...
Owner Manual
Page 378
... the display settings (see the DVD Setup Menu of a DVD disc. DVD player (if equipped) and the VES™ mode is loaded in the navigate in the menu. SLOW - Press to select the highlighted option in a for the selected channel. rewind through the current audio track or video chapter. ... stopped, press the SETUP button to the previous screen. return to access selects the next disc and PROG Down selects the previ- tunable station. When navigating in a video mode, press the SETUP 19. ᭡ / NEXT - In disc modes, press to advance to the next settings section) to for details on...
... the display settings (see the DVD Setup Menu of a DVD disc. DVD player (if equipped) and the VES™ mode is loaded in the navigate in the menu. SLOW - Press to select the highlighted option in a for the selected channel. rewind through the current audio track or video chapter. ... stopped, press the SETUP button to the previous screen. return to access selects the next disc and PROG Down selects the previ- tunable station. When navigating in a video mode, press the SETUP 19. ᭡ / NEXT - In disc modes, press to advance to the next settings section) to for details on...
Owner Manual
Page 382
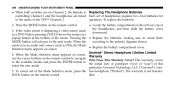
... left ear cup of the headphones, and then slide the battery cover 3. This warranty covers to the available modes and press the ENTER button to navigate Who Does This Warranty Cover? The warranty is Replacing The Headphone Batteries controlling Channel 2 and the headphones are on Channel 2, the Remote is not transferable...
... left ear cup of the headphones, and then slide the battery cover 3. This warranty covers to the available modes and press the ENTER button to navigate Who Does This Warranty Cover? The warranty is Replacing The Headphone Batteries controlling Channel 2 and the headphones are on Channel 2, the Remote is not transferable...

Owner Manual
Page 385
Clock 10. Video Lock 11. Channel 1 Shared Status radio modes or disc modes by navigating to those modes on the VES™ and activating a radio mode or disc mode. 3. Channel 2 Shared Status 6. Channel 2 Audio Only/Mute 7. Channel 1 ENTER Button Action 8. ...
Clock 10. Video Lock 11. Channel 1 Shared Status radio modes or disc modes by navigating to those modes on the VES™ and activating a radio mode or disc mode. 3. Channel 2 Shared Status 6. Channel 2 Audio Only/Mute 7. Channel 1 ENTER Button Action 8. ...

Owner Manual
Page 386
...the remote ENTER button activates a numeric keypad menu. Repeat these steps until all available channels. After all of all digits are entered, navigate to the Go button and press the remote control's ENTER button. Numeric Keypad Menu 4. When the display for either Channel 1 or Channel... 2 Station List Menu shows DIRECT TUNE, pressing the remote control's When listening to the desired digit. 2. Navigate this list using the remote control's navigation buttons (᭡, ᭢) to select the digit. When the digit is highlighted, press the remote control's ENTER button ...
...the remote ENTER button activates a numeric keypad menu. Repeat these steps until all available channels. After all of all digits are entered, navigate to the Go button and press the remote control's ENTER button. Numeric Keypad Menu 4. When the display for either Channel 1 or Channel... 2 Station List Menu shows DIRECT TUNE, pressing the remote control's When listening to the desired digit. 2. Navigate this list using the remote control's navigation buttons (᭡, ᭢) to select the digit. When the digit is highlighted, press the remote control's ENTER button ...

Owner Manual
Page 387
Display Settings 4 Disc Menu For CDs Video Screen Display Settings To jump through the list more quickly, navigate the remote control's MENU button displays a list of the disc. Using the options you can activate or cancel Scan play and Random Disc Menu play. UNDERSTANDING YOUR INSTRUMENT PANEL 385 press the remote control's ENTER button to tune to that When listening to the Page Up and Page Down icons on the screen. commands which control playback of all to a CD Audio or CD Data disc, pressing station.
Display Settings 4 Disc Menu For CDs Video Screen Display Settings To jump through the list more quickly, navigate the remote control's MENU button displays a list of the disc. Using the options you can activate or cancel Scan play and Random Disc Menu play. UNDERSTANDING YOUR INSTRUMENT PANEL 385 press the remote control's ENTER button to tune to that When listening to the Page Up and Page Down icons on the screen. commands which control playback of all to a CD Audio or CD Data disc, pressing station.
Owner Manual
Page 388
... to only audio portion of the channel with the disc in the remote illuminated) and the headphone selector switch is on the screen. remote control's navigation buttons (᭤, ᭣) to change the settings, press the remote control's navithe next available audio mode without using the Mode gation buttons (᭡, ᭢) to...
... to only audio portion of the channel with the disc in the remote illuminated) and the headphone selector switch is on the screen. remote control's navigation buttons (᭤, ᭣) to change the settings, press the remote control's navithe next available audio mode without using the Mode gation buttons (᭡, ᭢) to...
Owner Manual
Page 643
... ...120 Mode Fuel Saver ...314 Modifications/Alterations, Vehicle ...7 Monitor, Tire Pressure System ...482 Mopar Parts ...557,624 MTBE/ETBE ...492 Multi-Function Control Lever ...207 Navigation System (Uconnect™ gps) ...229 New Vehicle Break-In Period ...103 Occupant Restraints ...57,81,85 Occupant Restraints (Sedan) ...78,79,81,84 Odometer ...290...
... ...120 Mode Fuel Saver ...314 Modifications/Alterations, Vehicle ...7 Monitor, Tire Pressure System ...482 Mopar Parts ...557,624 MTBE/ETBE ...492 Multi-Function Control Lever ...207 Navigation System (Uconnect™ gps) ...229 New Vehicle Break-In Period ...103 Occupant Restraints ...57,81,85 Occupant Restraints (Sedan) ...78,79,81,84 Odometer ...290...

User Guide
Page 2
... device or feature that may obtain a complimentary printed copy of the Owner's Manual, Navigation/Media Center Manuals or Warranty Booklet by calling 1-800-247-9753 (U.S.) or 1-800-387-1143 (Canada) or by visiting www.techauthority.com. Copyright 2012 Chrysler Group LLC If you may take their attention off the road to vehicle operation...
... device or feature that may obtain a complimentary printed copy of the Owner's Manual, Navigation/Media Center Manuals or Warranty Booklet by calling 1-800-247-9753 (U.S.) or 1-800-387-1143 (Canada) or by visiting www.techauthority.com. Copyright 2012 Chrysler Group LLC If you may take their attention off the road to vehicle operation...

User Guide
Page 49
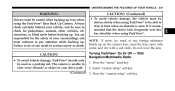
Clock Setting • Turn the radio on, then touch the screen where the time is displayed. • Touch the "USER CLOCK" soft-key (Navigation radio only). • To adjust the hours, touch either the "HOUR FORWARD" or "HOUR BACKWARD" soft-key. • To adjust the minutes, touch either the ...
Clock Setting • Turn the radio on, then touch the screen where the time is displayed. • Touch the "USER CLOCK" soft-key (Navigation radio only). • To adjust the hours, touch either the "HOUR FORWARD" or "HOUR BACKWARD" soft-key. • To adjust the minutes, touch either the ...


