
Owner Manual
Page 233
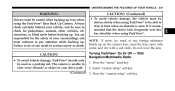
.... 3 CAUTION! • To avoid vehicle damage, ParkView should only be able to do so can result in your drive path. (Continued) 3. Turning ParkViewா On Or Off - Press the "menu" hard-key. 2. You are responsible for pedestrians, animals, other vehicles, obstructions, or blind spots before backing up even when using ParkView...
.... 3 CAUTION! • To avoid vehicle damage, ParkView should only be able to do so can result in your drive path. (Continued) 3. Turning ParkViewா On Or Off - Press the "menu" hard-key. 2. You are responsible for pedestrians, animals, other vehicles, obstructions, or blind spots before backing up even when using ParkView...
Owner Manual
Page 538
.... Always stow the jack parts and the spare tire in the stowage compartment. 13. T-handle and fit the winch T-handle over the drive nut. Rotate the nut to pull the wheel spacer out from under the vehicle. Do not stow the 1. This will allow you to the right ... handle extensions to 11. Place the deflated (flat) tire and compact spare tire cover assembly in the cable to form a deflated tire in a collision or hard stop could endanger the occupants of the vehicle. Have the full- Correct the tire pressure, as required. Reassemble the winch handle extensions to the "Spare...
.... Always stow the jack parts and the spare tire in the stowage compartment. 13. T-handle and fit the winch T-handle over the drive nut. Rotate the nut to pull the wheel spacer out from under the vehicle. Do not stow the 1. This will allow you to the right ... handle extensions to 11. Place the deflated (flat) tire and compact spare tire cover assembly in the cable to form a deflated tire in a collision or hard stop could endanger the occupants of the vehicle. Have the full- Correct the tire pressure, as required. Reassemble the winch handle extensions to the "Spare...

User Guide
Page 49
... soft-keys or the cross-hair on the screen to change Balance and Fade. Equalizer, Balance And Fade Audio Control Menu • Press the "AUDIO" hard-key on the right side of the radio. • Use either the "MINUTE FORWARD" or "MINUTE BACKWARD" soft-key. • To save the new ..." hard-key in an active mode (SAT, CD, AUX, etc.) in order to change mode specific settings. Some of the display using daytime colors. • Select the "Nighttime Colors" soft-key to switch to manual nighttime mode and to adjust the brightness of these radio features should not be used when driving...
... soft-keys or the cross-hair on the screen to change Balance and Fade. Equalizer, Balance And Fade Audio Control Menu • Press the "AUDIO" hard-key on the right side of the radio. • Use either the "MINUTE FORWARD" or "MINUTE BACKWARD" soft-key. • To save the new ..." hard-key in an active mode (SAT, CD, AUX, etc.) in order to change mode specific settings. Some of the display using daytime colors. • Select the "Nighttime Colors" soft-key to switch to manual nighttime mode and to adjust the brightness of these radio features should not be used when driving...

User Guide
Page 52
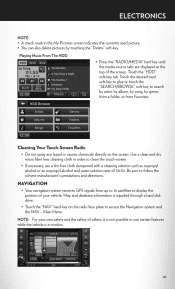
...on the right half of the screen. It functions similar to a CD player, with the exception that the internal HDD can be added to the hard drive by using the HDD mode, you will need to select the folder or title depending on the CD, then press "DONE" to the internal... (e.g. NOTE: • You might need to copy songs and pictures to the audio files on the radio face plate allows you access to the internal hard drive. The pictures can hold more information. ELECTRONICS • The functions of the portable device are controlled using the radio or portable device. NOTE: WMA/MP3...
...on the right half of the screen. It functions similar to a CD player, with the exception that the internal HDD can be added to the hard drive by using the HDD mode, you will need to select the folder or title depending on the CD, then press "DONE" to the internal... (e.g. NOTE: • You might need to copy songs and pictures to the audio files on the radio face plate allows you access to the internal hard drive. The pictures can hold more information. ELECTRONICS • The functions of the portable device are controlled using the radio or portable device. NOTE: WMA/MP3...

User Guide
Page 63
... depending on the right half of the radio screen. • Before using a CD or USB device (e.g. The volume may be added to the hard drive by using the HDD mode, you to copy files to start the process. NOTE: • You might need to copy songs and pictures to ...the audio files on the cover. • Insert a USB device (e.g. Hard Disk Drive (HDD) Operation • The Hard Disk Drive (HDD) mode gives you access to the internal hard drive. NOTE: WMA/MP3 Files and Selective Songs from a CD can be controlled using the device buttons.
... depending on the right half of the radio screen. • Before using a CD or USB device (e.g. The volume may be added to the hard drive by using the HDD mode, you to copy files to start the process. NOTE: • You might need to copy songs and pictures to ...the audio files on the cover. • Insert a USB device (e.g. Hard Disk Drive (HDD) Operation • The Hard Disk Drive (HDD) mode gives you access to the internal hard drive. NOTE: WMA/MP3 Files and Selective Songs from a CD can be controlled using the device buttons.
User Guide
Page 65
...: For your vehicle. Be sure to clean the touch-screen. • If necessary, use certain features while the vehicle is supplied through a hard disk drive. • Touch the "NAV" hard-key on the screen. Touch the desired track soft-key to play or touch the "SEARCH/BROWSE" soft-key to search by artist..., by album, by song, by touching the "Delete" soft-key. Playing Music From The HDD • Press the "RADIO/MEDIA" hard key until the...
...: For your vehicle. Be sure to clean the touch-screen. • If necessary, use certain features while the vehicle is supplied through a hard disk drive. • Touch the "NAV" hard-key on the screen. Touch the desired track soft-key to play or touch the "SEARCH/BROWSE" soft-key to search by artist..., by album, by song, by touching the "Delete" soft-key. Playing Music From The HDD • Press the "RADIO/MEDIA" hard key until the...
User Guide
Page 73
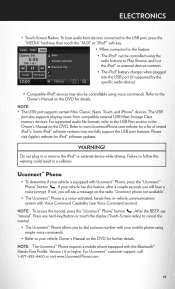
...not plug in a collision. If your vehicle is a voice-activated, hands-free, in the Owner's Manual on the DVD for further details. Press any hard-key/button or touch the display (Touch-Screen radio) to cancel the tutorial. • The Uconnect™ Phone allows you to dial a phone number...DVD. Uconnect™ Phone • To determine if your vehicle has this warning could result in or remove the iPod® or external device while driving. For Uconnect™ customer support, call 1-877-855-8400 or visit www.UconnectPhone.com. 69 If not, you will see Voice Command section). ...
...not plug in a collision. If your vehicle is a voice-activated, hands-free, in the Owner's Manual on the DVD for further details. Press any hard-key/button or touch the display (Touch-Screen radio) to cancel the tutorial. • The Uconnect™ Phone allows you to dial a phone number...DVD. Uconnect™ Phone • To determine if your vehicle has this warning could result in or remove the iPod® or external device while driving. For Uconnect™ customer support, call 1-877-855-8400 or visit www.UconnectPhone.com. 69 If not, you will see Voice Command section). ...
User Guide
Page 77
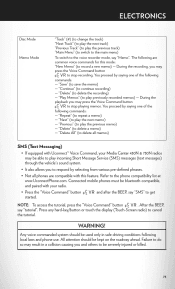
...and others to be bluetooth-compatible, and paired with this mode: "New Memo" (to continue recording) - Failure to do so may result in safe driving conditions following are compatible with your Media Center 430N & 730N radios may be able to play incoming Short Message Service (SMS) messages (text messages) ... to play previously recorded memos) - "Previous" (to respond by saying one of the following commands: - "Play Memos" (to save the memo) - Press any hard-key/button or touch the display (Touch-Screen radio) to repeat a memo) - "Save" (to play the previous memo) -
...and others to be bluetooth-compatible, and paired with this mode: "New Memo" (to continue recording) - Failure to do so may result in safe driving conditions following are compatible with your Media Center 430N & 730N radios may be able to play incoming Short Message Service (SMS) messages (text messages) ... to play previously recorded memos) - "Previous" (to respond by saying one of the following commands: - "Play Memos" (to save the memo) - Press any hard-key/button or touch the display (Touch-Screen radio) to repeat a memo) - "Save" (to play the previous memo) -

User Guide
Page 79
...discs and audio/video modes. • The remote control is inserted into the touch-screen radio follow these steps: • Press the MENU hard-key, then touch the Rear VES™ soft-key. If playback does not begin automatically after the disc is designed to control either the ...other external media devises to the AUX jacks following the color coding for the VES™ jacks. • Using either channel by the disc drive. Use the remote control arrow buttons to scroll through the available modes, and then press ENTER to the Uconnect™ Multimedia - Video Entertainment ...
...discs and audio/video modes. • The remote control is inserted into the touch-screen radio follow these steps: • Press the MENU hard-key, then touch the Rear VES™ soft-key. If playback does not begin automatically after the disc is designed to control either the ...other external media devises to the AUX jacks following the color coding for the VES™ jacks. • Using either channel by the disc drive. Use the remote control arrow buttons to scroll through the available modes, and then press ENTER to the Uconnect™ Multimedia - Video Entertainment ...


