
Owner's Manual
Page 1
2010 Chevrolet Aveo Owner Manual M In Brief ...1-1 Instrument Panel ...1-2 Initial Drive Information ...1-3 Vehicle Features ...1-18 Performance and Maintenance ...1-22 Seats and Restraint System ...2-1 Head Restraints ...2-2 Front Seats ...2-4 Rear Seats ...2-8 Safety ...
2010 Chevrolet Aveo Owner Manual M In Brief ...1-1 Instrument Panel ...1-2 Initial Drive Information ...1-3 Vehicle Features ...1-18 Performance and Maintenance ...1-22 Seats and Restraint System ...2-1 Head Restraints ...2-2 Front Seats ...2-4 Rear Seats ...2-8 Safety ...

Owner's Manual
Page 2
2010 Chevrolet Aveo Owner Manual M Service and Appearance Care ...6-1 Service ...6-4 Fuel ...6-6 Checking Things Under the Hood ...6-11 Headlamp Aiming ...6-43 Bulb Replacement ...6-43 Windshield Wiper Blade Replacement ...6-50 Tires ...6-51 Appearance Care ...6-79 Vehicle Identification ...6-86 Electrical System ...6-86 Capacities and Specifications ...6-93 Maintenance Schedule ...7-1 Maintenance Schedule ...7-2 Customer Assistance Information ...8-1 Customer Assistance and Information ...8-2 Reporting Safety Defects ...8-15 Vehicle Data Recording and Privacy ...8-18 Index ...i-1
2010 Chevrolet Aveo Owner Manual M Service and Appearance Care ...6-1 Service ...6-4 Fuel ...6-6 Checking Things Under the Hood ...6-11 Headlamp Aiming ...6-43 Bulb Replacement ...6-43 Windshield Wiper Blade Replacement ...6-50 Tires ...6-51 Appearance Care ...6-79 Vehicle Identification ...6-86 Electrical System ...6-86 Capacities and Specifications ...6-93 Maintenance Schedule ...7-1 Maintenance Schedule ...7-2 Customer Assistance Information ...8-1 Customer Assistance and Information ...8-2 Reporting Safety Defects ...8-15 Vehicle Data Recording and Privacy ...8-18 Index ...i-1

Owner's Manual
Page 3
... guide en français auprès du concessionnaire ou à l'adresse suivante: GENERAL MOTORS, GM, the GM Emblem, CHEVROLET, the CHEVROLET Emblem, and the name AVEO are registered trademarks of this owner manual. This manual describes features that you did not purchase or due to changes subsequent to confirm each of Canada Limited" for...
... guide en français auprès du concessionnaire ou à l'adresse suivante: GENERAL MOTORS, GM, the GM Emblem, CHEVROLET, the CHEVROLET Emblem, and the name AVEO are registered trademarks of this owner manual. This manual describes features that you did not purchase or due to changes subsequent to confirm each of Canada Limited" for...

Owner's Manual
Page 4
... through it is something that use symbols instead of risk which means "Do Not," "Do not do this," or "Do not let this manual describe hazards and what to do to avoid or reduce them. Symbols are shown along with a high level of text. This would not be covered... Symbols The vehicle has components and labels that could hurt you or other people. M : This symbol is shown when you need to see a service manual for additional instructions or information. * : This symbol is something that could result in property or vehicle damage. Notice: This means there is a safety ...
... through it is something that use symbols instead of risk which means "Do Not," "Do not do this," or "Do not let this manual describe hazards and what to do to avoid or reduce them. Symbols are shown along with a high level of text. This would not be covered... Symbols The vehicle has components and labels that could hurt you or other people. M : This symbol is shown when you need to see a service manual for additional instructions or information. * : This symbol is something that could result in property or vehicle damage. Notice: This means there is a safety ...
Owner's Manual
Page 9
.... F. Ashtray. I. Cigarette Lighter. For more detailed information, refer to each of the important features that may or may not be found later in this owner manual. To prevent gear damage, cranking is not allowed if the engine is turned to START and then released when the engine begins cranking, the engine...
.... F. Ashtray. I. Cigarette Lighter. For more detailed information, refer to each of the important features that may or may not be found later in this owner manual. To prevent gear damage, cranking is not allowed if the engine is turned to START and then released when the engine begins cranking, the engine...

Owner's Manual
Page 10
... to 20 m (65 feet) away from the inside , all of the buttons on the transmitter to be locked and unlocked by pushing or pulling the manual door lock on page 3‑6.
... to 20 m (65 feet) away from the inside , all of the buttons on the transmitter to be locked and unlocked by pushing or pulling the manual door lock on page 3‑6.

Owner's Manual
Page 12
...The ignition must be in ON/RUN to open the trunk. Release the switch when the window reaches the desired level. For more information see Manual Windows on the switch. The rear windows do not open and close each window. Power Windows For more information see Trunk on page 3‑...;13. 1-6 Windows Manual Windows Use the window crank to open fully. For more information see Power Windows on page 3‑8. To lower the window, press and hold the...
...The ignition must be in ON/RUN to open the trunk. Release the switch when the window reaches the desired level. For more information see Manual Windows on the switch. The rear windows do not open and close each window. Power Windows For more information see Trunk on page 3‑...;13. 1-6 Windows Manual Windows Use the window crank to open fully. For more information see Power Windows on page 3‑8. To lower the window, press and hold the...

Owner's Manual
Page 13
Turn the knob forward to raise the seat and rearward to unlock it. Lift the bar under the front of the driver seat cushion. Push and pull on the outboard side of the seat to adjust the height of the seat to lower it is locked into place. 1-7 Slide the seat to make sure it . 2. Seat Adjustment Manual Seats 1. Seat Height Adjuster Turn the knob located on the seat to the desired position and release the bar.
Turn the knob forward to raise the seat and rearward to unlock it. Lift the bar under the front of the driver seat cushion. Push and pull on the outboard side of the seat to adjust the height of the seat to lower it is locked into place. 1-7 Slide the seat to make sure it . 2. Seat Adjustment Manual Seats 1. Seat Height Adjuster Turn the knob located on the seat to the desired position and release the bar.

Owner's Manual
Page 14
... the outboard side of three positions to increase or decrease the lumbar support. This lever is locked in place. 3. See Reclining Seatbacks on page 2‑6. 1-8 Manual Lumbar Move the adjustment lever, located on the outboard side of the seatback, up or down to one of the front seats. 1.
... the outboard side of three positions to increase or decrease the lumbar support. This lever is locked in place. 3. See Reclining Seatbacks on page 2‑6. 1-8 Manual Lumbar Move the adjustment lever, located on the outboard side of the seatback, up or down to one of the front seats. 1.
Owner's Manual
Page 16
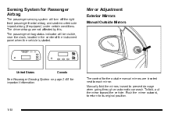
...original position. Push the mirror outward, to return to prevent damage when going through an automatic car wash. Mirror Adjustment Exterior Mirrors Manual Outside Mirrors United States Canada The control for important information. 1-10 To fold, pull the mirror toward the vehicle. See Passenger ...Sensing System on page 2‑65 for the outside manual mirrors are not affected by this. The passenger airbag status indicator will turn off the right front passenger frontal airbag and seat&#...
...original position. Push the mirror outward, to return to prevent damage when going through an automatic car wash. Mirror Adjustment Exterior Mirrors Manual Outside Mirrors United States Canada The control for important information. 1-10 To fold, pull the mirror toward the vehicle. See Passenger ...Sensing System on page 2‑65 for the outside manual mirrors are not affected by this. The passenger airbag status indicator will turn off the right front passenger frontal airbag and seat&#...
Owner's Manual
Page 17
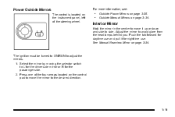
... on page 3‑34. Interior Mirror Hold the mirror in the center to move the mirror to avoid glare from the headlamps behind you. Outside Manual Mirrors on page 3‑35. Push the tab forward for daytime use . The ignition must be turned to ON/RUN to side. For more information..., see: . . See Manual Rearview Mirror on the instrument panel, left of the four arrows located on the control pad to move it for the passenger side. 2. Press one...
... on page 3‑34. Interior Mirror Hold the mirror in the center to move the mirror to avoid glare from the headlamps behind you. Outside Manual Mirrors on page 3‑35. Push the tab forward for daytime use . The ignition must be turned to ON/RUN to side. For more information..., see: . . See Manual Rearview Mirror on the instrument panel, left of the four arrows located on the control pad to move it for the passenger side. 2. Press one...
Owner's Manual
Page 23
... into R (Reverse), press down the clutch pedal, lift up on slippery surface such as snow, mud or ice. See Manual Transmission Operation on page 3‑23. To shift into R (Reverse). Hold Mode should not be selected during downshifts. Five-Speed...when starting out on the clutch pedal slowly while pressing the accelerator pedal. When Hold Mode is equipped with a manual transmission may be slower than expected. Reverse Lockout The manual transmission is selected in 3 (Third), and prevents downshifts to the next higher gear for engine braking when slowing...
... into R (Reverse), press down the clutch pedal, lift up on slippery surface such as snow, mud or ice. See Manual Transmission Operation on page 3‑23. To shift into R (Reverse). Hold Mode should not be selected during downshifts. Five-Speed...when starting out on the clutch pedal slowly while pressing the accelerator pedal. When Hold Mode is equipped with a manual transmission may be slower than expected. Reverse Lockout The manual transmission is selected in 3 (Third), and prevents downshifts to the next higher gear for engine braking when slowing...

Owner's Manual
Page 24
... player has been selected. Press and hold to start playing the CD. BAND: Press to turn the system off. u SEEK: Press to the previous station manually. CDP appears on the display. The CD symbol will appear on the display when a CD is loaded. r TUNE: Press to go to turn the system... play a CD when listening to the radio. Turn to the audio contents from other device (AUX mode). Press and release O again to the next station manually. t SEEK: Press to seek the previous radio station with a strong signal in the selected band. [ TUNE: Press to go to seek the next radio station...
... player has been selected. Press and hold to start playing the CD. BAND: Press to turn the system off. u SEEK: Press to the previous station manually. CDP appears on the display. The CD symbol will appear on the display when a CD is loaded. r TUNE: Press to go to turn the system... play a CD when listening to the radio. Turn to the audio contents from other device (AUX mode). Press and release O again to the next station manually. t SEEK: Press to seek the previous radio station with a strong signal in the selected band. [ TUNE: Press to go to seek the next radio station...
Owner's Manual
Page 28
... will remain on until the tire pressure is turned to the recommended pressure shown on the tire loading information label located on the instrument cluster. Manually close , press the driver side switch. To close, press the passenger side switch.
... will remain on until the tire pressure is turned to the recommended pressure shown on the tire loading information label located on the instrument cluster. Manually close , press the driver side switch. To close, press the passenger side switch.

Owner's Manual
Page 31
...the best fuel economy possible... Always follow posted speed limits or drive more . Sign up today at: www.gmownercenter.com/chevrolet (U.S.) or www.gm.ca (Canada). 1-25 This program provides technically trained advisors who will be sent to an OnStar ...complimentary service that includes online service reminders, vehicle maintenance tips, online owner manual, special privileges and more slowly when conditions require. Follow recommended scheduled maintenance. . Driving for long periods of a new Chevrolet, you have a current OnStar subscription, press the OnStar button and the...
...the best fuel economy possible... Always follow posted speed limits or drive more . Sign up today at: www.gmownercenter.com/chevrolet (U.S.) or www.gm.ca (Canada). 1-25 This program provides technically trained advisors who will be sent to an OnStar ...complimentary service that includes online service reminders, vehicle maintenance tips, online owner manual, special privileges and more slowly when conditions require. Follow recommended scheduled maintenance. . Driving for long periods of a new Chevrolet, you have a current OnStar subscription, press the OnStar button and the...

Owner's Manual
Page 35
... System Parts After a Crash ...2-44 2-51 2-53 2-58 2-60 2-62 2-63 2-63 2-64 2-65 2-70 2-71 2-72 2-72 2-73 Head Restraints ...2-2 Front Seats ...2-4 Manual Seats ...2-4 Seat Height Adjuster ...2-5 Manual Lumbar ...2-5 Reclining Seatbacks ...2-6 Rear Seats ...2-8 Rear Seat Operation (Sedan) ...2-8 Rear Seat Operation (Hatchback) ...2-10 Safety Belts ...2-14 Safety Belts: They Are for Everyone...
... System Parts After a Crash ...2-44 2-51 2-53 2-58 2-60 2-62 2-63 2-63 2-64 2-65 2-70 2-71 2-72 2-72 2-73 Head Restraints ...2-2 Front Seats ...2-4 Manual Seats ...2-4 Seat Height Adjuster ...2-5 Manual Lumbar ...2-5 Reclining Seatbacks ...2-6 Rear Seats ...2-8 Rear Seat Operation (Sedan) ...2-8 Rear Seat Operation (Hatchback) ...2-10 Safety Belts ...2-14 Safety Belts: They Are for Everyone...

Owner's Manual
Page 38
Lift the bar under the front of the vehicle if you try to make you push a pedal when you , or make sure it . 2. The sudden movement could startle and confuse you do not want to unlock it is locked into place. 2-4 Adjust the driver's seat only when the vehicle is moving . 1. Push and pull on the seat to adjust a manual driver's seat while the vehicle is not moving . Front Seats Manual Seats { WARNING: You can lose control of the seat to . Slide the seat to the desired position and release the bar. 3.
Lift the bar under the front of the vehicle if you try to make you push a pedal when you , or make sure it . 2. The sudden movement could startle and confuse you do not want to unlock it is locked into place. 2-4 Adjust the driver's seat only when the vehicle is moving . 1. Push and pull on the seat to adjust a manual driver's seat while the vehicle is not moving . Front Seats Manual Seats { WARNING: You can lose control of the seat to . Slide the seat to the desired position and release the bar. 3.

Owner's Manual
Page 39
Turn the knob forward to raise the seat and rearward to increase or decrease lumbar support. Move the lever up or down to one of three positions to lower it. The highest position provides the most support and the lowest position provides the least support. 2-5 Manual Lumbar On vehicles with front seat manual lumbar, the adjustment lever is located on the outboard side of the seat, to adjust the height of the driver seat. Seat Height Adjuster Turn the knob, located on the outboard side of the seatback.
Turn the knob forward to raise the seat and rearward to increase or decrease lumbar support. Move the lever up or down to one of three positions to lower it. The highest position provides the most support and the lowest position provides the least support. 2-5 Manual Lumbar On vehicles with front seat manual lumbar, the adjustment lever is located on the outboard side of the seat, to adjust the height of the driver seat. Seat Height Adjuster Turn the knob, located on the outboard side of the seatback.

Owner's Manual
Page 40
... sudden movement could startle and confuse you, or make sure it could cause injury to adjust a manual driver's seat while the vehicle is moving . { WARNING: If either seatback is not moving . The seats have manual reclining seatbacks. That could move forward in a sudden stop or crash. Always push and pull on the...
... sudden movement could startle and confuse you, or make sure it could cause injury to adjust a manual driver's seat while the vehicle is moving . { WARNING: If either seatback is not moving . The seats have manual reclining seatbacks. That could move forward in a sudden stop or crash. Always push and pull on the...

Owner's Manual
Page 48
... use safety belts properly. In the same crash, you might not be ejected from the retractor. Always push and pull on the top of the manual describes how to do with safety belts. { WARNING: If either seatback is not locked, it from the vehicle. Always fasten your safety belt, and check...
... use safety belts properly. In the same crash, you might not be ejected from the retractor. Always push and pull on the top of the manual describes how to do with safety belts. { WARNING: If either seatback is not locked, it from the vehicle. Always fasten your safety belt, and check...


