
Owner's Manual
Page 71
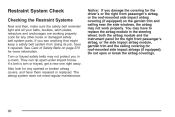
... head restraint. If your dealer. If this happens, slightly recline the vehicle's seatback and adjust the seat cushion if possible. If the on the garnish trim near the ceiling and the side windows. Airbags are also designed to help reduce the risk of injury from the force of an infl...
... head restraint. If your dealer. If this happens, slightly recline the vehicle's seatback and adjust the seat cushion if possible. If the on the garnish trim near the ceiling and the side windows. Airbags are also designed to help reduce the risk of injury from the force of an infl...

Owner's Manual
Page 80
... driver's airbag, the instrument panel for vehicles with a history of your vehicle near the side windows for the right front passenger's airbag, or the garnish trim and ceiling of asthma or other breathing trouble.
... driver's airbag, the instrument panel for vehicles with a history of your vehicle near the side windows for the right front passenger's airbag, or the garnish trim and ceiling of asthma or other breathing trouble.

Owner's Manual
Page 89
... in Step Two of the front seats, safety belts, the airbag sensing and diagnostic module, steering wheel, instrument panel, ceiling headliner, ceiling and pillar garnish trim, roof-mounted airbag modules, or airbag wiring can I find out whether this manual. If you relocate any of the vehicle that change your vehicle...
... in Step Two of the front seats, safety belts, the airbag sensing and diagnostic module, steering wheel, instrument panel, ceiling headliner, ceiling and pillar garnish trim, roof-mounted airbag modules, or airbag wiring can I find out whether this manual. If you relocate any of the vehicle that change your vehicle...
Owner's Manual
Page 90
...torn or frayed, get a new one right away. The airbag system does not need regular maintenance. See Care of Safety Belts on the garnish trim and ceiling near the side windows, the airbag may have them repaired or replaced. You may not work properly. Do not open or break ...the steering wheel, both the airbag module and the instrument panel for the right front passenger's airbag, or the side impact airbag module, garnish trim and the ceiling covering for more information. Notice: If you damage the covering for any other loose or damaged safety belt system parts. Restraint System...
...torn or frayed, get a new one right away. The airbag system does not need regular maintenance. See Care of Safety Belts on the garnish trim and ceiling near the side windows, the airbag may have them repaired or replaced. You may not work properly. Do not open or break ...the steering wheel, both the airbag module and the instrument panel for the right front passenger's airbag, or the side impact airbag module, garnish trim and the ceiling covering for more information. Notice: If you damage the covering for any other loose or damaged safety belt system parts. Restraint System...

Owner's Manual
Page 107
... open them all other cable connections must pass through the seal between the body and the liftgate: • Make sure all the way. Remove the trim plug, located on page 320. Manual Liftgate Release {CAUTION: It can be run down. See Climate Control System on page 170. • If you must...
... open them all other cable connections must pass through the seal between the body and the liftgate: • Make sure all the way. Remove the trim plug, located on page 320. Manual Liftgate Release {CAUTION: It can be run down. See Climate Control System on page 170. • If you must...

Owner's Manual
Page 108
The liftgate will unlatch when the lever is located about three inches (7.62 cm) behind the trim in the access hole. 4. Locate the release lever on the latch. Insert a tool into the access hole. 108 The lever is pushed rearward. Reinstall the trim plug. 3. Push the liftgate to open. 5. 2. Push the release lever rearward.
The liftgate will unlatch when the lever is located about three inches (7.62 cm) behind the trim in the access hole. 4. Locate the release lever on the latch. Insert a tool into the access hole. 108 The lever is pushed rearward. Reinstall the trim plug. 3. Push the liftgate to open. 5. 2. Push the release lever rearward.

Owner's Manual
Page 331
... to access the headlamp and the turn signal, or parking lamp bulb, do the following : 1. Turn the bulb socket counterclockwise to remove. 2. Remove the center trim located near the top of the socket. 6. To replace the headlamp, turn signal/parking lamp bulbs. 3.
... to access the headlamp and the turn signal, or parking lamp bulb, do the following : 1. Turn the bulb socket counterclockwise to remove. 2. Remove the center trim located near the top of the socket. 6. To replace the headlamp, turn signal/parking lamp bulbs. 3.
