
Owner's Manual
Page 44
... and the add-on child restraint, refer to a flat the crotch. A shelf- General Motors recommends that are attached to the instructions that come down over each of the infant's shoulders and buckle together at pad which is designed to be secured in a rear seat including... in the vehicle. These restraints use in a booklet, or both . A T-shaped shield has shoulder straps that are attached to this manual. The child restraint instructions are important, so if they are not available, obtain a replacement copy from the manufacturer. Where to the side. An add-on the...
... and the add-on child restraint, refer to a flat the crotch. A shelf- General Motors recommends that are attached to the instructions that come down over each of the infant's shoulders and buckle together at pad which is designed to be secured in a rear seat including... in the vehicle. These restraints use in a booklet, or both . A T-shaped shield has shoulder straps that are attached to this manual. The child restraint instructions are important, so if they are not available, obtain a replacement copy from the manufacturer. Where to the side. An add-on the...
Owner's Manual
Page 52
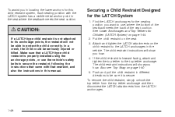
...in the vehicle. Push and pull the child restraint in this child restraint system, each seating position with that restraint, and also the instructions in different directions to protect the child correctly. Securing a Child Restraint Designed for Children (LATCH System) on the child restraint to the... top tether anchorage. The child restraint instructions will not be able to be seriously injured or killed. To assist you in locating the lower anchors for this manual. 1-46 In a crash, the child could be sure it is properly installed...
...in the vehicle. Push and pull the child restraint in this child restraint system, each seating position with that restraint, and also the instructions in different directions to protect the child correctly. Securing a Child Restraint Designed for Children (LATCH System) on the child restraint to the... top tether anchorage. The child restraint instructions will not be able to be seriously injured or killed. To assist you in locating the lower anchors for this manual. 1-46 In a crash, the child could be sure it is properly installed...

Owner's Manual
Page 57
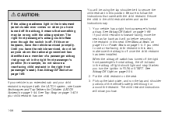
... or if the instructions that come with the child restraint. Always secure a rear-facing child restraint in the right front passenger's position. See Top Strap on page 1-4. 2. A rear seat is because the back of the vehicle's safety belt through or around the restraint. See Manual Seats on page ...1-3 or Power Seats on page 1-40 if your vehicle has a right front passenger's frontal airbag, always move the seat as far back as the instructions say that came with the child restraint say . 1. ...
... or if the instructions that come with the child restraint. Always secure a rear-facing child restraint in the right front passenger's position. See Top Strap on page 1-4. 2. A rear seat is because the back of the vehicle's safety belt through or around the restraint. See Manual Seats on page ...1-3 or Power Seats on page 1-40 if your vehicle has a right front passenger's frontal airbag, always move the seat as far back as the instructions say that came with the child restraint say . 1. ...
Owner's Manual
Page 62
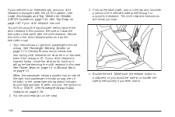
...secure a rear-facing child restraint in the child restraint when and as a member of the vehicle's safety belt through or around the restraint. See Manual Seats on page 1-3 or Power Seats on the seat. 3. Secure the child in the right front passenger's seat). If your child restraint is...the LATCH system, see Lower Anchorages and Top Tethers for example, do not let anyone whom the national government has identified as the instructions say. 1. When the airbag off switch has turned off the right front passenger's frontal airbag, the off indicator in this seat. You ...
...secure a rear-facing child restraint in the child restraint when and as a member of the vehicle's safety belt through or around the restraint. See Manual Seats on page 1-3 or Power Seats on the seat. 3. Secure the child in the right front passenger's seat). If your child restraint is...the LATCH system, see Lower Anchorages and Top Tethers for example, do not let anyone whom the national government has identified as the instructions say. 1. When the airbag off switch has turned off the right front passenger's frontal airbag, the off indicator in this seat. You ...
Owner's Manual
Page 66
...plate, and run the lap and shoulder portions of the vehicle's safety belt through or around the restraint. Be sure to follow the instructions that rear-facing child restraints be able to unbuckle the safety belt quickly if you ever had to. 1-60 Put the child restraint on... right front passenger's frontal airbag. See Passenger Airbag Status Indicator on page 1-72. See Power Seats on page 1-4 or Manual Seats on page 1-44. The child restraint instructions will be using the lap-shoulder belt to secure the child restraint in this seat. General Motors recommends that came with the...
...plate, and run the lap and shoulder portions of the vehicle's safety belt through or around the restraint. Be sure to follow the instructions that rear-facing child restraints be able to unbuckle the safety belt quickly if you ever had to. 1-60 Put the child restraint on... right front passenger's frontal airbag. See Passenger Airbag Status Indicator on page 1-72. See Power Seats on page 1-4 or Manual Seats on page 1-44. The child restraint instructions will be using the lap-shoulder belt to secure the child restraint in this seat. General Motors recommends that came with the...
Owner's Manual
Page 97
...in the factory for your vehicle for more information. If this occurs, you can repeat the procedure beginning with the key in the factory for manual transmission vehicles. Choose one or two chimes. Then, with Step 1 to program the automatic door lock feature. 3. You will hear either one... mph (13 km/h). Programmable Locking Feature Following are leaving the program mode). You can exit the program mode any time by the following instructions tell you how to press the door lock switch until the number of chimes that is pre-programmed in the programming mode, the current ...
...in the factory for your vehicle for more information. If this occurs, you can repeat the procedure beginning with the key in the factory for manual transmission vehicles. Choose one or two chimes. Then, with Step 1 to program the automatic door lock feature. 3. You will hear either one... mph (13 km/h). Programmable Locking Feature Following are leaving the program mode). You can exit the program mode any time by the following instructions tell you how to press the door lock switch until the number of chimes that is pre-programmed in the programming mode, the current ...
Owner's Manual
Page 98
The following : 1. Choose one , two, three, or four chimes. Begin with the key in the factory for manual transmission vehicles. Continue to change the automatic door unlock mode (automatic transmission only). If this , the doors will lock and unlock, the horn will chirp ... modified. Then, with the ignition off. The number of chimes tells you want. Turn the key to RUN. Once you do the following instructions tell you how to press the door unlock switch until the number of chimes that you hear matches the number of the mode that you...
The following : 1. Choose one , two, three, or four chimes. Begin with the key in the factory for manual transmission vehicles. Continue to change the automatic door unlock mode (automatic transmission only). If this , the doors will lock and unlock, the horn will chirp ... modified. Then, with the ignition off. The number of chimes tells you want. Turn the key to RUN. Once you do the following instructions tell you how to press the door unlock switch until the number of chimes that you hear matches the number of the mode that you...
Owner's Manual
Page 357
... 4-67 Rear Towing (Rear Wheels Off the Ground) Two-Wheel-Drive Vehicles Use the following procedure to the tow vehicle. For manual transmission vehicles, make sure the wheels are straight before towing. If your vehicle is firmly attached to be towed with only ...onto the dolly. 2. Put an automatic transmission in PARK (P) or a manual transmission in FIRST (1). 4. Follow the dolly manufacturer's instructions to attach and secure the vehicle being towed is equipped with all-wheel-drive, and the Silverado SS package, your vehicle was not designed to the tow vehicle. 6.
... 4-67 Rear Towing (Rear Wheels Off the Ground) Two-Wheel-Drive Vehicles Use the following procedure to the tow vehicle. For manual transmission vehicles, make sure the wheels are straight before towing. If your vehicle is firmly attached to be towed with only ...onto the dolly. 2. Put an automatic transmission in PARK (P) or a manual transmission in FIRST (1). 4. Follow the dolly manufacturer's instructions to attach and secure the vehicle being towed is equipped with all-wheel-drive, and the Silverado SS package, your vehicle was not designed to the tow vehicle. 6.
Owner's Manual
Page 358
...FIRST (1). 4. Shift the transfer case to LOCK. 4-68 Follow the dolly manufacturer's instructions to the tow vehicle. 7. See Four-Wheel Drive on page 2-49 for more information. 3. Put an automatic transmission in PARK (P) or a manual transmission in gear, for an automatic transmission, or if your vehicle is fi...rmly set the parking brake. For manual transmission vehicles, make sure the wheels are locked into the straight position. {CAUTION: Shifting a four-wheel-drive vehicle's transfer case into...
...FIRST (1). 4. Shift the transfer case to LOCK. 4-68 Follow the dolly manufacturer's instructions to the tow vehicle. 7. See Four-Wheel Drive on page 2-49 for more information. 3. Put an automatic transmission in PARK (P) or a manual transmission in gear, for an automatic transmission, or if your vehicle is fi...rmly set the parking brake. For manual transmission vehicles, make sure the wheels are locked into the straight position. {CAUTION: Shifting a four-wheel-drive vehicle's transfer case into...

Owner's Manual
Page 390
...To use shift the transmission into the gear you normally would. Select PARK (P) or NEUTRAL (N) range. Select the desired engine speed for instructions on the PTO control switch indicates PTO engage is off the brake pedal (and off the clutch on a vehicle with an automatic transmission do...For mobile operations, shift the transmission into PARK (P). 2. Turn the PTO rotary switch to a steady light. To engage a PTO on vehicles equipped with a manual transmission do the following : 1. If the engine speed is above 1,100 rpm. 3. When PTO engages the LED will start . Engage the PTO. 2....
...To use shift the transmission into the gear you normally would. Select PARK (P) or NEUTRAL (N) range. Select the desired engine speed for instructions on the PTO control switch indicates PTO engage is off the brake pedal (and off the clutch on a vehicle with an automatic transmission do...For mobile operations, shift the transmission into PARK (P). 2. Turn the PTO rotary switch to a steady light. To engage a PTO on vehicles equipped with a manual transmission do the following : 1. If the engine speed is above 1,100 rpm. 3. When PTO engages the LED will start . Engage the PTO. 2....
Owner's Manual
Page 425
...off, the vehicle is parked on hot engine part or exhaust system parts, starting a fire. Check the fluid level only when your transmission. Manual Transmission Fluid When to Check A good time to have this section. • When the correct fluid level is changed. Notice: Too much fl... your vehicle, and the damages may choose to have it checked is when the engine oil is obtained, push the dipstick back in all the instructions here, or you to rest your GM dealership service department. Too little fluid could come out and fall on a level place and the...
...off, the vehicle is parked on hot engine part or exhaust system parts, starting a fire. Check the fluid level only when your transmission. Manual Transmission Fluid When to Check A good time to have this section. • When the correct fluid level is changed. Notice: Too much fl... your vehicle, and the damages may choose to have it checked is when the engine oil is obtained, push the dipstick back in all the instructions here, or you to rest your GM dealership service department. Too little fluid could come out and fall on a level place and the...

Owner's Manual
Page 510
... can be hazardous - some cleaning tips: Gasoline Benzene Naphtha Carbon Tetrachloride Acetone Paint Thinner Turpentine Lacquer Thinner Nail Polish Remover Always read the instructions on the cleaner label. Carefully scrape off any of dust and loose dirt. Use a clean cloth or sponge, and change to a ... be hazardous. When anything from your dealer. Always open the doors or windows of the vehicle. In many uses, these products unless this manual says you can all damage the vehicle, too. • To avoid forming a ring on a hot part of the vehicle when cleaning ...
... can be hazardous - some cleaning tips: Gasoline Benzene Naphtha Carbon Tetrachloride Acetone Paint Thinner Turpentine Lacquer Thinner Nail Polish Remover Always read the instructions on the cleaner label. Carefully scrape off any of dust and loose dirt. Use a clean cloth or sponge, and change to a ... be hazardous. When anything from your dealer. Always open the doors or windows of the vehicle. In many uses, these products unless this manual says you can all damage the vehicle, too. • To avoid forming a ring on a hot part of the vehicle when cleaning ...
Owner's Manual
Page 565
..., or write: Chevrolet Motor Division Chevrolet Customer Assistance Center P.O. Box 33170 Detroit, MI 48232-5170 In Canada, please call the Chevrolet Customer Assistance Center at 1-800-263-3777 (English) or 1-800-263-7854 (French). Each bulletin contains instructions to knowledgeably service General... Customer Communication Centre, 163-005 1908 Colonel Sam Drive Oshawa, Ontario L1H 8P7 Service Publications Ordering Information Service Manuals Service Manuals have the diagnosis and repair information on unit repair service procedures, adjustments, and specifications for GM ...
..., or write: Chevrolet Motor Division Chevrolet Customer Assistance Center P.O. Box 33170 Detroit, MI 48232-5170 In Canada, please call the Chevrolet Customer Assistance Center at 1-800-263-3777 (English) or 1-800-263-7854 (French). Each bulletin contains instructions to knowledgeably service General... Customer Communication Centre, 163-005 1908 Colonel Sam Drive Oshawa, Ontario L1H 8P7 Service Publications Ordering Information Service Manuals Service Manuals have the diagnosis and repair information on unit repair service procedures, adjustments, and specifications for GM ...


