
Owner's Manual
Page 50
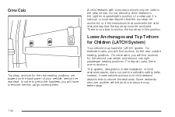
... cabs, you will have the LATCH system. This system, designed to make installation of child restraints easier, does not use another vehicle anchor to the brackets, you will find anchors for Children (LATCH System) Your vehicle may have to remove the trim plugs covering them. 1-44 Lower Anchorages and Top...
... cabs, you will have the LATCH system. This system, designed to make installation of child restraints easier, does not use another vehicle anchor to the brackets, you will find anchors for Children (LATCH System) Your vehicle may have to remove the trim plugs covering them. 1-44 Lower Anchorages and Top...
Owner's Manual
Page 184
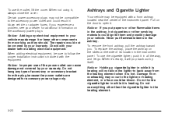
... location in the instrument panel. Notice: Adding any type of the instrument panel. Check with a front ashtray located near the center of accessory or accessory bracket from overheating may not be sure to the accessory power outlet and could ignite them and possibly damage your warranty. Never put papers or other...
... location in the instrument panel. Notice: Adding any type of the instrument panel. Check with a front ashtray located near the center of accessory or accessory bracket from overheating may not be sure to the accessory power outlet and could ignite them and possibly damage your warranty. Never put papers or other...

Owner's Manual
Page 386
...-wiring harness is equipped with a seven-pin connector and separate CHMSL connector are located at the rear of the vehicle, attached to the frame bracket. A connector will have to be added to the wiring harness which connects to the camper. The eight-wire harness contains the following camper/trailer... Wiring Package" earlier in this section. Camper/Fifth-Wheel Trailer Wiring Package The eight-wire camper harness is located under the front edge of the pickup box on the driver's side of the vehicle and are tied to the vehicle's frame. • Red: Battery Feed • Dark Blue: Trailer ...
...-wiring harness is equipped with a seven-pin connector and separate CHMSL connector are located at the rear of the vehicle, attached to the frame bracket. A connector will have to be added to the wiring harness which connects to the camper. The eight-wire harness contains the following camper/trailer... Wiring Package" earlier in this section. Camper/Fifth-Wheel Trailer Wiring Package The eight-wire camper harness is located under the front edge of the pickup box on the driver's side of the vehicle and are tied to the vehicle's frame. • Red: Battery Feed • Dark Blue: Trailer ...

Owner's Manual
Page 447
... explosive gas could be sure the right amount of fluid is located on the engine drive bracket on all lamps that can cause battery gas to the engine accessory drive bracket where it is marked GND. Battery fluid contains acid that are not needed. Turn off ... and negative (−) terminal locations of the remote positive (+) and remote negative (−) terminals. {CAUTION: Using a match near the engine accessory drive bracket. People have been hurt doing this, and some have been blinded. If you . Notice: If you leave your new vehicle. The repairs would not be...
... explosive gas could be sure the right amount of fluid is located on the engine drive bracket on all lamps that can cause battery gas to the engine accessory drive bracket where it is marked GND. Battery fluid contains acid that are not needed. Turn off ... and negative (−) terminal locations of the remote positive (+) and remote negative (−) terminals. {CAUTION: Using a match near the engine accessory drive bracket. People have been hurt doing this, and some have been blinded. If you . Notice: If you leave your new vehicle. The repairs would not be...

Owner's Manual
Page 460
... the two screws and lift off the lens. 2. Put the headlamp assembly back into the bulb socket. Put the bulb socket back into the retainer bracket until it from the socket. 5-68 Use care not to remove it locks. 8. Put the turn it clockwise until you hear a click. 9. 6.
... the two screws and lift off the lens. 2. Put the headlamp assembly back into the bulb socket. Put the bulb socket back into the retainer bracket until it from the socket. 5-68 Use care not to remove it locks. 8. Put the turn it clockwise until you hear a click. 9. 6.

Owner's Manual
Page 496
Front Location (Two-Wheel-Drive 1500 Series) B. Position the jack under the rear axle between the spring anchor and the shock absorber bracket. {CAUTION: Raising your vehicle, lower the snow plow fully before raising the vehicle. 5-104 Jacking Locations A. Rear Location (All Series) 3. If the fl.... If you could be sure to fit the jack lift head into the proper location before raising the vehicle. {CAUTION: Getting under the bracket attached to the front of the vehicle (all other models), position the jack on the rear, position the jack under the vehicle as shown....
Front Location (Two-Wheel-Drive 1500 Series) B. Position the jack under the rear axle between the spring anchor and the shock absorber bracket. {CAUTION: Raising your vehicle, lower the snow plow fully before raising the vehicle. 5-104 Jacking Locations A. Rear Location (All Series) 3. If the fl.... If you could be sure to fit the jack lift head into the proper location before raising the vehicle. {CAUTION: Getting under the bracket attached to the front of the vehicle (all other models), position the jack on the rear, position the jack under the vehicle as shown....

Owner's Manual
Page 506
...in the passenger compartment of time or with the valve stem pointing up may damage the wheel. A. Wheel Wrench and Extensions E. Storage Bag Mounting Bracket Bottle Jack Retaining Hook 5-114 Notice: Storing an aluminum wheel with the valve stem pointing down and have the wheel/tire repaired as soon as...location behind the passenger's seat. Storing a Flat or Spare Tire and Tools {CAUTION: Storing a jack, a tire, or other equipment in the proper place. Retaining Bracket and Wing Nut D. Wing Nut B. In a sudden stop or collision, loose equipment could cause injury. Wheel Blocks C.
...in the passenger compartment of time or with the valve stem pointing up may damage the wheel. A. Wheel Wrench and Extensions E. Storage Bag Mounting Bracket Bottle Jack Retaining Hook 5-114 Notice: Storing an aluminum wheel with the valve stem pointing down and have the wheel/tire repaired as soon as...location behind the passenger's seat. Storing a Flat or Spare Tire and Tools {CAUTION: Storing a jack, a tire, or other equipment in the proper place. Retaining Bracket and Wing Nut D. Wing Nut B. In a sudden stop or collision, loose equipment could cause injury. Wheel Blocks C.

Owner's Manual
Page 507
...following to assist you: A. Tighten down the wing nut. 3. Hoist Assembly C. Hoist Cable D. Position the jack in the retaining bracket. 2. Hoist End of the vehicle in the mounting bracket. Use the art and text following : 1. Hoist Lock (If Equipped) 5-115 Tire Retainer E. Hoist Shaft F. Wheel Wrench I. ...Store the tire under the rear of Extension Tool G. Put the jack tools in the tool bag and place them in the mounting bracket. Assemble the wheel blocks and bottle jack together with the wing nut and retaining hook. 4. Position the holes in the base of ...
...following to assist you: A. Tighten down the wing nut. 3. Hoist Assembly C. Hoist Cable D. Position the jack in the retaining bracket. 2. Hoist End of the vehicle in the mounting bracket. Use the art and text following : 1. Hoist Lock (If Equipped) 5-115 Tire Retainer E. Hoist Shaft F. Wheel Wrench I. ...Store the tire under the rear of Extension Tool G. Put the jack tools in the tool bag and place them in the mounting bracket. Assemble the wheel blocks and bottle jack together with the wing nut and retaining hook. 4. Position the holes in the base of ...