Owner's Manual
Page 171
... or the edge of a disc is still tightened to the CD mechanism. 3-19 Pick up discs by hand, then with lubricants internal to the rear quarter panel. Check every once in their original cases or other protective cases and away from the center to the risk of contaminating the lens of... the mast should ever become slightly bent, you should replace it , wiping from direct sunlight and dust. Care of the CD optics with a wrench one quarter turn. Store them in a while to touch the side without being damaged.
... or the edge of a disc is still tightened to the CD mechanism. 3-19 Pick up discs by hand, then with lubricants internal to the rear quarter panel. Check every once in their original cases or other protective cases and away from the center to the risk of contaminating the lens of... the mast should ever become slightly bent, you should replace it , wiping from direct sunlight and dust. Care of the CD optics with a wrench one quarter turn. Store them in a while to touch the side without being damaged.
Owner's Manual
Page 184
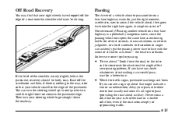
Ease off the edge of a road onto the shoulder while you can see a sign up to one-quarter turn your steering wheel to go straight down the road, to the sides and to crossroads for situations that your vehicle straddles the edge of ...
Ease off the edge of a road onto the shoulder while you can see a sign up to one-quarter turn your steering wheel to go straight down the road, to the sides and to crossroads for situations that your vehicle straddles the edge of ...

Owner's Manual
Page 234
... trunk. Turn the screw heads until the slots point front and back to remove the panel. 2. Turn the two wing fasteners under the trunk edge a quarter turn counterclockwise to the unlock position. Gently lift the trim panel front forward edge and remove the panel. First you may be long enough to...
... trunk. Turn the screw heads until the slots point front and back to remove the panel. 2. Turn the two wing fasteners under the trunk edge a quarter turn counterclockwise to the unlock position. Gently lift the trim panel front forward edge and remove the panel. First you may be long enough to...

Owner's Manual
Page 242
8. Then, using the wheel wrench, tighten an additional one-quarter turn. 5-32 This could lead to use the correct wheel nuts. Be sure to an accident. Install the plastic nut caps and tighten by hand. ...
8. Then, using the wheel wrench, tighten an additional one-quarter turn. 5-32 This could lead to use the correct wheel nuts. Be sure to an accident. Install the plastic nut caps and tighten by hand. ...

Owner's Manual
Page 279
... can damage your windshield washer. This allows for adding water. It is filled with ready-to freeze and damage your washer fluid tank only three-quarters full when it is on the driver's side of the washer system. Don't mix water with DOT-3 brake fluid. See "Engine Compartment Overview" in your...
... can damage your windshield washer. This allows for adding water. It is filled with ready-to freeze and damage your washer fluid tank only three-quarters full when it is on the driver's side of the washer system. Don't mix water with DOT-3 brake fluid. See "Engine Compartment Overview" in your...

Owner's Manual
Page 286
Replace the bulb and insert the socket into the headlamp. 2. Gently pull the assembly out, turn the bulb counterclockwise and remove it from the back of the socket one-quarter turn the base of the assembly. 3. Press and turn counterclockwise. (See arrows). 4. Remove the socket with a new bulb. 6-40 Center High-Mounted Stoplamp 1. Remove the two screws in the stoplamp lens. 3. Reverse the steps with the burned lamp. 5.
Replace the bulb and insert the socket into the headlamp. 2. Gently pull the assembly out, turn the bulb counterclockwise and remove it from the back of the socket one-quarter turn the base of the assembly. 3. Press and turn counterclockwise. (See arrows). 4. Remove the socket with a new bulb. 6-40 Center High-Mounted Stoplamp 1. Remove the two screws in the stoplamp lens. 3. Reverse the steps with the burned lamp. 5.