Owner's Manual
Page 33
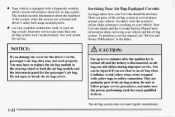
... is qualified to inflate while someone is equipped with yellowtape oryellow connectors. Servicing Your Air Bag-Equipped Corvette Air bags affect how your dealer See for service. Avoid yellow wires, wires wrapped with a diagnostic module, which records information about servicing your vehicle. There are parts of the...and the air bag system. Be sure to an air bag when it inflates. Let only qualified technicians work on Corvette dealer and'the Corvette Service Manual have to replace the bag module in air the steeringwheel or both theair bag module and the instrument ...
... is qualified to inflate while someone is equipped with yellowtape oryellow connectors. Servicing Your Air Bag-Equipped Corvette Air bags affect how your dealer See for service. Avoid yellow wires, wires wrapped with a diagnostic module, which records information about servicing your vehicle. There are parts of the...and the air bag system. Be sure to an air bag when it inflates. Let only qualified technicians work on Corvette dealer and'the Corvette Service Manual have to replace the bag module in air the steeringwheel or both theair bag module and the instrument ...

Owner's Manual
Page 93
... after use. To remove it will pop back by itself. Also, to put papersand other smoking materials could puncture or cut the radio receiver or wiring. Whenyou put the ashtray back, first put the ashtray into the forward opening. NOTICE: Loose objects (such paper clips) can remove the ashtray and use... lid and prevent movement of the door next to the receiver: Securely store the jack (if equipped) in all theway and let go. NOTICE: Your Corvette'sradio receiver is inthe rear storage compartment.
... after use. To remove it will pop back by itself. Also, to put papersand other smoking materials could puncture or cut the radio receiver or wiring. Whenyou put the ashtray back, first put the ashtray into the forward opening. NOTICE: Loose objects (such paper clips) can remove the ashtray and use... lid and prevent movement of the door next to the receiver: Securely store the jack (if equipped) in all theway and let go. NOTICE: Your Corvette'sradio receiver is inthe rear storage compartment.

Owner's Manual
Page 95
... from the coinholder to uncover the screws on the plastic locking tab and pull the plug into the console. ' The plug has three separate wires: The orange wire connects to the battery. Disconnect the plug by pulling up and back. 7. Remove the screws. (See the arrows in front part of the the...
... from the coinholder to uncover the screws on the plastic locking tab and pull the plug into the console. ' The plug has three separate wires: The orange wire connects to the battery. Disconnect the plug by pulling up and back. 7. Remove the screws. (See the arrows in front part of the the...

Owner's Manual
Page 96
...someone help you can drain your battery. 0 Do not use . The panel could cause an accident. NOTICE: When usingthe accessory plug: Don't splice wires directly into PARK (P). After you to lose control, or itcould fly off any electrical equipment should not exceed 10 amps. 0 Be sure to the ...vehicle and cause you 've installed the electrical equipment, put the trim panel and console lid back in place and install the screws. The black wire connects to your electrical system. Roof Panel (Coupe) Until you are sure you . Removing theRoof Panel A CAUTION: Don't try to remove the...
...someone help you can drain your battery. 0 Do not use . The panel could cause an accident. NOTICE: When usingthe accessory plug: Don't splice wires directly into PARK (P). After you to lose control, or itcould fly off any electrical equipment should not exceed 10 amps. 0 Be sure to the ...vehicle and cause you 've installed the electrical equipment, put the trim panel and console lid back in place and install the screws. The black wire connects to your electrical system. Roof Panel (Coupe) Until you are sure you . Removing theRoof Panel A CAUTION: Don't try to remove the...

Owner's Manual
Page 109
You may need to lift the hardtop slightly to removethe brackets. 9. Using the wrench, remove the two lower bolts (A) from the bottom flange of each side. 6. Slide both wire connectors located behind the lock pillar brackets. These are the rear window defogger wires. 2-66 5. Remove the bolt (B) from the lock pillar bracket on each side. 8. Disconnect both lock pillar brackets down and forward from the receiver bracket on each lock pillar bracket. 7. Then remove the two upper bolts ( C ) from the receiver brackets.
You may need to lift the hardtop slightly to removethe brackets. 9. Using the wrench, remove the two lower bolts (A) from the bottom flange of each side. 6. Slide both wire connectors located behind the lock pillar brackets. These are the rear window defogger wires. 2-66 5. Remove the bolt (B) from the lock pillar bracket on each side. 8. Disconnect both lock pillar brackets down and forward from the receiver bracket on each lock pillar bracket. 7. Then remove the two upper bolts ( C ) from the receiver brackets.
Owner's Manual
Page 119
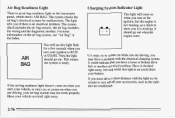
... bag system may have a loose or broken drive belt or another electrical problem. The system check includesthe air bag sensors, the air bag modules, the wiring and the diagnosticmodule. Driving while this light flash for malfunctions. The system checks the air bag's electrical system for a few seconds when you may not...
... bag system may have a loose or broken drive belt or another electrical problem. The system check includesthe air bag sensors, the air bag modules, the wiring and the diagnosticmodule. Driving while this light flash for malfunctions. The system checks the air bag's electrical system for a few seconds when you may not...

Owner's Manual
Page 226
... jack, wheel nut socket and wheel lock key in the compartment. Do not toss or 'place the items against the radio receiver box or any wiring. 5-35 Lift the tray using wheel wrench (B) the and insert the latch bolt the notch inthe tray (C). Position thejack inthe container so that you can...
... jack, wheel nut socket and wheel lock key in the compartment. Do not toss or 'place the items against the radio receiver box or any wiring. 5-35 Lift the tray using wheel wrench (B) the and insert the latch bolt the notch inthe tray (C). Position thejack inthe container so that you can...
Owner's Manual
Page 229
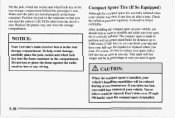
...stored properly in the compartment. Check the'inflationpressure regularly. Do not toss or place the items against the radio receiver box or any wiring. Put the jack, wheel nut socket and wheel lock key inthe rear storage compartment behind the passenger's seat. Replace the plastic tray...was fully inflated when your vehicle was new, it 's best to 3,000 miles (5 OOO km), so you needit again. NOTICE: Your Corvette's radio receiver box isin the rear storage compartment. Position the jackin the container so that you could beinjured. To help avoid damage, carefully place...
...stored properly in the compartment. Check the'inflationpressure regularly. Do not toss or place the items against the radio receiver box or any wiring. Put the jack, wheel nut socket and wheel lock key inthe rear storage compartment behind the passenger's seat. Replace the plastic tray...was fully inflated when your vehicle was new, it 's best to 3,000 miles (5 OOO km), so you needit again. NOTICE: Your Corvette's radio receiver box isin the rear storage compartment. Position the jackin the container so that you could beinjured. To help avoid damage, carefully place...

Owner's Manual
Page 271
... from under the front bumper. 1. Turn the bulb base counterclockwise one -quarter of a turn and pull it You can reach the fog lamps from the wiring harness. 4. Cornering Lamps 2. Reverse the steps with a new bulb. 6-40 1 _ Remove the screw in ,turn and pull it counterclockwise, theh pull out. Push the bulb...
... from under the front bumper. 1. Turn the bulb base counterclockwise one -quarter of a turn and pull it You can reach the fog lamps from the wiring harness. 4. Cornering Lamps 2. Reverse the steps with a new bulb. 6-40 1 _ Remove the screw in ,turn and pull it counterclockwise, theh pull out. Push the bulb...

Owner's Manual
Page 295
...., the wiper will cause the lamps to go on Electrical Equipment Headlamps The headlamp wiring is causedby some cases to your Corvette unless you check with your Corvette, see "Servicing Your Air Bag-Equipped Corvette" in some electrical problem and not snow, etc., be covered by a fuse ... in the Index. NOTICE: Don't add anything electrical to get it fixed. Some add-on electrical equipment can damage your headlamp wiring checked right away. Power Windows and Other Power Options Circuit breakers protect the power windows and other components from working as they should...
...., the wiper will cause the lamps to go on Electrical Equipment Headlamps The headlamp wiring is causedby some cases to your Corvette unless you check with your Corvette, see "Servicing Your Air Bag-Equipped Corvette" in some electrical problem and not snow, etc., be covered by a fuse ... in the Index. NOTICE: Don't add anything electrical to get it fixed. Some add-on electrical equipment can damage your headlamp wiring checked right away. Power Windows and Other Power Options Circuit breakers protect the power windows and other components from working as they should...

Owner's Manual
Page 296
... cigarette -lighter -- This greatly reduces the chanceof fires caused byelectrical problems. Look at the silver-colored band inside the fuse. Fuses and Circuit Breakers The wiring circuits in your vehicle that has the same amperage. Turn the knob and pull thedoor to access the fuses. 6-65
... cigarette -lighter -- This greatly reduces the chanceof fires caused byelectrical problems. Look at the silver-colored band inside the fuse. Fuses and Circuit Breakers The wiring circuits in your vehicle that has the same amperage. Turn the knob and pull thedoor to access the fuses. 6-65

Owner's Manual
Page 300
One ispart of theforward lamp wiring harness (A), and the otheris part of the ECM-engine wiring harness (B). 6-69 Fuse 44 Usage Cigarette Lighter, AccessoryPlug Hatch or Deck Lid Release Relay Power Seats Blank Power Windows Blank Blank Engine Compartment Fuse Blocks 45 K L M N P There aretwo maxi-fuse blocks in theengine compartment.
One ispart of theforward lamp wiring harness (A), and the otheris part of the ECM-engine wiring harness (B). 6-69 Fuse 44 Usage Cigarette Lighter, AccessoryPlug Hatch or Deck Lid Release Relay Power Seats Blank Power Windows Blank Blank Engine Compartment Fuse Blocks 45 K L M N P There aretwo maxi-fuse blocks in theengine compartment.

Owner's Manual
Page 315
... or other commercial application. 0 One of the reasons you operateyour vehicle under any one of these conditions cause engine oil to 16 km). Spark Plug Wire Inspection. These intervals only summarize maintenanceservices. If the vehicle is used for your vehicle: Most trips are less than 5 to 10 miles (8 to break down...
... or other commercial application. 0 One of the reasons you operateyour vehicle under any one of these conditions cause engine oil to 16 km). Spark Plug Wire Inspection. These intervals only summarize maintenanceservices. If the vehicle is used for your vehicle: Most trips are less than 5 to 10 miles (8 to break down...

Owner's Manual
Page 316
...): Engine Oil and Filter Change (or every 12 months, whichever occurs first). Every 30,000 Miles (50 000 km): Air Cleaner Filter Replacement. Spark Plug Wire Inspection. Every 15,000 Miles (25 000 km): Automatic Transmission Service (severe conditions only). Fuel Tank, Cap and Lines Inspection. These intervals only summarize maintenanceservices...
...): Engine Oil and Filter Change (or every 12 months, whichever occurs first). Every 30,000 Miles (50 000 km): Air Cleaner Filter Replacement. Spark Plug Wire Inspection. Every 15,000 Miles (25 000 km): Automatic Transmission Service (severe conditions only). Fuel Tank, Cap and Lines Inspection. These intervals only summarize maintenanceservices...

Owner's Manual
Page 350
An Emission Control Service. 0If you haven't used your vehicle under severe service conditions listed previously and, therefore, haven't changedyour automatic transmission fluid, change both the fluid and filter. An Emission Control Service. DATE MILEAGE ACTUAL SERVICED BY: 7-39 Replace spark plugs. L w g Tripmighway daintenmce Schedule I 0Inspect spark plug wires.
An Emission Control Service. 0If you haven't used your vehicle under severe service conditions listed previously and, therefore, haven't changedyour automatic transmission fluid, change both the fluid and filter. An Emission Control Service. DATE MILEAGE ACTUAL SERVICED BY: 7-39 Replace spark plugs. L w g Tripmighway daintenmce Schedule I 0Inspect spark plug wires.

Owner's Manual
Page 378
... en ...11 GVWR ...4-28 Halogen Bulbs ...6-36 Hardtop.Convertible ...2-64 Hazard Warning Flashers ...5-1 Headlamp Bulb Replacement ...6-36 HeadlampDoors ...2-43 Headlamps ...2-42 HighLow Beam Changer ...2-36 Wiring ...6-64 Hearing Impaired, Customer Assistance ...8-3 3-2, 3-6 Heating ...111 Heritage Pages ...High-Beam Lamps ...2-36 Highway Hypnosis ...4-22 Hill and Mountain Roads ...4-22 9-5 Manual Transmission ...2-24 Filling...
... en ...11 GVWR ...4-28 Halogen Bulbs ...6-36 Hardtop.Convertible ...2-64 Hazard Warning Flashers ...5-1 Headlamp Bulb Replacement ...6-36 HeadlampDoors ...2-43 Headlamps ...2-42 HighLow Beam Changer ...2-36 Wiring ...6-64 Hearing Impaired, Customer Assistance ...8-3 3-2, 3-6 Heating ...111 Heritage Pages ...High-Beam Lamps ...2-36 Highway Hypnosis ...4-22 Hill and Mountain Roads ...4-22 9-5 Manual Transmission ...2-24 Filling...

Owner's Manual
Page 385
Gauges and Indicators ...2-74 WasherFluid.Windshield ...6-30 WashingYourVehicle ...6-58 Weatherstrips ...6-57 Wheel 6-52 Alignment ...LockKey ...5-24 Nut Torque ...5.32. 6.75 Replacement ...: ...6-52 Wrench ...5.23 2-34 Windows ...Express-Down ...2-34 Power ...2-34 2-38 WindshieldWasher ...6-30 Fluid ...Fluid Level Check ...7-40 Windshield Wipers ...2-37 BladeReplacement ...6.45.6.75 6-64 Fuses ...Winter Driving ...4-24 Wiring.Headlamp ...6-64 WreckerTowing ...5-6 9-12 w a r n i n g Devices ...5-2 Warning Lights.
Gauges and Indicators ...2-74 WasherFluid.Windshield ...6-30 WashingYourVehicle ...6-58 Weatherstrips ...6-57 Wheel 6-52 Alignment ...LockKey ...5-24 Nut Torque ...5.32. 6.75 Replacement ...: ...6-52 Wrench ...5.23 2-34 Windows ...Express-Down ...2-34 Power ...2-34 2-38 WindshieldWasher ...6-30 Fluid ...Fluid Level Check ...7-40 Windshield Wipers ...2-37 BladeReplacement ...6.45.6.75 6-64 Fuses ...Winter Driving ...4-24 Wiring.Headlamp ...6-64 WreckerTowing ...5-6 9-12 w a r n i n g Devices ...5-2 Warning Lights.
