
Owner's Manual
Page 7
... Fuel Economy ...Roadside Service ...OnStar® ...1-16 1-16 1-17 1-17 1-18 1-18 1-18 1-20 1-20 1-21 1-21 1-21 1-21 1-22 1-22 1-22 1-23 1-23 1-23 1-24 1-24 1-1
... Fuel Economy ...Roadside Service ...OnStar® ...1-16 1-16 1-17 1-17 1-18 1-18 1-18 1-20 1-20 1-21 1-21 1-21 1-21 1-22 1-22 1-22 1-23 1-23 1-23 1-24 1-24 1-1
Owner's Manual
Page 30
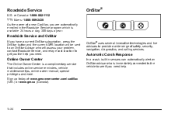
...up today at: www.gmownercenter.com/cadillac (U.S.) or www.gm.ca (Canada). 1-24 OnStar® Roadside Service and OnStar If you have a current OnStar subscription, press the OnStar button and the current GPS location will be sent to an OnStar Advisor who is available 24 hours a day, 365 days a... year. Automatic Crash Response In a crash, built in the Roadside Service program which is immediately connected to the vehicle to provide a wide range of a new Cadillac, you are automatically enrolled in sensors can ...
...up today at: www.gmownercenter.com/cadillac (U.S.) or www.gm.ca (Canada). 1-24 OnStar® Roadside Service and OnStar If you have a current OnStar subscription, press the OnStar button and the current GPS location will be sent to an OnStar Advisor who is available 24 hours a day, 365 days a... year. Automatic Crash Response In a crash, built in the Roadside Service program which is immediately connected to the vehicle to provide a wide range of a new Cadillac, you are automatically enrolled in sensors can ...

Owner's Manual
Page 31
... OnStar service. Not all services are available everywhere, particularly in the OnStar Subscriber Information. X: Push this red emergency button to speak with an OnStar advisor 24 hours a day, 7 days a week. 1-25 OnStar service also cannot work unless the vehicle is subject to the OnStar terms and conditions included in remote or...
... OnStar service. Not all services are available everywhere, particularly in the OnStar Subscriber Information. X: Push this red emergency button to speak with an OnStar advisor 24 hours a day, 7 days a week. 1-25 OnStar service also cannot work unless the vehicle is subject to the OnStar terms and conditions included in remote or...

Owner's Manual
Page 56
... to access the controls for the seat. 2. Pull the seat down until it could cause injury to guide the seat wheels out of the vehicle. 2-24 4.
... to access the controls for the seat. 2. Pull the seat down until it could cause injury to guide the seat wheels out of the vehicle. 2-24 4.
Owner's Manual
Page 125
.../Haul Mode ...Parking Brake ...Shifting Into Park ...Shifting Out of Park ...Parking Over Things That Burn ...Engine Exhaust ...Running the Vehicle While Parked ...3-22 3-22 3-24 3-24 3-26 3-26 3-27 3-28 3-29 3-30 3-31 3-32 3-32 3-36 3-38 3-39 3-40 3-41 3-41 3-42 Keys ...3-3 Remote Keyless Entry (RKE) System ...3-4 Remote Keyless Entry...
.../Haul Mode ...Parking Brake ...Shifting Into Park ...Shifting Out of Park ...Parking Over Things That Burn ...Engine Exhaust ...Running the Vehicle While Parked ...3-22 3-22 3-24 3-24 3-26 3-26 3-27 3-28 3-29 3-30 3-31 3-32 3-32 3-36 3-38 3-39 3-40 3-41 3-41 3-42 Keys ...3-3 Remote Keyless Entry (RKE) System ...3-4 Remote Keyless Entry...
Owner's Manual
Page 148
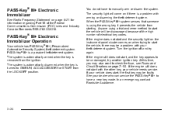
... panel cluster comes on when trying to check the fuse, see Fuses and Circuit Breakers on if there is removed from the LOCK/OFF position. 3-24 PASS-Key® III+ Electronic Immobilizer Operation Your vehicle has PASS-Key® III+ (Personalized Automotive Security System) theft-deterrent system. PASS-Key® III...
... panel cluster comes on when trying to check the fuse, see Fuses and Circuit Breakers on if there is removed from the LOCK/OFF position. 3-24 PASS-Key® III+ Electronic Immobilizer Operation Your vehicle has PASS-Key® III+ (Personalized Automotive Security System) theft-deterrent system. PASS-Key® III...

Owner's Manual
Page 175
... vehicle may have a Rear Vision Camera system. Select the Video screen button. Field Strength: Not greater than 2.5V/m peak (0.25V/m average) at a distance of operation: 24.05GHz - 24.25GHz. Read this equipment. The rear vision camera system is designed to select Display or touch the Display screen button. 3.
... vehicle may have a Rear Vision Camera system. Select the Video screen button. Field Strength: Not greater than 2.5V/m peak (0.25V/m average) at a distance of operation: 24.05GHz - 24.25GHz. Read this equipment. The rear vision camera system is designed to select Display or touch the Display screen button. 3.

Owner's Manual
Page 204
... IntelliBeam® system turns the high-beam headlamps on the inside rear view mirror. IntelliBeam® is enabled. The vehicle's speed drops below 15 mph (24 km/h). . Press and release the IntelliBeam® button on when it will appear on . The system detects a preceding vehicle's taillamps. The high-beam headlamps will...
... IntelliBeam® system turns the high-beam headlamps on the inside rear view mirror. IntelliBeam® is enabled. The vehicle's speed drops below 15 mph (24 km/h). . Press and release the IntelliBeam® button on when it will appear on . The system detects a preceding vehicle's taillamps. The high-beam headlamps will...

Owner's Manual
Page 216
... let hot inside the vehicle. An indicator light comes on . Press the REAR button to turn the rear climate control system on page 4‑26. 4-24 If recirculation is on to show that the air conditioning mode has been canceled. While in recirculation mode the windows may fog when the weather...
... let hot inside the vehicle. An indicator light comes on . Press the REAR button to turn the rear climate control system on page 4‑26. 4-24 If recirculation is on to show that the air conditioning mode has been canceled. While in recirculation mode the windows may fog when the weather...

Owner's Manual
Page 247
... this message still comes on, it means there may be a problem with the StabiliTrak system. If the warning comes on and stays on page 3‑24 for more information. SERVICE THEFT DETERRENT SYSTEM This message displays when there is not operating properly. See PASS-Key® III+ Electronic Immobilizer Operation on...
... this message still comes on, it means there may be a problem with the StabiliTrak system. If the warning comes on and stays on page 3‑24 for more information. SERVICE THEFT DETERRENT SYSTEM This message displays when there is not operating properly. See PASS-Key® III+ Electronic Immobilizer Operation on...
Owner's Manual
Page 303
... 5-86 Overview ...5-2 Navigation System Overview ...5-2 Getting Started ...5-4 Cleaning the Display ...5-11 Features and Controls ...5-12 Using the Navigation System ...5-12 Maps ...5-14 Symbols ...5-17 Destination ...5-24 Configure Menu ...5-42 Global Positioning System (GPS) ...5-57 5-1
... 5-86 Overview ...5-2 Navigation System Overview ...5-2 Getting Started ...5-4 Cleaning the Display ...5-11 Features and Controls ...5-12 Using the Navigation System ...5-12 Maps ...5-14 Symbols ...5-17 Destination ...5-24 Configure Menu ...5-42 Global Positioning System (GPS) ...5-57 5-1
Owner's Manual
Page 305
...;60 for more information. See "Adding Destinations to install and eject a map DVD. AUDIO Key. See "Sound Menu" under Navigation Audio System on page 5‑24 for more information. A. P.
...;60 for more information. See "Adding Destinations to install and eject a map DVD. AUDIO Key. See "Sound Menu" under Navigation Audio System on page 5‑24 for more information. A. P.

Owner's Manual
Page 306
..., and adjusting the speakers. . 5-4 The navigation system has built-in features intended to become familiar with the navigation system operation, hard keys on page 5‑24 for more information. w (Tune) Knob. See Destination on the faceplate, and touch-sensitive screen buttons of the navigation system. POI (Point of Interest (POI) on...
..., and adjusting the speakers. . 5-4 The navigation system has built-in features intended to become familiar with the navigation system operation, hard keys on page 5‑24 for more information. w (Tune) Knob. See Destination on the faceplate, and touch-sensitive screen buttons of the navigation system. POI (Point of Interest (POI) on...
Owner's Manual
Page 309
... the AUDIO hard key and select the desired band (AM, FM, or XM (if equipped)). 3. See "Storing Radio Station Presets" under Destination on page 5‑24 for more information. Music Navigator Scrolling Radio Category Scrolling Navigation Menu Scrolling and some functions 5-7 Storing Radio Station Presets To set preset radio stations, do...
... the AUDIO hard key and select the desired band (AM, FM, or XM (if equipped)). 3. See "Storing Radio Station Presets" under Destination on page 5‑24 for more information. Music Navigator Scrolling Radio Category Scrolling Navigation Menu Scrolling and some functions 5-7 Storing Radio Station Presets To set preset radio stations, do...

Owner's Manual
Page 311
.... Select the route preference (Fastest, Shortest, or Other). You are available, the List screen button displays a number. See "Address Entry" under Maps on page 5‑24 for entry. Select this button to view the list and select a street. 10. If the radio is automatically selected for more than five are now...
.... Select the route preference (Fastest, Shortest, or Other). You are available, the List screen button displays a number. See "Address Entry" under Maps on page 5‑24 for entry. Select this button to view the list and select a street. 10. If the radio is automatically selected for more than five are now...

Owner's Manual
Page 312
...). Enter a destination. Select the Name screen button. See "Adding or Changing Preset Destinations" under Destination on page 5‑24 for more information on page 5‑24 for more than five are available, a list displays. The route is already on with the destination marked appears. 10. ...See "Point of the POI in the screen button on . See Destination on page 5‑24 for more information. 4. Select the Go screen button next to Address Book screen button. The address book screen appears. 7. The information ...
...). Enter a destination. Select the Name screen button. See "Adding or Changing Preset Destinations" under Destination on page 5‑24 for more information on page 5‑24 for more than five are available, a list displays. The route is already on with the destination marked appears. 10. ...See "Point of the POI in the screen button on . See Destination on page 5‑24 for more information. 4. Select the Go screen button next to Address Book screen button. The address book screen appears. 7. The information ...

Owner's Manual
Page 313
... final destination is now ready to turn the system on with the adjusted voice level. See "Installing the Map DVD" under Maps on page 5‑24 for more information. A map screen, with clean water. 5-11 The system calculates and highlights the route. 8. See "Preset Destination" under Configure Menu on page 5‑...
... final destination is now ready to turn the system on with the adjusted voice level. See "Installing the Map DVD" under Maps on page 5‑24 for more information. A map screen, with clean water. 5-11 The system calculates and highlights the route. 8. See "Preset Destination" under Configure Menu on page 5‑...
Owner's Manual
Page 315
... screen to enter letters from the alphabet. NAV (Navigation): Press to view your vehicle's current position on a DVD. Screen buttons are located on page 5‑24 for more information. e (Sound): Press to access the Sound screen to repeat the last voice guidance prompt. Each press of this key cycles through OnStar...
... screen to enter letters from the alphabet. NAV (Navigation): Press to view your vehicle's current position on a DVD. Screen buttons are located on page 5‑24 for more information. e (Sound): Press to access the Sound screen to repeat the last voice guidance prompt. Each press of this key cycles through OnStar...

Owner's Manual
Page 319
... you continue touching the map screen. Move your finger from the current position to the destination mark. Scrolling the Map Touch anywhere on page 5‑24 for a longer distance. Keep touching the map screen to scroll in P (Park), the system scrolls initially at a slower rate. See "From Map" under Destination on...
... you continue touching the map screen. Move your finger from the current position to the destination mark. Scrolling the Map Touch anywhere on page 5‑24 for a longer distance. Keep touching the map screen to scroll in P (Park), the system scrolls initially at a slower rate. See "From Map" under Destination on...

Owner's Manual
Page 321
... "Adding Destinations to switch between North Up, Heading Up, and 3-D view modes. Select this screen symbol to the Address Book" under Destination on page 5‑24 for more information. 5-19 While in the address book. Three-dimensional (3-D) view mode changes the appearance of which direction the vehicle is known as North...
... "Adding Destinations to switch between North Up, Heading Up, and 3-D view modes. Select this screen symbol to the Address Book" under Destination on page 5‑24 for more information. 5-19 While in the address book. Three-dimensional (3-D) view mode changes the appearance of which direction the vehicle is known as North...
