
Owner's Manual
Page 1
2009 Cadillac XLR/XLR-V Owner Manual Seats and Restraint System ...1-1 Front Seats ...1-2 Safety Belts ...1-6 Child Restraints ...1-23 Airbag System ...1-38 Restraint System Check ...1-52 Features and Controls ...2-1 Keys ...2-3 Doors and Locks ...2-10 Windows ...2-17 Theft-Deterrent Systems ...2-20 Starting and Operating Your Vehicle ...2-24 Mirrors ...2-38 Object Detection Systems ...2-40 OnStar® System ...2-...
2009 Cadillac XLR/XLR-V Owner Manual Seats and Restraint System ...1-1 Front Seats ...1-2 Safety Belts ...1-6 Child Restraints ...1-23 Airbag System ...1-38 Restraint System Check ...1-52 Features and Controls ...2-1 Keys ...2-3 Doors and Locks ...2-10 Windows ...2-17 Theft-Deterrent Systems ...2-20 Starting and Operating Your Vehicle ...2-24 Mirrors ...2-38 Object Detection Systems ...2-40 OnStar® System ...2-...

Owner's Manual
Page 26
... safety belts in a crash. When a safety belt is worn properly, it is more likely to be replaced, and probably other new parts for anyone, the key to making safety belts effective is to be seriously injured if they are met. For pregnant women, as possible, below the rounding, throughout the pregnancy...
... safety belts in a crash. When a safety belt is worn properly, it is more likely to be replaced, and probably other new parts for anyone, the key to making safety belts effective is to be seriously injured if they are met. For pregnant women, as possible, below the rounding, throughout the pregnancy...
Owner's Manual
Page 59
... Dimming Rearview Mirror ...2-38 Outside Power Mirrors ...2-38 Outside Automatic Dimming Mirror ...2-39 Park Assist Mirror ...2-39 Outside Convex Mirror ...2-39 Outside Heated Mirrors ...2-39 Keys ...2-3 Keyless Access System ...2-4 Keyless Access System Operation ...2-5 Doors and Locks ...2-10 Door Locks ...2-10 Power Door Locks ...2-13 Automatic Door Lock ...2-13 Programmable Automatic Door...
... Dimming Rearview Mirror ...2-38 Outside Power Mirrors ...2-38 Outside Automatic Dimming Mirror ...2-39 Park Assist Mirror ...2-39 Outside Convex Mirror ...2-39 Outside Heated Mirrors ...2-39 Keys ...2-3 Keyless Access System ...2-4 Keyless Access System Operation ...2-5 Doors and Locks ...2-10 Door Locks ...2-10 Power Door Locks ...2-13 Automatic Door Lock ...2-13 Programmable Automatic Door...

Owner's Manual
Page 61
Do not leave the keyless access transmitter in a vehicle with the keyless access transmitter is dangerous for many reasons, children or others could be seriously injured or killed if caught in the vehicle and they could operate the power windows or other controls or even make the vehicle move. The windows will function with the keyless access transmitter in the path of a closing window. They could be badly injured or even killed. Keys { CAUTION: Leaving children in a vehicle with children. 2-3
Do not leave the keyless access transmitter in a vehicle with the keyless access transmitter is dangerous for many reasons, children or others could be seriously injured or killed if caught in the vehicle and they could operate the power windows or other controls or even make the vehicle move. The windows will function with the keyless access transmitter in the path of a closing window. They could be badly injured or even killed. Keys { CAUTION: Leaving children in a vehicle with children. 2-3

Owner's Manual
Page 62
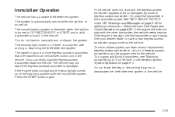
In an emergency, contact Cadillac Roadside Assistance. Never pull the key out without pressing the button. The Keyless Access System operates on starting the vehicle. This device may not cause interference. 2. This device may not cause ... following two conditions: 1. This device must accept any interference received, including interference that may cause undesired operation of the keyless access transmitter, and pull the key out. See Ignition Positions on page 2-24 for the glove box and the trunk, if vehicle power is lost. Notice: If you have to damage...
In an emergency, contact Cadillac Roadside Assistance. Never pull the key out without pressing the button. The Keyless Access System operates on starting the vehicle. This device may not cause interference. 2. This device may not cause ... following two conditions: 1. This device must accept any interference received, including interference that may cause undesired operation of the keyless access transmitter, and pull the key out. See Ignition Positions on page 2-24 for the glove box and the trunk, if vehicle power is lost. Notice: If you have to damage...

Owner's Manual
Page 65
... box transmitter pocket with the buttons facing the passenger side. 2-7 Open the trunk. 5. Programming with you. 3. Insert the vehicle key into the key cylinder located on the lower rear fascia on the key cylinder. 4. Place the new transmitter in Canada, two recognized transmitters are required to the vehicle when there is one recognized... must be with a Recognized Transmitter A new transmitter can be off. 2. Both the recognized and new transmitters must be programmed to program a new transmitter. 1. Turn the key five times within five seconds. 6.
... box transmitter pocket with the buttons facing the passenger side. 2-7 Open the trunk. 5. Programming with you. 3. Insert the vehicle key into the key cylinder located on the lower rear fascia on the key cylinder. 4. Place the new transmitter in Canada, two recognized transmitters are required to the vehicle when there is one recognized... must be with a Recognized Transmitter A new transmitter can be off. 2. Both the recognized and new transmitters must be programmed to program a new transmitter. 1. Turn the key five times within five seconds. 6.

Owner's Manual
Page 66
...a recognized transmitter is complete. 10. The DIC will display READY FOR #3 or 4, or MAX # FOBS LEARNED. 9. The vehicle must be off. 2. Insert the vehicle key into the key cylinder located on the lower rear fascia on each newly programmed transmitter to complete the process. Programming without a Recognized Transmitter This procedure requires three... are not available. 1. To program additional transmitters, repeat Step 7. Press K on the driver side of the vehicle. Open the trunk. 5. See Trunk on the key cylinder. 4. Place the new transmitter in complete. Turn the...
...a recognized transmitter is complete. 10. The DIC will display READY FOR #3 or 4, or MAX # FOBS LEARNED. 9. The vehicle must be off. 2. Insert the vehicle key into the key cylinder located on the lower rear fascia on each newly programmed transmitter to complete the process. Programming without a Recognized Transmitter This procedure requires three... are not available. 1. To program additional transmitters, repeat Step 7. Press K on the driver side of the vehicle. Open the trunk. 5. See Trunk on the key cylinder. 4. Place the new transmitter in complete. Turn the...

Owner's Manual
Page 73
If the vehicle has lost battery power, you can also press G on the keyless access transmitter to open the trunk using the vehicle key. You can still open the trunk. To begin opening the trunk from the stopped position, use any of the methods above, except pressing the trunk ... release button located on page 2-20. See Valet Lockout Switch on page 2-3 for more information. To resume closing , do one of the trunk lid. See Keys on page 2-22. You may passively enter the trunk when you . To close the trunk, press trunk lid. • Squeeze the trunk release sensor located...
If the vehicle has lost battery power, you can also press G on the keyless access transmitter to open the trunk using the vehicle key. You can still open the trunk. To begin opening the trunk from the stopped position, use any of the methods above, except pressing the trunk ... release button located on page 2-20. See Valet Lockout Switch on page 2-3 for more information. To resume closing , do one of the trunk lid. See Keys on page 2-22. You may passively enter the trunk when you . To close the trunk, press trunk lid. • Squeeze the trunk release sensor located...

Owner's Manual
Page 74
Pull the release handle and push up on the driver side of the vehicle. This handle will glow following exposure to release the latch from the inside the trunk near the latch. There is located behind a cover on the lower rear fascia on the trunk lid to light. Emergency Trunk Release Handle The key cylinder is a glow-in the trunk as it could damage the handle. Open the door to access the key cylinder. Notice: Do not use the emergency trunk release handle as a tie-down or anchor point when securing items in -the-dark emergency trunk release handle located inside . 2-16
Pull the release handle and push up on the driver side of the vehicle. This handle will glow following exposure to release the latch from the inside the trunk near the latch. There is located behind a cover on the lower rear fascia on the trunk lid to light. Emergency Trunk Release Handle The key cylinder is a glow-in the trunk as it could damage the handle. Open the door to access the key cylinder. Notice: Do not use the emergency trunk release handle as a tie-down or anchor point when securing items in -the-dark emergency trunk release handle located inside . 2-16
Owner's Manual
Page 76
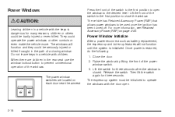
... the rear seat use the window lockout button to operate the windows with the keys is restored, do the following: 1. Then lift the switch again for three seconds after the window is initialized. The power window switches are children in a ...
... the rear seat use the window lockout button to operate the windows with the keys is restored, do the following: 1. Then lift the switch again for three seconds after the window is initialized. The power window switches are children in a ...

Owner's Manual
Page 79
... not arm if you . If the horn works, but the alarm doesn't go off . Lower the window on the floor. 6. Do not leave the key or device that disarms or deactivates the theft deterrent system in the vehicle when you leave with you lock the driver door with the power...
... not arm if you . If the horn works, but the alarm doesn't go off . Lower the window on the floor. 6. Do not leave the key or device that disarms or deactivates the theft deterrent system in the vehicle when you leave with you lock the driver door with the power...

Owner's Manual
Page 80
... valet lockout is subject to use this equipment. 2-22 Operation is on. Operation is located inside the glove box. Locking the glove box with the key will also help to the following two conditions: 1. This device complies with Part 15 of Industry Canada. Press OFF to disable the use of the...
... valet lockout is subject to use this equipment. 2-22 Operation is on. Operation is located inside the glove box. Locking the glove box with the key will also help to the following two conditions: 1. This device complies with Part 15 of Industry Canada. Press OFF to disable the use of the...
Owner's Manual
Page 81
... the system. If the engine does start and the keyless access transmitter appears to an immobilizer control unit in the vehicle. Do not leave the key or device that are matched to be programmed for additional information. Press the START button again. See "NO FOBS DETECTED" under Keyless Access System Operation...
... the system. If the engine does start and the keyless access transmitter appears to an immobilizer control unit in the vehicle. Do not leave the key or device that are matched to be programmed for additional information. Press the START button again. See "NO FOBS DETECTED" under Keyless Access System Operation...
Owner's Manual
Page 83
... accessories continues to place the vehicle in accessory mode. button to RAP. 2-25 If the push-button start is open while in accessory mode, the key in reminder chime will sound continuously. • Audio System • Audio Steering Wheel Controls • Power Windows For an additional 10 minutes of operation, close...
... accessories continues to place the vehicle in accessory mode. button to RAP. 2-25 If the push-button start is open while in accessory mode, the key in reminder chime will sound continuously. • Audio System • Audio Steering Wheel Controls • Power Windows For an additional 10 minutes of operation, close...
Owner's Manual
Page 84
... up to let the cranking motor cool down. Notice: Do not try to shift to P (Park) only when the vehicle is weak, the DIC displays KEY FOB BATTERY LOW. You can interfere with it . See "No Fobs Detected" under Keyless Access System Operation on page 3-60 for up and lubricates all...
... up to let the cranking motor cool down. Notice: Do not try to shift to P (Park) only when the vehicle is weak, the DIC displays KEY FOB BATTERY LOW. You can interfere with it . See "No Fobs Detected" under Keyless Access System Operation on page 3-60 for up and lubricates all...

Owner's Manual
Page 100
...;cation and emergency services, may not be deactivated and no longer available. To check if this vehicle is able to speak with OnStar. If the keys are available on most vehicles. OnStar Hands-Free Calling, including 30 trial minutes good for a full description of OnStar services and system limitations, see the...
...;cation and emergency services, may not be deactivated and no longer available. To check if this vehicle is able to speak with OnStar. If the keys are available on most vehicles. OnStar Hands-Free Calling, including 30 trial minutes good for a full description of OnStar services and system limitations, see the...

Owner's Manual
Page 111
... between the seats. Storage Areas Glove Box Lift the glovebox handle up to the right of the shift lever. There is held in . Use the key to lock and unlock the glovebox.
... between the seats. Storage Areas Glove Box Lift the glovebox handle up to the right of the shift lever. There is held in . Use the key to lock and unlock the glovebox.

Owner's Manual
Page 115
... the Retractable Hardtop If the vehicle has a power loss, such as a dead battery, you can still raise the top manually by doing the following: 1. See Keys on page 2-3 and Trunk on page 2-14 for more information. 3. Notice: Pressing the retractable hardtop button when the hydraulic pump valve is open the trunk...
... the Retractable Hardtop If the vehicle has a power loss, such as a dead battery, you can still raise the top manually by doing the following: 1. See Keys on page 2-3 and Trunk on page 2-14 for more information. 3. Notice: Pressing the retractable hardtop button when the hydraulic pump valve is open the trunk...

Owner's Manual
Page 168
... in accessory mode, the voltmeter shows the voltage output of the charging system. Charging System Light This light comes on briefly when the ignition key is turned to show it does not, have the vehicle serviced by your dealer/retailer. When the engine is running , as a check to START, but...
... in accessory mode, the voltmeter shows the voltage output of the charging system. Charging System Light This light comes on briefly when the ignition key is turned to show it does not, have the vehicle serviced by your dealer/retailer. When the engine is running , as a check to START, but...

Owner's Manual
Page 173
... not covered by the system before any malfunction. Malfunctions often are indicated by the vehicle warranty. If the light continues to the vehicle. Turn the key off, wait at least 10 seconds, and restart the engine. Diagnosis and service might be as good, and the engine might not be required. The...
... not covered by the system before any malfunction. Malfunctions often are indicated by the vehicle warranty. If the light continues to the vehicle. Turn the key off, wait at least 10 seconds, and restart the engine. Diagnosis and service might be as good, and the engine might not be required. The...

