
Owner's Manual
Page 202
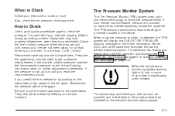
...evaporate into the atmosphere. A loose or missing fuel cap will clear it from the DIC display. TURN SIGNAL ON If a turn signal is left off the vehicle. TRANSMISSION HOT If the transmission fluid temperature becomes high, the message center will clear the message. When the transmission fl...seconds until the next ignition cycle. This message will clear it from the DIC display. The diagnostic system can determine if the fuel cap has been left on for the message on page 3-41. Adding washer fluid will display this message immediately and clear it from...
...evaporate into the atmosphere. A loose or missing fuel cap will clear it from the DIC display. TURN SIGNAL ON If a turn signal is left off the vehicle. TRANSMISSION HOT If the transmission fluid temperature becomes high, the message center will clear the message. When the transmission fl...seconds until the next ignition cycle. This message will clear it from the DIC display. The diagnostic system can determine if the fuel cap has been left on for the message on page 3-41. Adding washer fluid will display this message immediately and clear it from...

Owner's Manual
Page 307
...High Intensity Discharge (HID) Lighting ...5-53 Halogen Bulbs ...5-54 Headlamps ...5-54 Front Turn Signal, Sidemarker and Daytime Running Lamps ...5-58 Center High-Mounted Stoplamp (CHMSL) ...5-59 Taillamps ...5-59 Replacement Bulbs ...5-60 Windshield Wiper Blade Replacement ...5-61 Tires ...5-62 Inflation ......5-11 Engine Air Cleaner/Filter ...5-16 Automatic Transmission Fluid ...5-18 Engine Coolant ...5-21 Coolant Surge Tank Pressure Cap ...5-24 Engine Overheating ...5-25 Cooling System ...5-28 Engine Fan Noise ...5-34 Power Steering Fluid ...5-35 Windshield Washer Fluid ...5-36 Brakes ...
...High Intensity Discharge (HID) Lighting ...5-53 Halogen Bulbs ...5-54 Headlamps ...5-54 Front Turn Signal, Sidemarker and Daytime Running Lamps ...5-58 Center High-Mounted Stoplamp (CHMSL) ...5-59 Taillamps ...5-59 Replacement Bulbs ...5-60 Windshield Wiper Blade Replacement ...5-61 Tires ...5-62 Inflation ......5-11 Engine Air Cleaner/Filter ...5-16 Automatic Transmission Fluid ...5-18 Engine Coolant ...5-21 Coolant Surge Tank Pressure Cap ...5-24 Engine Overheating ...5-25 Cooling System ...5-28 Engine Fan Noise ...5-34 Power Steering Fluid ...5-35 Windshield Washer Fluid ...5-36 Brakes ...
Owner's Manual
Page 377
...ficantly under-inflated. Radial tires may look properly in flation pressure matches the recommended pressure on the Driver Information Center (DIC); Remove the valve cap from the tire valve stem. If the pressure is low, add air until you overfill the tire, release air by pushing..., one or more of the tire valve. You can't tell if your tires are properly in the center of your tires once a month or more than 1 mile (1.6 km). Be sure to put the valve caps back on the vehicle's tire information placard. 5-71 Check the tire's in flate them . Recheck the...
...ficantly under-inflated. Radial tires may look properly in flation pressure matches the recommended pressure on the Driver Information Center (DIC); Remove the valve cap from the tire valve stem. If the pressure is low, add air until you overfill the tire, release air by pushing..., one or more of the tire valve. You can't tell if your tires are properly in the center of your tires once a month or more than 1 mile (1.6 km). Be sure to put the valve caps back on the vehicle's tire information placard. 5-71 Check the tire's in flate them . Recheck the...
Owner's Manual
Page 379
... continue flashing throughout the matching procedure. See your dealer for a single horn chirp. 3. Turn the exterior lamp switch from the valve cap stem. Proceed to OFF. 10. Set all four tires to "On" four times within 15 seconds, confirming that the TPM matching... process has started. Remove the valve cap from "Off" to the recommended air pressure level as indicated on the Driver Information Center (DIC). 4. To let air-pressure out of a tire you re-install the road tire containing...
... continue flashing throughout the matching procedure. See your dealer for a single horn chirp. 3. Turn the exterior lamp switch from the valve cap stem. Proceed to OFF. 10. Set all four tires to "On" four times within 15 seconds, confirming that the TPM matching... process has started. Remove the valve cap from "Off" to the recommended air pressure level as indicated on the Driver Information Center (DIC). 4. To let air-pressure out of a tire you re-install the road tire containing...

Owner's Manual
Page 393
Remove the center cap by placing the chisel end of the wheel wrench in the slot on the wheel and gently prying the cap out. 2. Turn the wheel wrench counterclockwise to loosen all the wheel nuts. 1. Use the wheel wrench to loosen the wheel nuts. Don't remove the wheel nuts yet. 5-87
Remove the center cap by placing the chisel end of the wheel wrench in the slot on the wheel and gently prying the cap out. 2. Turn the wheel wrench counterclockwise to loosen all the wheel nuts. 1. Use the wheel wrench to loosen the wheel nuts. Don't remove the wheel nuts yet. 5-87

Owner's Manual
Page 397
... wrench to get new GM original equipment wheel nuts. Be sure to use the wheel wrench to line up the tab on the center cap with the wheel. Place the cap on the wheel. 5-91 After mounting the spare, put the wheel nuts back on one way. If you must also reinstall the... center cap. Be sure to tighten the nuts until it seats flush with the indentation on the wheel and tap it into place until the wheel ...
... wrench to get new GM original equipment wheel nuts. Be sure to use the wheel wrench to line up the tab on the center cap with the wheel. Place the cap on the wheel. 5-91 After mounting the spare, put the wheel nuts back on one way. If you must also reinstall the... center cap. Be sure to tighten the nuts until it seats flush with the indentation on the wheel and tap it into place until the wheel ...
Owner's Manual
Page 469
...19 Steering ...4-12 Steering in Emergencies ...4-13 Steering Tips ...4-12 Steering Wheel Controls, Audio ...3-95 Stereo RCA Jacks ...3-87 Storage Areas Center Console Storage Area ...2-43 Convenience Net ...2-44 Cupholder(s) ...2-42 Glove Box ...2-42 Luggage Carrier ...2-43 Rear Seat Armrest ...2-44 Rear Storage...Content Theft-Deterrent ...2-16 Passlock® ...2-17 Third Row ...1-68 Third Row - Lap Belt ...1-41 Throttle, Adjustable ...2-20 TIGHTEN FUEL CAP ...3-60 Tilt Wheel ...3-7 Tilting the 50/50 Split Bench Seat ...1-14 Tilting the Full Bench Seat ...1-19 Tire Sidewall Labeling ...5-62...
...19 Steering ...4-12 Steering in Emergencies ...4-13 Steering Tips ...4-12 Steering Wheel Controls, Audio ...3-95 Stereo RCA Jacks ...3-87 Storage Areas Center Console Storage Area ...2-43 Convenience Net ...2-44 Cupholder(s) ...2-42 Glove Box ...2-42 Luggage Carrier ...2-43 Rear Seat Armrest ...2-44 Rear Storage...Content Theft-Deterrent ...2-16 Passlock® ...2-17 Third Row ...1-68 Third Row - Lap Belt ...1-41 Throttle, Adjustable ...2-20 TIGHTEN FUEL CAP ...3-60 Tilt Wheel ...3-7 Tilting the 50/50 Split Bench Seat ...1-14 Tilting the Full Bench Seat ...1-19 Tire Sidewall Labeling ...5-62...
