

Owner's Manual
Page 21
... until it is securely in place. 4. Check to see that the safety belt buckles on the driver's side seatback are not under the seat cushions. 1-9 Lift the seatback up on the strap loop located at the rear of the headrest upwards until you hear a click. 5. Return the headrest to make sure...
... until it is securely in place. 4. Check to see that the safety belt buckles on the driver's side seatback are not under the seat cushions. 1-9 Lift the seatback up on the strap loop located at the rear of the headrest upwards until you hear a click. 5. Return the headrest to make sure...

Owner's Manual
Page 24
While still holding lever 3 toward you, grasp the top of the seat and pull it locks into place. Lift the rear of the seat up on the lever labeled 2, located on the rear of the floor and push it forward until it toward you ...
While still holding lever 3 toward you, grasp the top of the seat and pull it locks into place. Lift the rear of the seat up on the lever labeled 2, located on the rear of the floor and push it forward until it toward you ...

Owner's Manual
Page 26
To unlatch the rear of the seat from the floor, pull up on the release lever labeled 2, at the rear of the seat, and lift the rear of the seat up , roll the seat out of the floor. 4. 3. Squeeze the release handle while pulling the seat out. 5. While holding the rear of the seat up off of the vehicle. 1-14
To unlatch the rear of the seat from the floor, pull up on the release lever labeled 2, at the rear of the seat, and lift the rear of the seat up , roll the seat out of the floor. 4. 3. Squeeze the release handle while pulling the seat out. 5. While holding the rear of the seat up off of the vehicle. 1-14

Owner's Manual
Page 91
Liftgate/Liftglass CAUTION: It can be dangerous to drive with the liftgate or liftglass open the entire liftgate, lift the handle located in the center of the door. D Turn the fan on VENT or OUTSIDE AIR. That will lock. See "Comfort Controls" in the ...
Liftgate/Liftglass CAUTION: It can be dangerous to drive with the liftgate or liftglass open the entire liftgate, lift the handle located in the center of the door. D Turn the fan on VENT or OUTSIDE AIR. That will lock. See "Comfort Controls" in the ...

Owner's Manual
Page 109
Autoride t The Autoride feature provides superior vehicle ride and handling under a variety of the shock absorbers. Autoride also interacts with traction to body position, lift/dive and steering position of the rear wheels has no traction and the other does, this feature will allow the wheel with the tow/haul ...
Autoride t The Autoride feature provides superior vehicle ride and handling under a variety of the shock absorbers. Autoride also interacts with traction to body position, lift/dive and steering position of the rear wheels has no traction and the other does, this feature will allow the wheel with the tow/haul ...

Owner's Manual
Page 128
Center Console Storage Area Your vehicle has a console compartment between the bucket seats. 2-49 To open . Storage Compartments Glove Box To open your glove box, lift up . The console has a place to store compact discs and loose change. To access the cell phone storage area, press the button on the front ...
Center Console Storage Area Your vehicle has a console compartment between the bucket seats. 2-49 To open . Storage Compartments Glove Box To open your glove box, lift up . The console has a place to store compact discs and loose change. To access the cell phone storage area, press the button on the front ...
Owner's Manual
Page 131
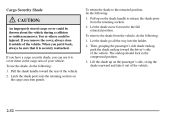
To remove the shade from the retaining sockets. 2. Lift the shade up on the shade handle to release the shade posts from the vehicle, do the following: 1. CAUTION: An improperly stored cargo cover could ...
To remove the shade from the retaining sockets. 2. Lift the shade up on the shade handle to release the shade posts from the vehicle, do the following: 1. CAUTION: An improperly stored cargo cover could ...

Owner's Manual
Page 135
Lift up on the front wall inside the console. Be sure to your vehicle can damage it . NOTICE: Adding some electrical equipment to reinstall the protective ...
Lift up on the front wall inside the console. Be sure to your vehicle can damage it . NOTICE: Adding some electrical equipment to reinstall the protective ...

Owner's Manual
Page 136
... until the desired time is a slide switch to adjust the intensity of the clock. 2. Your visors may have an extension that can swing down and lift the mirror cover to -side. Push and hold the button to the desired time. 3. Locate the adjust button on the lamps. Analog Clock To adjust...
... until the desired time is a slide switch to adjust the intensity of the clock. 2. Your visors may have an extension that can swing down and lift the mirror cover to -side. Push and hold the button to the desired time. 3. Locate the adjust button on the lamps. Analog Clock To adjust...

Owner's Manual
Page 275
... to NEUTRAL (N); If the warning doesn't come back on Grades" in the Index. Also, see or hear no steam, the problem may decide not to lift the hood but to get an engine overheat warning but see "Overheated Engine Protection Operating Mode" listed previously in this for long periods in a traffic...
... to NEUTRAL (N); If the warning doesn't come back on Grades" in the Index. Also, see or hear no steam, the problem may decide not to lift the hood but to get an engine overheat warning but see "Overheated Engine Protection Operating Mode" listed previously in this for long periods in a traffic...

Owner's Manual
Page 276
Engine Fan When the engine is boiling, don't do anything else until it isn't, you 'll see: If the coolant inside the coolant surge tank is cold, the coolant level should be at or above the FILL COLD mark. Coolant Surge Tank B. Coolant Surge Tank Pressure Cap C. Cooling System When you decide it's safe to lift the hood, here's what you may have a leak in the radiator hoses, heater hoses, radiator, water pump or somewhere else in the Index for more information on its location. A. See "Engine Compartment Overview" in the cooling system. 5-12 If it cools down.
Engine Fan When the engine is boiling, don't do anything else until it isn't, you 'll see: If the coolant inside the coolant surge tank is cold, the coolant level should be at or above the FILL COLD mark. Coolant Surge Tank B. Coolant Surge Tank Pressure Cap C. Cooling System When you decide it's safe to lift the hood, here's what you may have a leak in the radiator hoses, heater hoses, radiator, water pump or somewhere else in the Index for more information on its location. A. See "Engine Compartment Overview" in the cooling system. 5-12 If it cools down.

Owner's Manual
Page 288
Turn the wheel wrench clockwise to raise the jack lift head to the jack. Attach the jack handle to the lifting point. 5-24 Attach the wheel wrench to the jack handle extensions (as needed).
Turn the wheel wrench clockwise to raise the jack lift head to the jack. Attach the jack handle to the lifting point. 5-24 Attach the wheel wrench to the jack handle extensions (as needed).

Owner's Manual
Page 290
... of the vehicle, position the jack on the rear axle. If the vehicle slips off the jack, you could be sure to fit the jack lift head into the proper location before raising the vehicle. 5-26 If the flat tire is on the front of the vehicle, use the jacking pad...
... of the vehicle, position the jack on the rear axle. If the vehicle slips off the jack, you could be sure to fit the jack lift head into the proper location before raising the vehicle. 5-26 If the flat tire is on the front of the vehicle, use the jacking pad...

Owner's Manual
Page 310
Before closing the hood, be sure all filler caps are on the secondary hood release located near the center of the steering wheel. Pull down the hood and close it firmly. 6-9 Lift the hood. Hood Release To open the hood, first pull the handle inside the vehicle located under and to the front of the vehicle and pull up on properly. Then go to the left of the grill.
Before closing the hood, be sure all filler caps are on the secondary hood release located near the center of the steering wheel. Pull down the hood and close it firmly. 6-9 Lift the hood. Hood Release To open the hood, first pull the handle inside the vehicle located under and to the front of the vehicle and pull up on properly. Then go to the left of the grill.

Owner's Manual
Page 319
... cleaner not only cleans the air, it off, and be careful working on the cover. 2. CAUTION: Operating the engine with the air cleaner/filter off. 1. Lift the cover upward and remove the engine air cleaner/filter out of the air cleaner housing. Install the cover and tighten the screws. And, dirt...
... cleaner not only cleans the air, it off, and be careful working on the cover. 2. CAUTION: Operating the engine with the air cleaner/filter off. 1. Lift the cover upward and remove the engine air cleaner/filter out of the air cleaner housing. Install the cover and tighten the screws. And, dirt...

Owner's Manual
Page 339
Sidemarker Lamp D. Headlamps 1. Low-Beam Headlamp B. Lift off the radiator cover. 6-38 High-Beam Headlamp E. Pry up the eight fastener plugs on the radiator cover with a screwdriver and pull the fasteners out. Daytime Running Lamp C. A. Front Turn Signal Lamp 3. Open the hood of the vehicle. 2.
Sidemarker Lamp D. Headlamps 1. Low-Beam Headlamp B. Lift off the radiator cover. 6-38 High-Beam Headlamp E. Pry up the eight fastener plugs on the radiator cover with a screwdriver and pull the fasteners out. Daytime Running Lamp C. A. Front Turn Signal Lamp 3. Open the hood of the vehicle. 2.

Owner's Manual
Page 340
Remove the headlamp assembly by lifting the end of the pin upward until it unsnaps and then pulling it out and away from the front of the vehicle. 5. 4. Remove the horizontal pin from the headlamp assembly by lifting it up and then pulling it upward 6. Remove the vertical pin from you better access to the headlamp assembly). 6-39 Disconnect the electrical connector from the lower corner of the pin away from the headlamp assembly by turning the end of the headlamp assembly (this will give you until it unsnaps and then pulling it toward the center of the vehicle. 7.
Remove the headlamp assembly by lifting the end of the pin upward until it unsnaps and then pulling it out and away from the front of the vehicle. 5. 4. Remove the horizontal pin from the headlamp assembly by lifting it up and then pulling it upward 6. Remove the vertical pin from you better access to the headlamp assembly). 6-39 Disconnect the electrical connector from the lower corner of the pin away from the headlamp assembly by turning the end of the headlamp assembly (this will give you until it unsnaps and then pulling it toward the center of the vehicle. 7.

Owner's Manual
Page 349
For proper type and length, see "Normal Maintenance Replacement Parts" in different ways. To replace the windshield wiper blade assembly do the following: 1. Lift the wiper arm and turn the blade until it is facing away from the windshield. 2. Windshield wiper blades should be inspected at least twice a year ...
For proper type and length, see "Normal Maintenance Replacement Parts" in different ways. To replace the windshield wiper blade assembly do the following: 1. Lift the wiper arm and turn the blade until it is facing away from the windshield. 2. Windshield wiper blades should be inspected at least twice a year ...

Owner's Manual
Page 372
Lift the cover for more information on the driver's side of the fuse between your thumb and index finger and pull straight out. 6-71 These are ...
Lift the cover for more information on the driver's side of the fuse between your thumb and index finger and pull straight out. 6-71 These are ...

Owner's Manual
Page 409
...for your dealer for more than an auto club or towing service. GM of vehicle purchase/lease. It provides every Cadillac owner with free resource information, such as area driver assessment centers and mobility equipment installers. Call 1-800-GM-DRIVE...(TTY) users, call 1-800-263-3830. All TTY users call 1-800-833-9935. Cadillac's exceptional Roadside Service is available for details. Each technician travels with a specially equipped service vehicle complete with the necessary... Canada also has a Mobility Program. See your vehicle (hand controls, wheelchair/scooter lifts, etc.).
...for your dealer for more than an auto club or towing service. GM of vehicle purchase/lease. It provides every Cadillac owner with free resource information, such as area driver assessment centers and mobility equipment installers. Call 1-800-GM-DRIVE...(TTY) users, call 1-800-263-3830. All TTY users call 1-800-833-9935. Cadillac's exceptional Roadside Service is available for details. Each technician travels with a specially equipped service vehicle complete with the necessary... Canada also has a Mobility Program. See your vehicle (hand controls, wheelchair/scooter lifts, etc.).
