

Owner's Manual
Page 7
In Brief 1-1 In Brief Instrument Panel Instrument Panel ...1-2 Windshield Wiper/Washer ...1-13 Climate Controls ...1-14 Transmission ...1-16 Regenerative Braking ...1-24 Battery ...1-24 Service ...1-25 Vehicle Features Radio(s) ...Satellite Radio ...Portable Audio Devices ...Bluetooth® ...Steering Wheel Controls ...Cruise Control ...Navigation System ...Driver Information Center (DIC) ...Vehicle... Exterior Lighting ...1-12 eAssist Features eAssist® Overview ...1-22 High Voltage Safety Information ...1-23 Driver Efficiency Gauge ...1-23 Automatic Engine Start/Stop Feature ...1-24
In Brief 1-1 In Brief Instrument Panel Instrument Panel ...1-2 Windshield Wiper/Washer ...1-13 Climate Controls ...1-14 Transmission ...1-16 Regenerative Braking ...1-24 Battery ...1-24 Service ...1-25 Vehicle Features Radio(s) ...Satellite Radio ...Portable Audio Devices ...Bluetooth® ...Steering Wheel Controls ...Cruise Control ...Navigation System ...Driver Information Center (DIC) ...Vehicle... Exterior Lighting ...1-12 eAssist Features eAssist® Overview ...1-22 High Voltage Safety Information ...1-23 Driver Efficiency Gauge ...1-23 Automatic Engine Start/Stop Feature ...1-24
Owner's Manual
Page 23
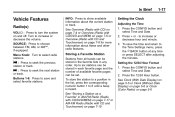
... button and select Time and Date. 2. Buttons 1‐6: Press to select radio stations. SOURCE: Press to seek the next station or track. Press the 12/24 Hour button. See Overview (Radio with CD) on page 7‑4 or Overview (Radio with CD/DVD and MEM) on page 7‑6 or Overview (Radio... bands can be stored in the favorite lists in each favorite page and the number of available favorite pages can be set. Setting the 12/24 Hour Format 1. Press to choose between FM, AM, or XM™, if equipped. Setting the Clock Adjusting the Time 1. In Brief 1-17 Vehicle ...
... button and select Time and Date. 2. Buttons 1‐6: Press to select radio stations. SOURCE: Press to seek the next station or track. Press the 12/24 Hour button. See Overview (Radio with CD) on page 7‑4 or Overview (Radio with CD/DVD and MEM) on page 7‑6 or Overview (Radio... bands can be stored in the favorite lists in each favorite page and the number of available favorite pages can be set. Setting the 12/24 Hour Format 1. Press to choose between FM, AM, or XM™, if equipped. Setting the Clock Adjusting the Time 1. In Brief 1-17 Vehicle ...
Owner's Manual
Page 30
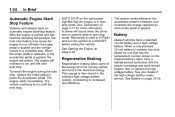
... the high voltage battery needs service. Regenerative Braking Regenerative braking takes some of the energy from the moving vehicle and turns it into electrical energy. 1-24 In Brief AUTO STOP on the tachometer signifies that has the replacement number shown on the original battery's label. Remember to shift to P (Park) and...
... the high voltage battery needs service. Regenerative Braking Regenerative braking takes some of the energy from the moving vehicle and turns it into electrical energy. 1-24 In Brief AUTO STOP on the tachometer signifies that has the replacement number shown on the original battery's label. Remember to shift to P (Park) and...

Owner's Manual
Page 57
... Restraints Head Restraints Head Restraints ...3-2 Rear Seats Rear Seats ...3-11 Airbag System Airbag System ...3-21 Where Are the Airbags? ...3-23 When Should an Airbag Inflate? ...3-24 What Makes an Airbag Inflate? ...3-25 How Does an Airbag Restrain? ...3-26 What Will You See after an Airbag Inflates? ...3-26 Passenger Sensing System ...3-27...
... Restraints Head Restraints Head Restraints ...3-2 Rear Seats Rear Seats ...3-11 Airbag System Airbag System ...3-21 Where Are the Airbags? ...3-23 When Should an Airbag Inflate? ...3-24 What Makes an Airbag Inflate? ...3-25 How Does an Airbag Restrain? ...3-26 What Will You See after an Airbag Inflates? ...3-26 Passenger Sensing System ...3-27...

Owner's Manual
Page 78
... you would be seriously injured or killed. To read how, see Older Children on page 3‑34 or Infants and Young Children on page 3‑24. The driver should not lean on the edge of the seat or leaning forward. Airbags are "supplemental restraints" to inflate in seating positions with seat...
... you would be seriously injured or killed. To read how, see Older Children on page 3‑34 or Infants and Young Children on page 3‑24. The driver should not lean on the edge of the seat or leaning forward. Airbags are "supplemental restraints" to inflate in seating positions with seat...

Owner's Manual
Page 80
... airbags to predict how severe a crash is hit, the direction of the impact, and how quickly the vehicle slows down through any other airbag covering. 3-24 Seats and Restraints WARNING (Continued) or even death. However, they are only designed to the door. Do not put anything to the driver's or front...
... airbags to predict how severe a crash is hit, the direction of the impact, and how quickly the vehicle slows down through any other airbag covering. 3-24 Seats and Restraints WARNING (Continued) or even death. However, they are only designed to the door. Do not put anything to the driver's or front...

Owner's Manual
Page 82
... coming from leaving the vehicle. { WARNING When an airbag inflates, there may automatically unlock the doors, turn on the interior lamps, turn on page 3‑24 for some time after the airbags inflate. In moderate to touch. on the hazard warning flashers, and shut off the fuel system after they quickly...
... coming from leaving the vehicle. { WARNING When an airbag inflates, there may automatically unlock the doors, turn on the interior lamps, turn on page 3‑24 for some time after the airbags inflate. In moderate to touch. on the hazard warning flashers, and shut off the fuel system after they quickly...
Owner's Manual
Page 117
...® Light ...5-21 Engine Coolant Temperature Warning Light ...5-22 Tire Pressure Light ...5-23 Engine Oil Pressure Light ...5-23 Low Fuel Warning Light ...5-24 Security Light ...5-24 High-Beam On Light ...5-24 Front Fog Lamp Light ...5-25 Taillamp Indicator Light ...5-25 Cruise Control Light ...5-25 Information Displays Driver Information Center (DIC) ...5-25 Head-Up...
...® Light ...5-21 Engine Coolant Temperature Warning Light ...5-22 Tire Pressure Light ...5-23 Engine Oil Pressure Light ...5-23 Low Fuel Warning Light ...5-24 Security Light ...5-24 High-Beam On Light ...5-24 Front Fog Lamp Light ...5-25 Taillamp Indicator Light ...5-25 Cruise Control Light ...5-25 Information Displays Driver Information Center (DIC) ...5-25 Head-Up...
Owner's Manual
Page 121
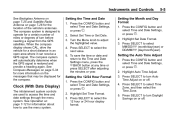
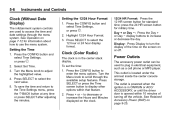
... Time and Date Settings, or press H. 2. Press SELECT to turn Auto Time Adjust on or off . Press SELECT to select the 12 hour or 24 hour display format. Press the CONFIG button and select Time and Date Settings, or press H. 2. Press SELECT to select Time Zone, and then select ... the compass display shows CAL, drive the vehicle for the compass. 5-5 Setting the Time and Date 1. Setting the Auto Time Adjust 1. Setting the 12/24 Hour Format 1. The compass system is restored and provide a heading again. See Compass Messages on page 5‑34 for more information on the messages that...
... Time and Date Settings, or press H. 2. Press SELECT to turn Auto Time Adjust on or off . Press SELECT to select the 12 hour or 24 hour display format. Press the CONFIG button and select Time and Date Settings, or press H. 2. Press SELECT to select Time Zone, and then select ... the compass display shows CAL, drive the vehicle for the compass. 5-5 Setting the Time and Date 1. Setting the Auto Time Adjust 1. Setting the 12/24 Hour Format 1. The compass system is restored and provide a heading again. See Compass Messages on page 5‑34 for more information on the messages that...
Owner's Manual
Page 122
... to increase or decrease the day. Clock (Without Date Display) The infotainment system controls are used to select the 12 hour or 24 hour display format. 12/24 HR Format: Press the 12 HR screen button for military time. To save the time and return to enter the menu options....or ACC/ ACCESSORY, or until the driver door is located under the armrest inside the center console storage. 5-6 Instruments and Controls Setting the 12/24 Hour Format 1. Display: Press Display to decrease or increase the Hours and Minutes displayed on or off the vehicle. Turn the Menu knob to select...
... to increase or decrease the day. Clock (Without Date Display) The infotainment system controls are used to select the 12 hour or 24 hour display format. 12/24 HR Format: Press the 12 HR screen button for military time. To save the time and return to enter the menu options....or ACC/ ACCESSORY, or until the driver door is located under the armrest inside the center console storage. 5-6 Instruments and Controls Setting the 12/24 Hour Format 1. Display: Press Display to decrease or increase the Hours and Minutes displayed on or off the vehicle. Turn the Menu knob to select...
Owner's Manual
Page 140
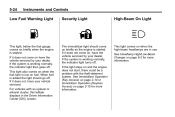
... when the fuel tank is working normally, the indicator light then goes off. If the system is low on fuel. If the system is started . 5-24 Instruments and Controls Low Fuel Warning Light Security Light High-Beam On Light This light, below the fuel gauge, comes on briefly when the engine...
... when the fuel tank is working normally, the indicator light then goes off. If the system is low on fuel. If the system is started . 5-24 Instruments and Controls Low Fuel Warning Light Security Light High-Beam On Light This light, below the fuel gauge, comes on briefly when the engine...

Owner's Manual
Page 175
... ...7-12 Radio AM-FM Radio (Radio with CD/ DVD/MEM) ...7-17 AM-FM Radio (Radio with CD and Touchscreen) ...7-19 Satellite Radio ...7-23 Radio Reception ...7-24 Backglass Antenna ...7-25 Satellite Radio Antenna ...7-26 Audio Players CD Player ...CD/DVD Player ...MP3 ...Mass Storage Media (MEM) ...Auxiliary Devices (Radio with CD) ...Auxiliary...
... ...7-12 Radio AM-FM Radio (Radio with CD/ DVD/MEM) ...7-17 AM-FM Radio (Radio with CD and Touchscreen) ...7-19 Satellite Radio ...7-23 Radio Reception ...7-24 Backglass Antenna ...7-25 Satellite Radio Antenna ...7-26 Audio Players CD Player ...CD/DVD Player ...MP3 ...Mass Storage Media (MEM) ...Auxiliary Devices (Radio with CD) ...Auxiliary...

Owner's Manual
Page 198
..., the receiver could have a fault. Radio Reception Frequency interference and static can occur, especially around tall buildings or hills, causing the sound to 40 mi). 7-24 Infotainment System CAT Not Found: The system is available at this time on this channel.
..., the receiver could have a fault. Radio Reception Frequency interference and static can occur, especially around tall buildings or hills, causing the sound to 40 mi). 7-24 Infotainment System CAT Not Found: The system is available at this time on this channel.
Owner's Manual
Page 206
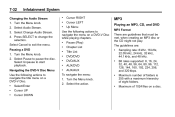
... List Title List DVD/DVD DVD/AUX AUX/DVD AUX/AUX Sampling rate: 8 kHz, 16 kHz, 22.05 kHz, 24 kHz, 32 kHz, 44.1 kHz, and 48 kHz. Bit rates supported: 8, 16, 24, 32, 40, 48, 56, 64, 80, 96, 112, 128, 144, 160, 192, 224, 256, and 320 kbps. Maximum of...
... List Title List DVD/DVD DVD/AUX AUX/DVD AUX/AUX Sampling rate: 8 kHz, 16 kHz, 22.05 kHz, 24 kHz, 32 kHz, 44.1 kHz, and 48 kHz. Bit rates supported: 8, 16, 24, 32, 40, 48, 56, 64, 80, 96, 112, 128, 144, 160, 192, 224, 256, and 320 kbps. Maximum of...

Owner's Manual
Page 267
...) ...Starting the Engine ...Engine Heater ...Retained Accessory Power (RAP) ...Shifting Into Park ...Shifting out of Park ...Parking over Things That Burn ...9-15 9-16 9-18 9-20 9-24 9-25 9-25 9-26 9-27 Brakes Antilock Brake System (ABS) ...Parking Brake ...Brake Assist ...Hill Start Assist (HSA) ...9-33 9-34 9-36 9-36 Ride Control Systems Traction...
...) ...Starting the Engine ...Engine Heater ...Retained Accessory Power (RAP) ...Shifting Into Park ...Shifting out of Park ...Parking over Things That Burn ...9-15 9-16 9-18 9-20 9-24 9-25 9-25 9-26 9-27 Brakes Antilock Brake System (ABS) ...Parking Brake ...Brake Assist ...Hill Start Assist (HSA) ...9-33 9-34 9-36 9-36 Ride Control Systems Traction...

Owner's Manual
Page 290
... on vehicles with a four cylinder engine. 3. To Use the Engine Coolant Heater 1. Plug it into a normal, grounded 110-volt AC outlet. Turn off the engine. 2. 9-24 Driving and Operating Engine Heater The engine coolant heater, if available, can help in cold weather conditions at or below −18°C (0°F) for...
... on vehicles with a four cylinder engine. 3. To Use the Engine Coolant Heater 1. Plug it into a normal, grounded 110-volt AC outlet. Turn off the engine. 2. 9-24 Driving and Operating Engine Heater The engine coolant heater, if available, can help in cold weather conditions at or below −18°C (0°F) for...

Owner's Manual
Page 350
... when new brake linings are installed. If brake fluid is hot enough. If you do, wash it . Always use the proper brake fluid. Notice . 10-24 . Have the brake hydraulic system fixed, since a leak means that they will have to Add Use only new DOT 3 brake fluid from entering the reservoir...
... when new brake linings are installed. If brake fluid is hot enough. If you do, wash it . Always use the proper brake fluid. Notice . 10-24 . Have the brake hydraulic system fixed, since a leak means that they will have to Add Use only new DOT 3 brake fluid from entering the reservoir...

Owner's Manual
Page 363
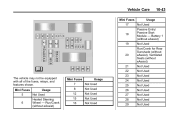
J-Case Fuses 6 12 Wiper Starter Usage 28 41 42 43 Battery 2 (eAssist) Antilock Brake System Pump Electric Park Brake Rear Window Defogger Brake Vacuum Pump Cooling Fan K2 Not Used 26 27 Engine Compartment Fuse Block The vehicle may not be equipped with all of the fuses, relays, and features shown. Vehicle Care J-Case Fuses 21 22 24 Usage Rear Power Windows Sunroof Front Power Windows 10-37 25 Passive Entry/ Passive Start Module -
J-Case Fuses 6 12 Wiper Starter Usage 28 41 42 43 Battery 2 (eAssist) Antilock Brake System Pump Electric Park Brake Rear Window Defogger Brake Vacuum Pump Cooling Fan K2 Not Used 26 27 Engine Compartment Fuse Block The vehicle may not be equipped with all of the fuses, relays, and features shown. Vehicle Care J-Case Fuses 21 22 24 Usage Rear Power Windows Sunroof Front Power Windows 10-37 25 Passive Entry/ Passive Start Module -

Owner's Manual
Page 368
..., Head‐Up Display, Preferred Device Interface Module, Rear Seat Infotainment (eAssist) Automatic Occupant Sensing 25 26 Relays R1 R2 R3 Fuses 21 22 23 24 Usage Instrument Panel Cluster Discrete Logic Ignition Switch Body Control Module 3 Body Control Module 2 Rear Heater Ventilation Air Conditioning/Blower AC/DC Inverter Usage Trunk...
..., Head‐Up Display, Preferred Device Interface Module, Rear Seat Infotainment (eAssist) Automatic Occupant Sensing 25 26 Relays R1 R2 R3 Fuses 21 22 23 24 Usage Instrument Panel Cluster Discrete Logic Ignition Switch Body Control Module 3 Body Control Module 2 Rear Heater Ventilation Air Conditioning/Blower AC/DC Inverter Usage Trunk...
Owner's Manual
Page 369
Battery 1 (without eAssist) Not Used Run/Crank for Rear Sunshade (without eAssist), Ventilated Seats (without eAssist) 23 Mini Fuses 7 8 12 15 16 Usage Not Used Not Used Not Used Not Used Not Used 24 25 26 27 28 29 Vehicle Care Mini Fuses 17 18 19 Usage Not Used 10-43 Passive Entry/ Passive Start Module - Mini Fuses 5 6 Usage Not Used Heated Steering Wheel - Run/Crank (without eAssist) Not Used Not Used Not Used Not Used Not Used Not Used Not Used Not Used Not Used 20 21 22 The vehicle may not be equipped with all of the fuses, relays, and features shown.
Battery 1 (without eAssist) Not Used Run/Crank for Rear Sunshade (without eAssist), Ventilated Seats (without eAssist) 23 Mini Fuses 7 8 12 15 16 Usage Not Used Not Used Not Used Not Used Not Used 24 25 26 27 28 29 Vehicle Care Mini Fuses 17 18 19 Usage Not Used 10-43 Passive Entry/ Passive Start Module - Mini Fuses 5 6 Usage Not Used Heated Steering Wheel - Run/Crank (without eAssist) Not Used Not Used Not Used Not Used Not Used Not Used Not Used Not Used Not Used 20 21 22 The vehicle may not be equipped with all of the fuses, relays, and features shown.
