

Owner's Manual
Page 232
... was pressed one time, the DVD player resumes playing where the DVD was pressed two times, the DVD player begins to make sure they are black borders on the top and bottom or on the remote control. In auxiliary mode, the picture moves or scrolls. The picture does not fill the...
... was pressed one time, the DVD player resumes playing where the DVD was pressed two times, the DVD player begins to make sure they are black borders on the top and bottom or on the remote control. In auxiliary mode, the picture moves or scrolls. The picture does not fill the...

Owner's Manual
Page 311
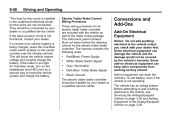
... seven-wire harness contains the following trailer circuits: . . Yellow: Left Stop/Turn Signal Dark Green: Right Stop/Turn Signal Brown: Taillamps Black: Ground Light Green: Back-up Lamps Red/Black: Battery Feed Dark Blue: Trailer Brake* A. Cross the safety chains under the tongue of Vehicle When using a weight-distributing hitch, the hitch...
... seven-wire harness contains the following trailer circuits: . . Yellow: Left Stop/Turn Signal Dark Green: Right Stop/Turn Signal Brown: Taillamps Black: Ground Light Green: Back-up Lamps Red/Black: Battery Feed Dark Blue: Trailer Brake* A. Cross the safety chains under the tongue of Vehicle When using a weight-distributing hitch, the hitch...
Owner's Manual
Page 312
... with the vehicle as they should be connected by the vehicle's warranty. The vehicle has an airbag system. Red/Black: Power Supply White: Brake Switch Signal Gray: Illumination Dark Blue: Trailer Brake Signal Black: Ground The electric trailer brake controller should . The harness contains the following wires: ... *The fuse for this circuit...
... with the vehicle as they should be connected by the vehicle's warranty. The vehicle has an airbag system. Red/Black: Power Supply White: Brake Switch Signal Gray: Illumination Dark Blue: Trailer Brake Signal Black: Ground The electric trailer brake controller should . The harness contains the following wires: ... *The fuse for this circuit...

Owner's Manual
Page 337
...25 Battery Refer to keep the battery from running down. If brake fluid is needed. If you are not careful. Infrequent Usage: Remove the black, negative (−) cable from the battery or use a battery trickle charger. { WARNING Battery posts, terminals, and related accessories contain lead and ... See Jump Starting on the vehicle's painted surfaces, the paint finish can badly damage brake hydraulic system parts. Extended Storage: Remove the black, negative (−) cable from the battery to the replacement number on the original battery label when a new battery is spilled on page...
...25 Battery Refer to keep the battery from running down. If brake fluid is needed. If you are not careful. Infrequent Usage: Remove the black, negative (−) cable from the battery or use a battery trickle charger. { WARNING Battery posts, terminals, and related accessories contain lead and ... See Jump Starting on the vehicle's painted surfaces, the paint finish can badly damage brake hydraulic system parts. Extended Storage: Remove the black, negative (−) cable from the battery to the replacement number on the original battery label when a new battery is spilled on page...

Owner's Manual
Page 341
Remove the black cuff from the lamp assembly by pulling rearward from the top to read and follow the instructions on page 2‑10. 2. If you try to ...
Remove the black cuff from the lamp assembly by pulling rearward from the top to read and follow the instructions on page 2‑10. 2. If you try to ...

Owner's Manual
Page 342
... counterclockwise and pull the bulb straight out of these bulbs: 1. Turn and pull the license plate lamp forward through the liftgate trim opening . 8. Replace the black cuff over the lamp assembly by pushing it . 6. Install the new bulb. 5. Replacement Bulbs Exterior Lamp License Plate Lamp Rear Sidemarker Lamp Rear Turn Signal...
... counterclockwise and pull the bulb straight out of these bulbs: 1. Turn and pull the license plate lamp forward through the liftgate trim opening . 8. Replace the black cuff over the lamp assembly by pushing it . 6. Install the new bulb. 5. Replacement Bulbs Exterior Lamp License Plate Lamp Rear Sidemarker Lamp Rear Turn Signal...

Owner's Manual
Page 375
... sealant canister. Selector Switch (Sealant/Air or Air Only) B. Power Plug 10-63 Replacement sealant canisters are available at your local dealer. Air Only Hose (Black) H. There is only enough sealant to Temporarily Seal and Inflate a Punctured Tire Follow the directions closely for correct sealant usage. The sealant canister should be...
... sealant canister. Selector Switch (Sealant/Air or Air Only) B. Power Plug 10-63 Replacement sealant canisters are available at your local dealer. Air Only Hose (Black) H. There is only enough sealant to Temporarily Seal and Inflate a Punctured Tire Follow the directions closely for correct sealant usage. The sealant canister should be...

Owner's Manual
Page 393
... (+) terminal if the vehicle has one . 8. The electrical connection is much less. Your vehicle has a remote negative (−) terminal for a while. 11. Now connect the black negative (−) cable to the positive (+) terminal of the good battery. Now start the vehicle with the dead battery. 6. Use a remote positive (+) terminal if the...
... (+) terminal if the vehicle has one . 8. The electrical connection is much less. Your vehicle has a remote negative (−) terminal for a while. 11. Now connect the black negative (−) cable to the positive (+) terminal of the good battery. Now start the vehicle with the dead battery. 6. Use a remote positive (+) terminal if the...

Owner's Manual
Page 394
... the jumper cables are connected or removed in the correct order, making sure that had the dead battery. 2. Jumper Cable Removal A. Disconnect the black negative (−) cable from both vehicles, do not touch each other or other vehicle. Disconnect the red positive (+) cable from the other metal.... connect and remove the jumper cables in the wrong order, electrical shorting may occur and damage the vehicle. Disconnect the black negative (−) cable from the vehicle with the good battery. 4. Good Battery or Remote Positive (+) and Remote Negative (−) Terminals C.
... the jumper cables are connected or removed in the correct order, making sure that had the dead battery. 2. Jumper Cable Removal A. Disconnect the black negative (−) cable from both vehicles, do not touch each other or other vehicle. Disconnect the red positive (+) cable from the other metal.... connect and remove the jumper cables in the wrong order, electrical shorting may occur and damage the vehicle. Disconnect the black negative (−) cable from the vehicle with the good battery. 4. Good Battery or Remote Positive (+) and Remote Negative (−) Terminals C.


