

Owner's Manual
Page 1
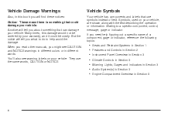
2004 Buick Regal Owner Manual Seats and Restraint Systems ...1-1 Front Seats ...1-2 Rear Seats ...1-6 Safety Belts ...1-6 Child Restraints ...1-27 Air Bag Systems ...1-46 Restraint System Check ...1-54... Theft-Deterrent Systems ...2-16 Starting and Operating Your Vehicle ...2-17 Mirrors ...2-31 OnStar® System ...2-34 Storage Areas ...2-35 Sunroof ...2-36 Instrument Panel ...3-1 Instrument Panel Overview ...3-2 Climate Controls ...3-17 Warning Lights, Gages and Indicators ...3-26 Driver Information Center (DIC) ...3-42 Audio System(s) ...3-44 M Driving Your Vehicle ...4-1 Your Driving, the...
2004 Buick Regal Owner Manual Seats and Restraint Systems ...1-1 Front Seats ...1-2 Rear Seats ...1-6 Safety Belts ...1-6 Child Restraints ...1-27 Air Bag Systems ...1-46 Restraint System Check ...1-54... Theft-Deterrent Systems ...2-16 Starting and Operating Your Vehicle ...2-17 Mirrors ...2-31 OnStar® System ...2-34 Storage Areas ...2-35 Sunroof ...2-36 Instrument Panel ...3-1 Instrument Panel Overview ...3-2 Climate Controls ...3-17 Warning Lights, Gages and Indicators ...3-26 Driver Information Center (DIC) ...3-42 Audio System(s) ...3-44 M Driving Your Vehicle ...4-1 Your Driving, the...
Owner's Manual
Page 4
... a component, gage or indicator, reference the following topics: Seats and Restraint Systems in Section 1 Features and Controls in Section 2 Instrument Panel Overview in Section 3 Climate Controls in Section 3 Warning Lights, Gages and Indicators in Section 3 Audio System(s) in Section 3 Engine Compartment... Overview in Section 5 iv Many times, this book you about something that could be covered by your warranty, and it could damage your...
... a component, gage or indicator, reference the following topics: Seats and Restraint Systems in Section 1 Features and Controls in Section 2 Instrument Panel Overview in Section 3 Climate Controls in Section 3 Warning Lights, Gages and Indicators in Section 3 Audio System(s) in Section 3 Engine Compartment... Overview in Section 5 iv Many times, this book you about something that could be covered by your warranty, and it could damage your...

Owner's Manual
Page 99
... Reception ...3-62 Care of Your Cassette Tape Player ...3-63 Care of Your CDs ...3-64 Care of Your CD Player ...3-64 Backglass Antenna ...3-64 3-1 Instrument Panel Overview ...3-2 Hazard Warning Flashers ...3-4 Other Warning Devices ...3-4 Horn ...3-5 Tilt Wheel ...3-5 Turn Signal/Multifunction Lever ...3-5 Exterior Lamps ...3-11 Interior Lamps ...3-14 Accessory Power Outlets ...3-16 Ashtrays and...
... Reception ...3-62 Care of Your Cassette Tape Player ...3-63 Care of Your CDs ...3-64 Care of Your CD Player ...3-64 Backglass Antenna ...3-64 3-1 Instrument Panel Overview ...3-2 Hazard Warning Flashers ...3-4 Other Warning Devices ...3-4 Horn ...3-5 Tilt Wheel ...3-5 Turn Signal/Multifunction Lever ...3-5 Exterior Lamps ...3-11 Interior Lamps ...3-14 Accessory Power Outlets ...3-16 Ashtrays and...

Owner's Manual
Page 209
... ...5-5 California Fuel ...5-5 Additives ...5-6 Fuels in Foreign Countries ...5-6 Filling Your Tank ...5-7 Filling a Portable Fuel Container ...5-9 Checking Things Under the Hood ...5-10 Hood Release ...5-11 Engine Compartment Overview ...5-12 Engine Oil ...5-16 Supercharger Oil ...5-21 Engine Air Cleaner/Filter ...5-22 Automatic Transaxle Fluid ...5-24 Engine Coolant ...5-26 Radiator Pressure Cap ...5-29 Engine Overheating...
... ...5-5 California Fuel ...5-5 Additives ...5-6 Fuels in Foreign Countries ...5-6 Filling Your Tank ...5-7 Filling a Portable Fuel Container ...5-9 Checking Things Under the Hood ...5-10 Hood Release ...5-11 Engine Compartment Overview ...5-12 Engine Oil ...5-16 Supercharger Oil ...5-21 Engine Air Cleaner/Filter ...5-22 Automatic Transaxle Fluid ...5-24 Engine Coolant ...5-26 Radiator Pressure Cap ...5-29 Engine Overheating...

Owner's Manual
Page 220
Engine Compartment Overview When you open the hood on the 3800 V6 engine, you will see: 5-12
Engine Compartment Overview When you open the hood on the 3800 V6 engine, you will see: 5-12

Owner's Manual
Page 224
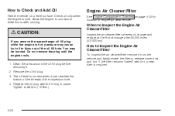
... handle is a good idea to check your engine oil every time you don't, the oil dipstick might not show the actual level. See Engine Compartment Overview on level ground. Pull out the dipstick and clean it with a paper towel or cloth, then push it again, keeping the tip down, and check...
... handle is a good idea to check your engine oil every time you don't, the oil dipstick might not show the actual level. See Engine Compartment Overview on level ground. Pull out the dipstick and clean it with a paper towel or cloth, then push it again, keeping the tip down, and check...

Owner's Manual
Page 225
... your engine has so much oil. Push the dipstick all the way back in the crosshatched area. But you are through. 5-17 See Engine Compartment Overview on page 5-103. Notice: Do not add too much oil that the oil level gets above the cross-hatched area that shows the proper operating...
... your engine has so much oil. Push the dipstick all the way back in the crosshatched area. But you are through. 5-17 See Engine Compartment Overview on page 5-103. Notice: Do not add too much oil that the oil level gets above the cross-hatched area that shows the proper operating...
Owner's Manual
Page 230
... . 2. You may cause hot oil to 88 lb-in place. Tighten to blow out of the inspection hole. 4. Engine Air Cleaner/Filter See Engine Compartment Overview on a level surface. Clean the area around the oil fill plug before removing it from the vehicle and lightly shake the filter to...
... . 2. You may cause hot oil to 88 lb-in place. Tighten to blow out of the inspection hole. 4. Engine Air Cleaner/Filter See Engine Compartment Overview on a level surface. Clean the area around the oil fill plug before removing it from the vehicle and lightly shake the filter to...

Owner's Manual
Page 233
... seconds in the crosshatched area. 4. The fluid level must be in each gear. Push it with a clean rag or paper towel. 2. See Engine Compartment Overview on location. 3. Check both sides of the engine. Then, without shutting off the engine, follow these steps: The automatic transaxle fluid dipstick handle is...
... seconds in the crosshatched area. 4. The fluid level must be in each gear. Push it with a clean rag or paper towel. 2. See Engine Compartment Overview on location. 3. Check both sides of the engine. Then, without shutting off the engine, follow these steps: The automatic transaxle fluid dipstick handle is...

Owner's Manual
Page 235
... additives which will . If coolant needs to be covered by your dealer check the cooling system. Plain water, or some other parts. See Engine Compartment Overview on a level surface. What to Use Use a mixture of one-half clean, drinkable water and one-half DEX-COOL® coolant which claim to improve...
... additives which will . If coolant needs to be covered by your dealer check the cooling system. Plain water, or some other parts. See Engine Compartment Overview on a level surface. What to Use Use a mixture of one-half clean, drinkable water and one-half DEX-COOL® coolant which claim to improve...
Owner's Manual
Page 237
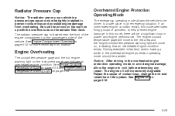
... overheated engine condition exists, this mode, there will come on, indicating that an overheated engine condition exists. See Engine Oil on location. See Engine Compartment Overview on page 5-12 for more information on page 5-16. Engine Overheating The coolant temperature gage and the hot engine warning light on page 3-34. 5-29...
... overheated engine condition exists, this mode, there will come on, indicating that an overheated engine condition exists. See Engine Oil on location. See Engine Compartment Overview on page 5-12 for more information on page 5-16. Engine Overheating The coolant temperature gage and the hot engine warning light on page 3-34. 5-29...

Owner's Manual
Page 248
The power steering fluid reservoir is cold. See Engine Compartment Overview on the passenger's side of the vehicle at the back of the filler neck, reinstall the pressure cap. At any time during this . 13. ...
The power steering fluid reservoir is cold. See Engine Compartment Overview on the passenger's side of the vehicle at the back of the filler neck, reinstall the pressure cap. At any time during this . 13. ...

Owner's Manual
Page 250
... not mix water with the washer symbol on page 5-12 for expansion if freezing occurs, which could damage the tank if it . See Engine Compartment Overview on it is completely full. • Do not use a fluid that has sufficient protection against freezing. Also, water does not clean as well as...
... not mix water with the washer symbol on page 5-12 for expansion if freezing occurs, which could damage the tank if it . See Engine Compartment Overview on it is completely full. • Do not use a fluid that has sufficient protection against freezing. Also, water does not clean as well as...
Owner's Manual
Page 251
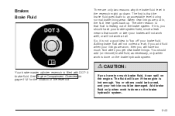
.... 5-43 Adding brake fluid will not correct a leak. You should have too much fluid when you get new brake linings. See Engine Compartment Overview on the brake hydraulic system. {CAUTION: Your brake master cylinder reservoir is not a good idea to an acceptable level during normal brake lining wear. So...
.... 5-43 Adding brake fluid will not correct a leak. You should have too much fluid when you get new brake linings. See Engine Compartment Overview on the brake hydraulic system. {CAUTION: Your brake master cylinder reservoir is not a good idea to an acceptable level during normal brake lining wear. So...

Owner's Manual
Page 254
... out of your braking system - for example, when your dealer to learn how to cause cancer and reproductive harm. You can explode. See Engine Compartment Overview on the original battery's label. Battery Your new vehicle comes with top-quality GM brake parts. Warning: Battery posts, terminals and related accessories contain lead...
... out of your braking system - for example, when your dealer to learn how to cause cancer and reproductive harm. You can explode. See Engine Compartment Overview on the original battery's label. Battery Your new vehicle comes with top-quality GM brake parts. Warning: Battery posts, terminals and related accessories contain lead...

Owner's Manual
Page 256
... (+) terminal, squeeze the sides of each vehicle. Find the positive (+) and negative (−) terminal location on each vehicle and locate the batteries. See Engine Compartment Overview on location. 5-48 You will not need to access your battery for jump starting terminal for more information on page 5-12 for that purpose. Your...
... (+) terminal, squeeze the sides of each vehicle. Find the positive (+) and negative (−) terminal location on each vehicle and locate the batteries. See Engine Compartment Overview on location. 5-48 You will not need to access your battery for jump starting terminal for more information on page 5-12 for that purpose. Your...

Owner's Manual
Page 309
Daytime Running Lamps, Rear Window Defogger Relay 5-101 See Engine Compartment Overview on page 5-12 for more information on the passenger's side of the vehicle in the engine compartment. Heating, Ventilation and Air Conditioning Controls; Fuses 1 2 3 4 5 6 7 8 Usage ...
Daytime Running Lamps, Rear Window Defogger Relay 5-101 See Engine Compartment Overview on page 5-12 for more information on the passenger's side of the vehicle in the engine compartment. Heating, Ventilation and Air Conditioning Controls; Fuses 1 2 3 4 5 6 7 8 Usage ...

Owner's Manual
Page 345
... ...Change Engine Oil Light ...Check and Service Engine Soon Light ...Coolant ...Coolant Heater ...Coolant Temperature Gage ...Coolant Temperature Warning Light ...Drive Belt Routing ...Engine Compartment Overview ...Exhaust ...Oil ...Overheating ...Starting ...Supercharger Oil ...5-97 5-98 5-98 5-98 5-98 2-13 3-37 5-22 5-46 3-39 3-35 5-26 2-20 3-34 3-34 6-14 5-12 2-29 5-16...
... ...Change Engine Oil Light ...Check and Service Engine Soon Light ...Coolant ...Coolant Heater ...Coolant Temperature Gage ...Coolant Temperature Warning Light ...Drive Belt Routing ...Engine Compartment Overview ...Exhaust ...Oil ...Overheating ...Starting ...Supercharger Oil ...5-97 5-98 5-98 5-98 5-98 2-13 3-37 5-22 5-46 3-39 3-35 5-26 2-20 3-34 3-34 6-14 5-12 2-29 5-16...

Owner's Manual
Page 347
Tire Pressure ...5-68 Instrument Panel Cluster ...3-27 Overview ...3-2 Instrument Panel Brightness ...3-14 Instrument Panel Fuse Block ...5-98 Interior Lamps ...3-14 L Lamps Exterior ...Interior ...Lap Belt ...Lap-Shoulder Belt ...1-12, LATCH System Child Restraints ......
Tire Pressure ...5-68 Instrument Panel Cluster ...3-27 Overview ...3-2 Instrument Panel Brightness ...3-14 Instrument Panel Fuse Block ...5-98 Interior Lamps ...3-14 L Lamps Exterior ...Interior ...Lap Belt ...Lap-Shoulder Belt ...1-12, LATCH System Child Restraints ......