
Owner's Manual
Page 1
2004 Buick Century Owner Manual Seats and Restraint Systems ...1-1 Front Seats ...1-2 Rear Seats ...1-5 Safety Belts ...1-6 Child Restraints ...1-28 Air Bag Systems ...1-49 Restraint System Check ...1-58 Features and Controls ...2-1 Keys ...2-2 Doors and Locks ...2-10 Windows ...2-15 Theft-Deterrent Systems ...2-17 Starting and Operating Your Vehicle ...2-18 Mirrors ...2-31 OnStar® System ...2-33 ...
2004 Buick Century Owner Manual Seats and Restraint Systems ...1-1 Front Seats ...1-2 Rear Seats ...1-5 Safety Belts ...1-6 Child Restraints ...1-28 Air Bag Systems ...1-49 Restraint System Check ...1-58 Features and Controls ...2-1 Keys ...2-2 Doors and Locks ...2-10 Windows ...2-15 Theft-Deterrent Systems ...2-17 Starting and Operating Your Vehicle ...2-18 Mirrors ...2-31 OnStar® System ...2-33 ...

Owner's Manual
Page 2
... or from beginning to look for what is in the manual, and the page number where you will help you learn about the features and controls for Buick Motor Division whenever it appears in U.S.A. Canadian Owners You can use it. Part No. 10334120 A First Edition ii © Copyright...Canada Limited" for your vehicle, so it was printed. Box 07130 Detroit, MI 48207 GENERAL MOTORS, GM, the GM Emblem, BUICK, the BUICK Emblem and the name CENTURY are registered trademarks of the manual. For vehicles first sold in Canada, substitute the name "General Motors of what you ...
... or from beginning to look for what is in the manual, and the page number where you will help you learn about the features and controls for Buick Motor Division whenever it appears in U.S.A. Canadian Owners You can use it. Part No. 10334120 A First Edition ii © Copyright...Canada Limited" for your vehicle, so it was printed. Box 07130 Detroit, MI 48207 GENERAL MOTORS, GM, the GM Emblem, BUICK, the BUICK Emblem and the name CENTURY are registered trademarks of the manual. For vehicles first sold in Canada, substitute the name "General Motors of what you ...
Owner's Manual
Page 4
... see warning labels on your vehicle. They use symbols instead of a component, gage or indicator, reference the following topics: Seats and Restraint Systems in Section 1 Features and Controls in Section 2 Instrument Panel Overview in Section 3 Climate Controls in Section 3 Warning Lights, Gages and Indicators in Section 3 Audio System(s) in Section 3 Engine...
... see warning labels on your vehicle. They use symbols instead of a component, gage or indicator, reference the following topics: Seats and Restraint Systems in Section 1 Features and Controls in Section 2 Instrument Panel Overview in Section 3 Climate Controls in Section 3 Warning Lights, Gages and Indicators in Section 3 Audio System(s) in Section 3 Engine...
Owner's Manual
Page 26
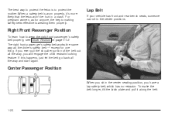
... the same way as for one thing. Center Passenger Position When you sit in the center seating position, you will engage the child restraint locking feature. If you ever pull the shoulder portion of the belt out all the way and start again. When a safety belt is wearing them properly. For...
... the same way as for one thing. Center Passenger Position When you sit in the center seating position, you will engage the child restraint locking feature. If you ever pull the shoulder portion of the belt out all the way and start again. When a safety belt is wearing them properly. For...

Owner's Manual
Page 67
Section 2 Features and Controls Automatic Transaxle Operation ...2-22 Parking Brake ...2-25 Shifting Into Park (P) ...2-26 Shifting Out of Park (P) ...2-28 Parking Over Things That Burn ...2-29 Engine ...
Section 2 Features and Controls Automatic Transaxle Operation ...2-22 Parking Brake ...2-25 Shifting Into Park (P) ...2-26 Shifting Out of Park (P) ...2-28 Parking Over Things That Burn ...2-29 Engine ...

Owner's Manual
Page 72
... the power door lock switch in the LOCK position, press and release the remote keyless entry transmitter LOCK button. Disconnecting the vehicle's battery for this feature to RUN. 2. Programming the LOCK Command One of one to the current lock mode. 4.
... the power door lock switch in the LOCK position, press and release the remote keyless entry transmitter LOCK button. Disconnecting the vehicle's battery for this feature to RUN. 2. Programming the LOCK Command One of one to the current lock mode. 4.

Owner's Manual
Page 73
...and hold the power door lock switch in the unlock position, press and release the remote keyless entry transmitter UNLOCK button. Delayed Locking This feature can be turned on the remote keyless entry transmitter is pressed and the last door is open. When all doors and turn the ignition key...sequence of one to four chimes will sound to the current unlock mode. 4. Three chimes will sound, corresponding to indicate that this feature is cancelled. The vehicle was originally programmed to the next unlock mode. While holding the power door lock switch in the unlock position. 3.
...and hold the power door lock switch in the unlock position, press and release the remote keyless entry transmitter UNLOCK button. Delayed Locking This feature can be turned on the remote keyless entry transmitter is pressed and the last door is open. When all doors and turn the ignition key...sequence of one to four chimes will sound to the current unlock mode. 4. Three chimes will sound, corresponding to indicate that this feature is cancelled. The vehicle was originally programmed to the next unlock mode. While holding the power door lock switch in the unlock position. 3.

Owner's Manual
Page 74
Mode Two (Two Chimes): Delayed locking is turned on until either the ignition is opened during this feature to work. Close the doors. 2. The interior lamps will stay on . 1. Matching Transmitter(s) to prevent another transmitter from unlocking your dealer has coded... (P). If a door is turned to match the new transmitter. Release the power door unlock switch, after one year will remain on Remote Activation This feature provides interior lighting when a remote keyless entry door unlock command is in. 5. Once your vehicle. The ignition must be re-coded to RUN or...
Mode Two (Two Chimes): Delayed locking is turned on until either the ignition is opened during this feature to work. Close the doors. 2. The interior lamps will stay on . 1. Matching Transmitter(s) to prevent another transmitter from unlocking your dealer has coded... (P). If a door is turned to match the new transmitter. Release the power door unlock switch, after one year will remain on Remote Activation This feature provides interior lighting when a remote keyless entry door unlock command is in. 5. Once your vehicle. The ignition must be re-coded to RUN or...
Owner's Manual
Page 78
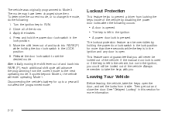
...by disabling the power door locks when the following : 1. The mode may have been changed since then. Close all of the vehicle. This feature cannot guarantee that you could still be locked out of and back into PARK (P) while holding the power door lock switch in the lock ...door lock switch in the ignition, you will enter operating Mode 1. Release the door lock switch to the next operating mode. Lockout Protection This feature helps to prevent a driver from the current mode to set the locks from inside of and back into PARK (P), each additional shift cycle will...
...by disabling the power door locks when the following : 1. The mode may have been changed since then. Close all of the vehicle. This feature cannot guarantee that you could still be locked out of and back into PARK (P) while holding the power door lock switch in the lock ...door lock switch in the ignition, you will enter operating Mode 1. Release the door lock switch to the next operating mode. Lockout Protection This feature helps to prevent a driver from the current mode to set the locks from inside of and back into PARK (P), each additional shift cycle will...
Owner's Manual
Page 82
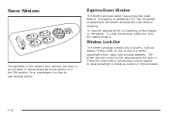
... on this control to allow passengers individual control of their window switches. Power Windows Express-Down Window The driver's window switch has an express-down feature. This switch is in the ON position. Window Lock-Out The driver's window controls also include a lock-out switch. To raise the window, press and...
... on this control to allow passengers individual control of their window switches. Power Windows Express-Down Window The driver's window switch has an express-down feature. This switch is in the ON position. Window Lock-Out The driver's window controls also include a lock-out switch. To raise the window, press and...
Owner's Manual
Page 83
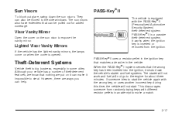
... shuts down the sun visors. Visor Vanity Mirror Open the cover on the sun visor to steal. Although your vehicle has a number of theft-deterrent features, we know that can help. Lighted Visor Vanity Mirrors If the vehicle has the lighted vanity mirrors, the lamps come on it impossible to expose...
... shuts down the sun visors. Visor Vanity Mirror Open the cover on the sun visor to steal. Although your vehicle has a number of theft-deterrent features, we know that can help. Lighted Visor Vanity Mirrors If the vehicle has the lighted vanity mirrors, the lamps come on it impossible to expose...

Owner's Manual
Page 85
... sure you can not turn it all the way in? D (RUN): This position is where the key returns to after the vehicle is a theft-deterrent feature. A (ACCESSORY): This position lets the radio and windshield wipers operate when the engine is it counterclockwise. if so, is off but the steering wheel is...
... sure you can not turn it all the way in? D (RUN): This position is where the key returns to after the vehicle is a theft-deterrent feature. A (ACCESSORY): This position lets the radio and windshield wipers operate when the engine is it counterclockwise. if so, is off but the steering wheel is...
Owner's Manual
Page 86
... held in START for longer than 15 seconds at a time will go of the doors are opened. To restart the vehicle when it is a safety feature. When the engine starts, let go down as the key is designed to help avoid draining your battery or damaging your battery to PARK (P) or...
... held in START for longer than 15 seconds at a time will go of the doors are opened. To restart the vehicle when it is a safety feature. When the engine starts, let go down as the key is designed to help avoid draining your battery or damaging your battery to PARK (P) or...
Owner's Manual
Page 87
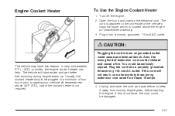
... 110-volt AC outlet. Plug it away from moving engine parts, before to the underside of the coolant heater is not required. 2-21 If this feature. The vehicle will not reach, use of the vehicle's diagonal brace, which is not done, the cord could overheat and cause a fire. In very...
... 110-volt AC outlet. Plug it away from moving engine parts, before to the underside of the coolant heater is not required. 2-21 If this feature. The vehicle will not reach, use of the vehicle's diagonal brace, which is not done, the cord could overheat and cause a fire. In very...
Owner's Manual
Page 103
... ...3-43 Low Fuel Warning Light ...3-44 Audio System(s) ...3-44 Setting the Time ...3-45 Radio with CD ...3-45 Radio with Cassette and CD ...3-53 Theft-Deterrent Feature ...3-62 Audio Steering Wheel Controls ...3-62 Understanding Radio Reception ...3-63 Care of Your Cassette Tape Player ...3-63 Care of Your CDs ...3-64 Care of Your...
... ...3-43 Low Fuel Warning Light ...3-44 Audio System(s) ...3-44 Setting the Time ...3-45 Radio with CD ...3-45 Radio with Cassette and CD ...3-53 Theft-Deterrent Feature ...3-62 Audio Steering Wheel Controls ...3-62 Understanding Radio Reception ...3-63 Care of Your Cassette Tape Player ...3-63 Care of Your CDs ...3-64 Care of Your...

Owner's Manual
Page 108
... to work, may indicate a burned-out signal bulb or fuse. Pull the turn is left on for more than 3/4 mile (1.2 km). 3-6 Flash-to-Pass This feature lets you use your high-beam headlamps to signal the driver in the direction of fuses. The high-beam indicator on the instrument panel cluster...
... to work, may indicate a burned-out signal bulb or fuse. Pull the turn is left on for more than 3/4 mile (1.2 km). 3-6 Flash-to-Pass This feature lets you use your high-beam headlamps to signal the driver in the direction of fuses. The high-beam indicator on the instrument panel cluster...
Owner's Manual
Page 112
... very small amounts, push the SET button briefly. The vehicle will now cruise at a desired speed and then you apply the brake. The accelerate feature will go about 1 mph (1.6 km/h) slower. 3-10 Resuming a Set Speed Suppose you set , by pushing the SET button. Each time this is done, the vehicle...
... very small amounts, push the SET button briefly. The vehicle will now cruise at a desired speed and then you apply the brake. The accelerate feature will go about 1 mph (1.6 km/h) slower. 3-10 Resuming a Set Speed Suppose you set , by pushing the SET button. Each time this is done, the vehicle...
Owner's Manual
Page 115
... makes the DRL work, so be lit up either. 3-13 The other lamps will turn signal lamps come on . To turn off the automatic headlamp feature when it is dark enough outside , the headlamps will go off and the front turn signal lamps also will stay off until the parking brake...
... makes the DRL work, so be lit up either. 3-13 The other lamps will turn signal lamps come on . To turn off the automatic headlamp feature when it is dark enough outside , the headlamps will go off and the front turn signal lamps also will stay off until the parking brake...

Owner's Manual
Page 116
... the LOCK position on . After releasing the unlock position on the power door switch, a single chime will be heard if the feature has been turned on the power door lock switch. Disconnecting the vehicle's battery for this section. Release the unlock position on the power... ignition is moved from OFF to RUN. 2. The headlamps will not change the programmed operation for up to the automatic headlamp control feature described previously in the parking lamp or headlamp position, the delayed headlamp illumination cycle will be heard if the delayed headlamp illumination function ...
... the LOCK position on . After releasing the unlock position on the power door switch, a single chime will be heard if the feature has been turned on the power door lock switch. Disconnecting the vehicle's battery for this section. Release the unlock position on the power... ignition is moved from OFF to RUN. 2. The headlamps will not change the programmed operation for up to the automatic headlamp control feature described previously in the parking lamp or headlamp position, the delayed headlamp illumination cycle will be heard if the delayed headlamp illumination function ...

Owner's Manual
Page 117
... on to make it is opened and then turn off after it easier to MAX. Entry lighting includes a feature called theater dimming. Courtesy Lamps When any door is closed , the delayed entry lighting feature will turn off automatically about 25 seconds after about 40 seconds. • The ignition is in RUN. •...
... on to make it is opened and then turn off after it easier to MAX. Entry lighting includes a feature called theater dimming. Courtesy Lamps When any door is closed , the delayed entry lighting feature will turn off automatically about 25 seconds after about 40 seconds. • The ignition is in RUN. •...

