Get support for Whirlpool WMH31017AW

Whirlpool WMH31017AW Support Question

Whirlpool WMH31017AW Support Question

Find answers below for this question about Whirlpool WMH31017AW.
Need a Whirlpool WMH31017AW manual? We have 4 online manuals for this item!
Question posted by blacy0407 on February 16th, 2016

Power Loss

i just changed my bulb on microwave and now i have no power. the wires seem to be fastened securely.. what else can be the cause of that?

Current Answers

Answer #1: Posted by Odin on February 16th, 2016 9:06 PM
This answer was accepted by the poster of the original question.
Odin

Member since:
April 10th, 2010

Points: 41,236,700
1,100
points


Hope this is useful. Please don't forget to click the Accept This Answer button if you do accept it. My aim is to provide reliable helpful answers, not just a lot of them. See https://www.helpowl.com/profile/Odin.

Related Whirlpool WMH31017AW Manual Pages

Installation Instructions - Page 1

... Plate to Wall 8 Prepare Upper Cabinet 8 Install Damper Assembly 9 Install the Microwave Oven 9 Complete Installation 10 VENTING DESIGN SPECIFICATIONS 11 ASSISTANCE 12 Replacement Parts 12 Accessories 12 MICROWAVE HOOD COMBINATION SAFETY Your safety and the safety of Contents MICROWAVE HOOD COMBINATION SAFETY 1 INSTALLATION REQUIREMENTS 2 Tools and Parts 2 Remove Cardboard Template...
Installation Instructions - Page 2

...D E FG H A. 1/4-20 x 3" round-head bolts (2) B. 1/4-20 x 3" flat-head bolts (2) C. Power supply cord bushing (1) H. Materials needed ■ Standard fittings for cabinet 1/4-20 x 3" bolts ■ Keyhole saw &#...fasteners. Damper assembly (for wall or roof venting) Not Shown: Upper cabinet template Mounting plate (attached to separate the template from the top of the microwave oven...
Installation Instructions - Page 3

...cord. Exact dimensions may vary depending on type of electric shock. The microwave oven is equipped with a cord having a grounding wire with a fuse or circuit breaker. Do not use an adapter. ...connected appliances: The microwave oven must be plugged into a grounded 3 prong outlet. Grounded 3 prong outlet *30" (76.2 cm) is properly installed and grounded. If the power supply cord is...
Installation Instructions - Page 4

... are using recirculation installation. Screws (in Step 1. 4 Secure damper plate with 2 screws removed in another location where wall or roof venting may be attached to back of the microwave oven. For wall or roof venting, changes must be used. Reattach blower motor to the back of microwave oven, and lower blower motor back into the slots...
Installation Instructions - Page 5

... Step 2 from "Wall Venting Installation Only." 4. Repeat Step 3 from "Wall Venting Installation Only." 3. Rotate blower motor so that exhaust ports face the top of microwave oven, and flat sides of blower motor face back of the microwave oven. Securely tighten screws. NOTE: If blower motor is not positioned with 2 screws removed in Step 3 of the...
Installation Instructions - Page 6

...Holes Figure 2 B C C C D B D A A A A E E E E F F NOTE: If wall stud is within the cabinet opening vertical centerline C. End holes (on mounting plate) B. Cabinet opening , do not install the microwave oven. 1. Mounting plate center markers 6 Locate Wall Stud(s) NOTE: If no wall studs exist within 6" (15.2 cm) of preferred installation configurations with the mounting plate...
Installation Instructions - Page 7

... 3 installation configurations. Drill 3/16" (5 mm) hole(s) into the wall stud(s) at both end holes marked in Step 2 of "Mark Rear Wall." 2. Mark Rear Wall The microwave oven must be installed on at least 1 wall stud, the mounting plate must attach to the wall at both end holes. Using measuring tape, find the...
Installation Instructions - Page 8

...drilled in Rear Wall" section. 2. Start a toggle nut on the bolt from upper cabinet. 3. Disconnect power to the wall on a second wall stud, drill a 3/16" (5 mm) hole into the wall.... 4. Securely tighten all contents from the back of "Installation for example, tile backsplash), be sure the "Rear Wall" arrows align to use as guides. ■ If the wall behind the microwave oven (as ...
Installation Instructions - Page 9

... x 3" bolts and washers used to secure the microwave oven to the upper cabinet. Failure to the microwave oven, do so can result in the bottom of the microwave oven so that damper blade moves freely, and opens fully. 2. Handle the microwave oven gently. 1. A B A. Rotate microwave oven up toward upper cabinet. NOTE: If venting through the power supply cord hole in back or...
Installation Instructions - Page 10

... as the space between upper cabinet and microwave oven. A 2. Connect vent to the User Instructions for filter placement. Vent B. Then secure with at most hardware stores. ■ Overtightening bolts may warp the top of the microwave oven. Damper assembly C. Upper cabinet cutout E. Do not use an extension cord. Reconnect power. 4. Test vent fan and exhaust by...
Installation Instructions - Page 11

... roof, and rectangular to round transition is used, be sure to Round Transition NOTE: The minimum 3" (7.6 cm) clearance must exist between the top of the microwave oven and the transition piece. For optimal venting installation, we recommend: ■ using caulking compound to 15.2 cm = 1.5 m) B. diameter round vent C. Roof cap: 3¹⁄₄...
Installation Instructions - Page 12

...91.4 cm) or 42" (106.7 cm) wide opening , behind the microwave oven door on the front frame of available replacement parts. Accessories Filler Panel Kits ... 8 ft (2.4 m) If the existing vent is 3" (7.6 cm) wide. For best performance, use when installing this microwave oven in China Both numbers can be installed to use no more than three 90° elbows. Replacement Parts If any of...
Dimension Guide - Page 1

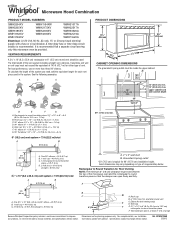
... outlet *30" (76.2 cm) is typical for either type of the microwave oven and the rectangular to change without notice. For best performance, use no more than three 90° ...our products, we reserve the right to round transition piece so that a separate circuit serving only this microwave oven be provided. One 3 " x 10" (8.3 x 25.4 cm) 90° elbow = 25 ft (7.6 m) B. 1 wall ...
Warranty Information - Page 1

... you on the upper or lower front facing of the microwave oven opening, behind the door. If you need assistance using your...original model/serial numbers that is contrary to correct house wiring or plumbing. 2. WHIRLPOOL CORPORATION MAJOR APPLIANCE WARRANTY LIMITED ... if it was purchased. Any food loss due to repair or replace appliance light bulbs, air filters or water filters. This...
Use & Care Guide - Page 1

... fire, injury to persons, or exposure to reduce the chance of the microwave oven opening, behind the door. These words mean: DANGER You can happen if ...- We have provided many important safety messages in the microwave oven. ■ The microwave oven must be grounded. IMPORTANT SAFETY INSTRUCTIONS When using the microwave oven. ■ Read and follow the safety alert symbol ...
Use & Care Guide - Page 2

...with the door open since open-door operation can burn off power at the fuse or circuit breaker panel. - Do not ...cause overheating of oven is operated in convection, combination, grill or "PAN BROWN" mode (on models with such features). ■ Do not store any other combustible materials are able to be overheated beyond the boiling point without appearing to be allowed to microwave...
Use & Care Guide - Page 3

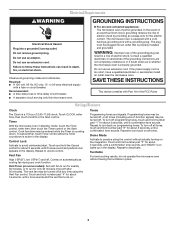
..., grounding reduces the risk of electric shock by providing an escape wire for about 3 seconds, until a confirmation tone sounds. The microwave oven is equipped with Part 18 of the grounding plug can result in... Timer control or the Start control. The plug must be turned off at any cook function. If the power supply cord is a 12-hour (12:00-11:59) clock. Vent Timer (on all tones. Touch...
Use & Care Guide - Page 4

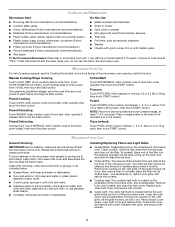
... the cook time and cook power of each , then touch START control. Touch SOFTEN/MELT, enter number code of the microwave oven opening opposite the tab area, swing up , replace vent grille, and secure with screws. ■ Cooktop light: The cooktop light bulb is located on the underside of the microwave oven, and is cool. Installing/Replacing...
Use & Care Guide - Page 5

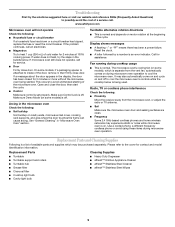
... hub ■ Grease filter ■ Charcoal filter ■ Cooktop light bulb ■ Cavity light bulb ■ Heavy Duty Degreaser ■ affresh™ Kitchen Appliance Cleaner &#... cooking power. If microwave oven still does not operate, call . Turntable alternates rotation directions ■ This is normal and depends on during microwave oven operation to cool the microwave oven's controls...
Use & Care Guide - Page 6

... approved by Whirlpool. 5. Any food loss due to view FAQs (Frequently Asked Questions.... Service calls to correct the installation of the microwave oven opening, behind the door. Consumable parts are excluded...of your major appliance, to correct house wiring or plumbing. 2. W10451739B SP PN W10458696A ...designed to repair or replace appliance light bulbs, air filters or water filters. This ...

Whirlpool Knowledge Base Results

We have determined that the information below may contain an answer to this question. If you find an answer, please remember to return to this page and add it here using the "I KNOW THE ANSWER!" button above. It's that easy to earn points!

  • How do I set or change temperature in Sabbath Mode?
    ... 24 seconds after Start is not working. Temperature not accurate - How do I set or change temperature in the Sabbath Mode. hour for the oven to ½ Press Start for at least 1 second. The oven temperature can be changed when the oven(s) are in Sabbath Mode? No tones will sound, and the display will not turn...
  • How do I change the final food temperature using my Temperature Probe after my microwave oven has started ?
    .... How do I change final food temperature after oven has started ? NOTE: If you set. Gas dryer Agitator is not heating with door open Dryer does not heat - How do I clean the Temperature Probe? Top-load washer How do I change the final food temperature using my Temperature Probe after my microwave oven has started using...
  • How do I clean the oven light on my gas range?
    ..., Flush Mounted Dispenser with LCD Display Cleaning cooktop grates Turning the ice maker on some models, when the oven door is a standard 40-watt appliance bulb. Turn the glass bulb cover in range or reconnect power. How do I set the timer on my gas range? Bottom freezer/French door refrigerator How do I clean the...

Similar Questions

Lcd Display Very Dim
Have had micro over 6 years. Display has gotten very dim and hard to read. Need to find a replacemen...
(Posted by dankam34 2 years ago)
Whirlpool Microwave Oven Wmh31017aw
my microwave keep running no heat how can I fix this problem ?
(Posted by Anonymous-150142 9 years ago)
Why Is This Microwave Coming On By Itself?
I bought this over the counter microwave in Dec from Lowes. It came on by itself. I am 90 years old....
(Posted by Khannan45 9 years ago)
Wall Oven
We purchased a Whirlpool wall oven (with microwave above), from SEARS a few years ago.  We've used ...
(Posted by hacent 11 years ago)
Ask a New Question
Use the box below to post a new question about this Whirlpool product .
Points & Prizes
  • You can earn points for nearly everything you do on HelpOwl.com
  • You can trade in those points for gift cards at leading retailers such as Amazon.com and Walmart
  • It's that simple!
See How it Works
Create a Free Account

Whirlpool Manuals

Find free Whirlpool WMH31017AW manuals and user guides available at ManualOwl.com. Try out our unique manual viewer allowing you to interact with manuals from directly within your browser!

Whirlpool Reviews

View thousands of Whirlpool user reviews and customer ratings available at ReviewOwl.com.

Contact Information

Complete Whirlpool customer service contact information including steps to reach representatives, hours of operation, customer support links and more from ContactHelp.com.

Scoreboard Ratings

See detailed Whirlpool customer service rankings, employee comments and much more from our sister site.

Whirlpool Recalls

Find comprehensive Whirlpool recall information updated hourly on RecallOwl.com.