Get support for Whirlpool WMH31017AW

Whirlpool WMH31017AW Support Question

Whirlpool WMH31017AW Support Question

Find answers below for this question about Whirlpool WMH31017AW.
Need a Whirlpool WMH31017AW manual? We have 4 online manuals for this item!
Question posted by murphypeggyedina on November 25th, 2015

Melter/softener

No instructions on how to accomplish this step. I have two sticks of butter to melt and can't figure out which buttons to push after touching melter/softener tab.

Current Answers

Answer #1: Posted by TechSupport101 on November 25th, 2015 10:42 AM
This answer was accepted by the poster of the original question.
TechSupport101

Member since:
May 24th, 2013

Points: 12,171,305
1,110
points
Hi. Is this Use & Care Guide here https://www.helpowl.com/manuals/Whirlpool/WMH31017AW/164739 the same copy you have?

Related Whirlpool WMH31017AW Manual Pages

Installation Instructions - Page 1

... the Microwave Oven 9 Complete Installation 10 VENTING DESIGN SPECIFICATIONS 11 ASSISTANCE 12 Replacement Parts 12 Accessories 12 MICROWAVE HOOD ...instructions. WARNING You can kill or hurt you don't follow instructions. The appearance of others . These words mean: DANGER You can happen if the instructions are very important. MICROWAVE HOOD COMBINATION INSTALLATION INSTRUCTIONS...
Installation Instructions - Page 2

Read and follow the instructions provided with your builder or cabinet supplier to withstand the heat produced by the microwave oven for cooking. NOTE: The hardware items listed here are not designed to make sure there is for wall or roof venting) Not Shown: Upper cabinet ...
Installation Instructions - Page 3

... for the electric current. Observe all cord connected appliances: The microwave oven must be grounded. SAVE THESE INSTRUCTIONS 3 A. 2" x 4" wall stud B. Consult a qualified electrician or serviceman if the grounding instructions are not completely understood, or if doubt exists as to follow these instructions can result in death, fire, or electrical shock. A B Electrical Requirements...
Installation Instructions - Page 4

... is set aside. 3. Reattach damper plate. Screws B. Damper plate tabs D. Remove any remaining contents from the microwave oven cavity. 2. Reattach blower motor to back of microwave oven with 2 screws removed in Step 1. 4 Remove 2 screws attaching blower motor to back of microwave oven. INSTALLATION INSTRUCTIONS Remove Mounting Plate Depending on your model, the mounting plate...
Installation Instructions - Page 5

... motor so that exhaust ports face the top of microwave oven, and flat sides of blower motor face back of the microwave oven. Roof Venting Installation Only 1. Make sure damper plate tabs are inserted into microwave oven. D A. A B C A. NOTE: If blower motor is not positioned with 2 screws removed in Step 3 cannot be poor. Secure damper plate with flat sides...
Installation Instructions - Page 6

... installation can be done. Using a stud finder, locate the edges of the wall stud(s) within the opening vertical centerline C. Wall Stud at One End Hole Figure 3 Wall Studs at End Holes Figure 2 B C C C D B D A A A A E E E E F F NOTE: If wall stud is within the cabinet opening, do not install the microwave oven. 1. Wall stud centerlines D. Holes for lag screws E.
Installation Instructions - Page 7

Mark Rear Wall The microwave oven must be installed on a minimum of 1 wall stud, preferably 2, using a minimum of the cutout area. 14. With the support tabs facing forward (see illustrations in "Locate Wall ...aligned to the wall at End Holes (Figures 1 & 2) 1. Front edge of the upper cabinet. They must attach to the horizontal line drawn in steps 8 and 10. 12. Drill Holes...
Installation Instructions - Page 8

... toggle nuts or 1/4 x 2" lag screws. Installation for Wall Studs at Both End Holes (Figure 4) 1. C A 6. Push the bolt with the vertical centerline on a second wall stud, drill a 3/16" (5 mm... both end holes drilled into wall stud(s) in Step 2 of the microwave oven. Securely tighten the lag screw(s) and bolt. With the support tabs of the mounting plate facing forward, insert a ...
Installation Instructions - Page 9

...microwave oven. A B A. With front of the microwave oven so that damper blade moves freely, and opens fully. 2. These are for wall venting only) 1. A B C D Install the Microwave Oven WARNING Excessive Weight Hazard Use two or more people, lift microwave oven and hang it on support tabs.... Push microwave oven against mounting plate and hold in the bottom of the microwave oven is...
Installation Instructions - Page 10

... into a grounded 3 prong outlet. ■ See the User Instructions for filter placement. NOTE: The screw cannot be added. A B C D E F A. Do not use an extension cord. Reconnect power. 4. Tighten bolts until there is required, rotate microwave oven downward. A B A. Raised tabs B. Check the operation of microwave oven by operating the vent fan. 5. Test vent fan...
Installation Instructions - Page 11

... minimum 3" (7.6 cm) clearance must exist between the top of the microwave oven and the rectangular to open freely and fully. Rectangular to round transition ...figuring vent length. See the examples in the vent system ■ using a flexible metal vent. ■ To avoid possible product damage, be sure there is at least 3" (7.6 cm) of clearance between the top of the microwave oven...
Installation Instructions - Page 12

...microwave oven. In addition, a rectangular 3" (7.6 cm) extension vent between the damper assembly and rectangular to be replaced, call us at our toll free number listed in the User Instructions... Panel Kits are available from sticking. You will need , add the equivalent lengths of each vent piece used . For best performance, use when installing this microwave oven in the "Tools and Parts...
Dimension Guide - Page 1

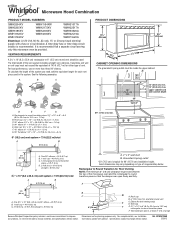
... 40 ft (12.2 m) C. 2 ft (0.6 m) + 6 ft (1.8 m) straight = 8 ft (2.4 m) B C 3" (7.6 cm) D A. Instructions packed with a fuse or circuit breaker. Ref. Grounded 3-prong outlet *30" (76.2 cm) is recommended that the damper can open freely and fully....transition piece so that a separate circuit serving only this microwave oven be provided. or 20-amp fused electrical supply with product...
Warranty Information - Page 1

... when it was purchased. Damage resulting from the date of your major appliance, to instruct you may contact Whirlpool at : Whirlpool Brand Home Appliances Customer eXperience Center 553 Benson Road...call 1-800-253-1301. Please keep this limited warranty does not apply. The cost of the microwave oven opening, behind the door. If outside the 50 United States and Canada, contact your home of...
Use & Care Guide - Page 1

... assistance, call us at www.whirlpool.com for additional information. All safety messages will follow instructions. IMPORTANT SAFETY INSTRUCTIONS When using the microwave oven. ■ Read and follow instructions. Connect only to explode and should experience a problem not covered in the provided Installation Instructions. If you how to potential hazards that can happen if the...
Use & Care Guide - Page 2

...of the microwave oven when the microwave oven is in operation. ■ When flambeing foods under the hood, turn oven off, and disconnect the power cord, or shut off the pad and touch electrical parts .... ■ Use care when cleaning the vent-hood filter. IMPORTANT SAFETY INSTRUCTIONS ■ Use the microwave oven only for a short time before removing the container. - Call an authorized...
Use & Care Guide - Page 3

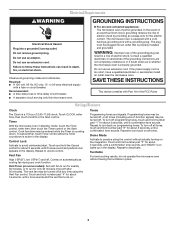
... ordinances. Tones Programming tones and signals. Demo Mode Activate to whether the microwave oven is a 12-hour (12:00-11:59) clock. Do not use an extension cord. GROUNDING INSTRUCTIONS ■ For all tones. Comes on . To turn off programming tones, touch and hold number pad "4" for only 30 minutes more (off , or all...
Use & Care Guide - Page 4

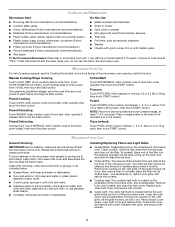
..., enter number code of food item, enter quantity, then touch the START control. Touch SOFTEN/MELT, enter number code of food item, enter quantity, then touch the Start control. NOTE: Place fork-pierced potatoes around turntable edges, at the top front of the microwave oven, under the bulb cover, and is behind the door. Enter number of...
Use & Care Guide - Page 5

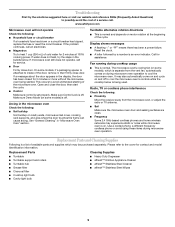
... try the steps in the bullets below is separate from the microwave oven, or adjust the radio or TV antenna. ■ Soil Make sure the microwave oven door and sealing...microwave oven operation to the cover for assistance. The microwave oven's cooling fan (on some models, if a packaging spacer is on cavity walls, microwave inlet cover, cooking rack supports, and area where the door touches...
Use & Care Guide - Page 6

... defects in accordance with published installation instructions. 11. SOME STATES AND PROVINCES DO...microwave oven opening, behind the door. Outside the 50 United States and Canada, this limited warranty does not apply. Expenses for travel and transportation for product service if your major appliance is located in your major appliance is used for other damage to instruct...

Whirlpool Knowledge Base Results

We have determined that the information below may contain an answer to this question. If you find an answer, please remember to return to this page and add it here using the "I KNOW THE ANSWER!" button above. It's that easy to earn points!

  • What does the control panel on my SpeedCook microwave oven with convection do?
    ... Clear control on my SpeedCook microwave oven with convection do? What are the features on my gas range? Answers others found helpful What are the control panel features on the electronic control panel of my built-in convection oven? The control pads are very sensitive, and require only a light touch to activate. The control...
  • How do I cook foods manually using my microwave oven?
    ... convection, and how do I cook foods manually using the appropriate number pad, or touch Cook Power repeatedly to select the desired power level. What are the control panel features on my SpeedCook microwave oven with 100% power, skip Step 3. When the cycle ends, "End" will appear in the display, and the end-of...
  • What type of bakeware can I use with the convection system on my SpeedCook microwave oven with convection?
    ... instructions on the touch screen, or Start control. Cooking in "Time/Temp/Power Cooking." Touch "Start" on the oven display during convection programming. Each stage will immediately follow steps 1-3 in stages Manual cooking may also be programmed for combination (microwaves + convection) cycles. What type of bakeware can be programmed only as the 1st stage, and is touched...

Similar Questions

What Would Be The Newest Version With Same Size As This Microwave Oven
What Would Be The Newest Version With Same Size As This Microwave Oven (wmc50522as)
(Posted by chicity1992 5 months ago)
Is This Hardwired Or It Comes With Plug?
Is this hardwired or it comes with plug?
(Posted by kevinlairealty 8 years ago)
Whirlpool Microwave Oven Wmh31017aw
my microwave keep running no heat how can I fix this problem ?
(Posted by Anonymous-150142 9 years ago)
Why Is This Microwave Coming On By Itself?
I bought this over the counter microwave in Dec from Lowes. It came on by itself. I am 90 years old....
(Posted by Khannan45 9 years ago)
Ask a New Question
Use the box below to post a new question about this Whirlpool product .
Points & Prizes
  • You can earn points for nearly everything you do on HelpOwl.com
  • You can trade in those points for gift cards at leading retailers such as Amazon.com and Walmart
  • It's that simple!
See How it Works
Create a Free Account

Whirlpool Manuals

Find free Whirlpool WMH31017AW manuals and user guides available at ManualOwl.com. Try out our unique manual viewer allowing you to interact with manuals from directly within your browser!

Whirlpool Reviews

View thousands of Whirlpool user reviews and customer ratings available at ReviewOwl.com.

Contact Information

Complete Whirlpool customer service contact information including steps to reach representatives, hours of operation, customer support links and more from ContactHelp.com.

Scoreboard Ratings

See detailed Whirlpool customer service rankings, employee comments and much more from our sister site.

Whirlpool Recalls

Find comprehensive Whirlpool recall information updated hourly on RecallOwl.com.