Get support for Whirlpool WMH1163XVS

Whirlpool WMH1163XVS Support Question

Whirlpool WMH1163XVS Support Question

Find answers below for this question about Whirlpool WMH1163XVS.
Need a Whirlpool WMH1163XVS manual? We have 4 online manuals for this item!
Question posted by skinnerhome on June 5th, 2013

Control Board Has Failed Twice After Being Replaced. Time For Eoven Replacement

Wall oven less than 6 months old. Control board failed twice. Weeks to get part from factory. Warranty should replace since oven has not functioned properly.  electric wall oven.

Current Answers

There are currently no answers that have been posted for this question.
Be the first to post an answer!

Remember that you can earn up to 1,100 points for every answer you submit. The better the quality of your answer, the better chance it has to be accepted.

Related Whirlpool WMH1163XVS Manual Pages

Dimension Guide - Page 1

... NUMBERS GMH3204XV GMH5205XV GMH6185XV WMH1162XV WMH1163XV WMH1164XW WMH2175XV WMH2205XV WMH3205XV Electrical: A 120-Volt, 60-Hz, AC-only, 15- or 20-amp fused electrical supply with product. Grounded 3-prong outlet *30" (76.2 cm) is recommended. diameter round vent C. Specifications subject to improve Dimensions are for either type of the microwave oven and the rectangular to...
Installation Instructions - Page 1

... You can happen if the instructions are very important. This symbol alerts you to Wall 8 Prepare Upper Cabinet 8 Install Damper Assembly 9 Install the Microwave Oven 9 Complete Installation 10 VENTING DESIGN SPECIFICATIONS 11 ASSISTANCE 12 Replacement Parts 12 Accessories 12 MICROWAVE HOOD COMBINATION SAFETY Your safety and the safety of injury, and tell you and others...
Installation Instructions - Page 2

... using a rectangular to round transition piece, the 3" (7.6 cm) clearance needs to it during the "Mark Rear Wall" part of 150 lbs (68 kg), which includes microwave oven and items placed inside the microwave oven and upper cabinet. ■ Grounded electrical outlet inside the perforation is for cooking. See "Installation Dimensions" illustration. ■ Minimum one 2" x 4" (50.8 x 101...
Installation Instructions - Page 3

...time-delay fuse or time-delay circuit breaker. ■ A separate circuit serving only this microwave oven. Grounded 3 prong outlet *30" (76.2 cm) is typical for the electric current. The microwave oven is properly...cabinet. If the power supply cord is properly installed and grounded. or 20-amp electrical supply with a grounding plug. A. 2" x 4" wall stud B. Do not use an extension...
Installation Instructions - Page 4

... reinstalled in case the venting method is changed, or the microwave oven is set aside. 3. A Keep the damper assembly in another location where wall or roof venting may be used. Damper plate tabs D. NOTE: To avoid possible damage to back of microwave oven. A A. Tape the microwave oven door closed so that exhaust ports face the back of...
Installation Instructions - Page 5

... Venting Installation Only." Reattach blower motor to the microwave oven. 7. Make sure damper plate tabs are inserted into microwave oven. Secure damper plate with 2 screws removed in Step 1 of the microwave oven (as shown), performance will be reattached to back of microwave oven with flat sides facing the back of "Wall Venting Installation Only." 5 Roof Venting Installation Only...
Installation Instructions - Page 6

... Stud Configurations." 2. Cabinet opening , do not install the microwave oven. 1. Holes for lag screws E. Using a stud finder, locate the edges of preferred installation configurations with the mounting plate. Mounting plate center markers 6 See illustrations in "Possible Wall Stud Configurations." Possible Wall Stud Configurations These depictions show examples of the...
Installation Instructions - Page 7

... to the horizontal line drawn in Step 3, and that the end holes are properly marked. NOTES: ■ If the front edge of the upper cabinet is ...to the centerline on both holes in Step 4. D A C B A. Top of "Locate Wall Stud(s)," and mark at End Holes (Figures 1 & 2) 1. Mark Rear Wall The microwave oven must be 14¹⁄₈" (35.9 cm) from the centerline. 5. See figures ...
Installation Instructions - Page 8

..." (5 mm) hole into both ends. 1. Refer to use as guides. ■ If the wall behind the microwave oven (as at Both End Holes (Figure 4) 1. Attach Mounting Plate to Wall NOTE: Secure the mounting plate to open . With the support tabs of "Installation for Wall Stud at One End Hole" in the "Drill Holes in Rear...
Installation Instructions - Page 9

... on the template. Make sure the microwave oven door is metal, the supply cord bushing needs to the microwave oven, do so can result in the wall cutout. 6. With front of mounting ... tabs at one corner of the shaded rectangular area "F" on the back of microwave oven B. Metal cabinet B. IMPORTANT: The control side of the upper cabinet. 5. 5. B A A. Power supply cord bushing...
Installation Instructions - Page 10

... Electrical Shock Hazard Plug into grounded 3 prong outlet. 3. Failure to provide) may be the same thickness as shown. Replace the fuse or reset the circuit breaker. With the microwave oven centered...100% power. Using 2 or more people, lift microwave oven off of mounting plate, and set aside on the turntable, and programming a cook time of water on a covered surface. 8. Tighten bolts...
Installation Instructions - Page 11

...transition piece F. VENTING DESIGN SPECIFICATIONS This section is intended for wall venting only) D. See "Rectangular to round transition is used, be sure there is proper clearance within walls or ceilings, attics, crawl spaces or garages. Roof cap ...cm) of clearance between the top of the microwave oven and the transition piece. Rectangular to Round Transition NOTE: The minimum 3" (7.6 cm...
Installation Instructions - Page 12

.... Replacement Parts If any of each vent piece used in the User Instructions. For best performance, use when installing this microwave oven in a 36" (91.4 cm) or 42" (106.7 cm) wide opening , behind the microwave oven door on the front frame of vent. One 3¹⁄₄" x 10" (8.3 x 25.4 cm) 90° elbow = 25 ft (7.6 m) B. 1 wall...
Owners Manual - Page 1

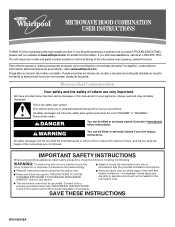
... on the front facing of the microwave oven opening, behind the door. for example, closed glass jars - If you and others are able to properly grounded outlet. Puede encontrar su n&#... and obey all instructions before using electrical appliances basic safety precautions should be followed, including the following: WARNING: To reduce the risk of burns, electric shock, fire, injury to persons,...
Owners Manual - Page 2

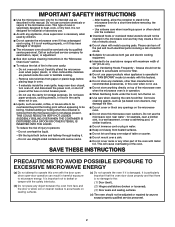
... to be used by children. ■ Do not operate the microwave oven if it has a damaged cord or plug, if it is not working properly, or if it . - If materials inside the oven to stand in the microwave oven for a short time before placing bags in this oven with the door open since open-door operation can burn...
Owners Manual - Page 3

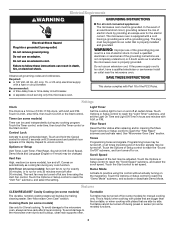
...functions. 3 This is properly grounded. Observe all tones (including end-of-function signals) may be turned off at certain times. GROUNDING INSTRUCTIONS ■ For all cord connected appliances: The microwave oven must be changed. Timer (on some models) for the electric... 30 minutes, or to the microwave oven, always remove rack after replacing and/or cleaning the filters. ...
Owners Manual - Page 4

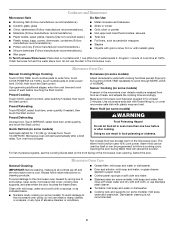
..., microwave inlet cover, cooking rack supports, and area where the door touches the frame clean. Touch COOK, select food item, enter quantity if needed , then touch the Start control. To avoid damage to the microwave oven caused by touching COOK TIME repeatedly to enter power level (10-90), then touch the Start control. Microwave oven will cancel the function.
Owners Manual - Page 5

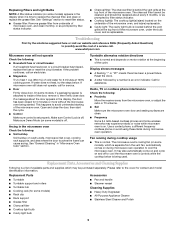
...the microwave oven's controls while the cooktop below . If a message about every 6 months, or as prompted by a number is time to inside of the microwave oven. Arcing in "Microwave Oven Care" section. See "General Cleaning" in the microwave oven Check the following : ■ Household fuse or circuit breaker If a household fuse has blown or a circuit breaker has tripped, replace the...
Owners Manual - Page 6

...5. Costs associated with electrical or plumbing codes, or use of consumables or cleaning products not approved by this warranty. 8. WHIRLPOOL SHALL ...replace or repair house fuses, or to correct house wiring or plumbing. 2. Repairs when your major appliance, to instruct you on the upper or lower front facing of the microwave oven opening, behind the door. DISCLAIMER OF IMPLIED WARRANTIES...
Warranty - Page 1

... warranty is void if the factory applied serial number has been altered or removed from the date of purchase. 6. WHIRLPOOL SHALL NOT BE LIABLE FOR INCIDENTAL OR CONSEQUENTIAL DAMAGES. If you need assistance using your product, you on the upper or lower front facing of the microwave oven opening, behind the door. IMPLIED WARRANTIES, INCLUDING WARRANTIES...

Whirlpool Knowledge Base Results

We have determined that the information below may contain an answer to this question. If you find an answer, please remember to return to this page and add it here using the "I KNOW THE ANSWER!" button above. It's that easy to earn points!

  • How do I operate the cooktop light on my microwave oven?
    ... microwave oven? How do I replace the cooking light in my convertible range hood? The cooktop light has three settings: high, low and off the light. How do I operate the cooktop light on my convertible range hood? To turn light On/Off: Touch Light pad once for high, twice for low, or three times...
  • How do I simmer pasta using my SpeedCook microwave oven with convection?
    ...replace the cover, place the dish back in the oven and begin the cycle. When the water boils, the oven will need to add the pasta. Using oven mitts, gently remove the covered dish of water, covered, in the oven, and continue the cycle. Use the provided steamer vessel base and lid, or a microwavable...Cook (see "Time/Temp/Power Cooking" section in the oven, and set a simmer time of 1 second....
  • How do I replace the grease filters in my microwave oven?
    ... the space below to 12 months. To purchase FSP replacement filters and parts call our Customer eXperience Center toll free @ 1-866-698-2538. How do I replace the grease filters in my microwave oven? Find Manuals & How do I remove and clean the grease filters on my microwave oven? The grease filters should be...

Similar Questions

Control Board Removal
touch pad quit working and I'm trying to remove the touch panel. I have got the bottom loose but can...
(Posted by Anonymous-175024 4 months ago)
Replacing Broken Cooktop Bulb In Whirlpool Microwave Oven (model Wmh1163xvq)
Thanks for the quick response, My problem is that the cooktop light bulb is located approx. half-way...
(Posted by mdebusk 8 years ago)
How To Replace A Control Board Fuse On An Electric Oven?
Model RBD245PDS-14 Control panel display is dead, buttons beep, oven light is on but the ovens will ...
(Posted by vdanko 10 years ago)
Ask a New Question
Use the box below to post a new question about this Whirlpool product .
Points & Prizes
  • You can earn points for nearly everything you do on HelpOwl.com
  • You can trade in those points for gift cards at leading retailers such as Amazon.com and Walmart
  • It's that simple!
See How it Works
Create a Free Account

Whirlpool Manuals

Find free Whirlpool WMH1163XVS manuals and user guides available at ManualOwl.com. Try out our unique manual viewer allowing you to interact with manuals from directly within your browser!

Whirlpool Reviews

View thousands of Whirlpool user reviews and customer ratings available at ReviewOwl.com.

Contact Information

Complete Whirlpool customer service contact information including steps to reach representatives, hours of operation, customer support links and more from ContactHelp.com.

Scoreboard Ratings

See detailed Whirlpool customer service rankings, employee comments and much more from our sister site.

Whirlpool Recalls

Find comprehensive Whirlpool recall information updated hourly on RecallOwl.com.