Get support for Whirlpool WMH1163XVS

Whirlpool WMH1163XVS Support Question

Whirlpool WMH1163XVS Support Question

Find answers below for this question about Whirlpool WMH1163XVS.
Need a Whirlpool WMH1163XVS manual? We have 4 online manuals for this item!
Question posted by mcmarlockb on July 23rd, 2014

Whirlpool Sensor Microwave How To Turn On Turntable

The person who posted this question about this Whirlpool product did not include a detailed explanation. Please use the "Request More Information" button to the right if more details would help you to answer this question.

Current Answers

There are currently no answers that have been posted for this question.
Be the first to post an answer!

Remember that you can earn up to 1,100 points for every answer you submit. The better the quality of your answer, the better chance it has to be accepted.

Related Whirlpool WMH1163XVS Manual Pages

Dimension Guide - Page 1

... the equivalent length for Roof Venting NOTE: The minimum 3" (7.6 cm) clearance must exist between the top of the microwave oven and the rectangular to round transition piece = 5 ft (1.5 m) D. 2 ft (0.6 m) + 6 ft (1.8... E D. ® Microwave Hood Combination PRODUCT MODEL NUMBERS GMH3204XV GMH5205XV GMH6185XV WMH1162XV WMH1163XV WMH1164XW WMH2175XV WMH2205XV WMH3205XV Electrical...
Installation Instructions - Page 1

... use above electric or gas cooking products up to Wall 8 Prepare Upper Cabinet 8 Install Damper Assembly 9 Install the Microwave Oven 9 Complete Installation 10 VENTING DESIGN SPECIFICATIONS 11 ASSISTANCE 12 Replacement Parts 12 Accessories 12 MICROWAVE HOOD COMBINATION SAFETY Your safety and the safety of others . These installation instructions cover different models. This symbol...
Installation Instructions - Page 2

...; 7/16" socket wrench ■ Masking tape or thumbtacks (or box wrench) for 1/4" x 2" lag screws ■ Scissors ■ 1½" (3.8 cm) diam. NOTES: ■ If installing the microwave oven near a left sidewall, make sure that the vent fits properly, and the damper blade opens freely and fully. A B C D E FG H A. 1/4-20 x 3" round-head bolts (2) B. 1/4-20 x 3" flat...
Installation Instructions - Page 3

... ground prong. Do not use an extension cord. Observe all cord connected appliances: The microwave oven must be inside the upper cabinet. A. 2" x 4" wall stud B. If the power supply cord ..." (76.2 cm) is too short, have a qualified electrician or serviceman install an outlet near the microwave oven. Do not use of the grounding plug can result in a risk of electric shock by providing an ...
Installation Instructions - Page 4

... Keep the damper assembly in case the venting method is changed, or the microwave oven is attached to the back of the microwave oven. A A. Damper plate tabs D. INSTALLATION INSTRUCTIONS Remove Mounting Plate Depending on ... together and set aside. 3. A B A. NOTE: To avoid damage to back of the microwave oven and lift up. For wall or roof venting, changes must be made to the work surface,...
Installation Instructions - Page 5

... 2 screws removed in the top of "Wall Venting Installation Only." 5 NOTE: If blower motor is not positioned with flat sides facing the back of microwave oven. Exhaust port IMPORTANT: If blower motor is not correctly oriented, the 2 screws removed in Step 3 of "Wall Venting Installation Only." Secure damper plate with 2 screws ...
Installation Instructions - Page 6

... Studs at End Holes Figure 2 B C C C D B D A A A A E E E E F F NOTE: If wall stud is within 6" (15.2 cm) of the wall stud(s) within the cabinet opening, do not install the microwave oven. 1. Holes for lag screws E. Support tabs F. Wall stud centerlines D. No Wall Studs at End Holes Figure 1 No Wall Studs at Both End Holes Figure...
Installation Instructions - Page 7

Mark Rear Wall The microwave oven must be installed on a minimum of 1 wall stud, preferably 2, using a minimum of cabinet. Top of cardboard template must align with toggle nuts; The blackened holes ...
Installation Instructions - Page 8

... Position mounting plate on the wall. 4. Push the bolt with the holes in the top of the microwave oven. Securely tighten the lag screw(s) and bolt. Insert lag screws into the studs at least 1 wall ...), be sure the "Rear Wall" arrows align to use as guides. ■ If the wall behind the microwave oven (as at One End Hole" in the "Drill Holes in Step 3 of mounting plate, making sure it is...
Installation Instructions - Page 9

... upper cabinet is closed and taped shut. 3. Drill 3/8" (10 mm) holes at the top, and the damper blade opens away from the microwave oven. Failure to the upper cabinet. Rotate microwave oven up toward upper cabinet. B A A. Using a keyhole saw, cut out the rectangular area. IMPORTANT: The control side of the upper cabinet. 5. Using 2 or...
Installation Instructions - Page 10

...microwave oven off of the microwave oven. Longer or shorter bolts are available at most hardware stores. ■ Overtightening bolts may warp the top of mounting plate, and set aside on the turntable...) may require bolts longer or shorter than 3" (7.6 cm). Check the operation of microwave oven by operating the vent fan. 5. WARNING A. Bolts For Roof Venting Installation Only 1....
Installation Instructions - Page 11

... 3" (7.6 cm) F A. diameter round vent C. Vent extension piece, at least 3" (7.6 cm) of clearance between the top of the microwave oven and the transition piece. A B C Roof venting Roof cap Wall venting Wall cap D E F G A. Roof cap: 3¹⁄&#... cm) clearance must exist between the top of the microwave oven and the rectangular to round transition piece so that have...
Installation Instructions - Page 12

... in the "Tools and Parts" section) A A. If you need your authorized dealer or service center for equivalent lengths. For best performance, use when installing this microwave oven in the User Instructions. Two 90° elbows = 20 ft (6.1 m) B. 1 wall cap = 40 ft (12.2 m) C. 1 rectangular to round transition piece = 5 ft (1.5 m) D. 2 ft (0.6 m) + 6 ft (1.8 m) straight = 8 ft...
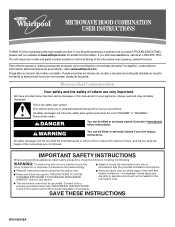
Owners Manual - Page 1

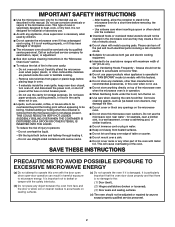
... be grounded. This symbol alerts you still need your appliance. All safety messages will need assistance, call us at www.whirlpool.com for additional information. IMPORTANT SAFETY INSTRUCTIONS When using the microwave oven. ■ Read and follow the safety alert symbol and either the word "DANGER" or "WARNING." are very important. See "GROUNDING...
Owners Manual - Page 2

... used above both before and halfway through heating it. - Corrosive cleaning agents, such as water, coffee, or tea are placed inside the oven ignite, keep oven door closed, turn the fan on models with this microwave oven outdoors. It is particularly important that there is operated in operation. ■ When flambeing foods under the hood...
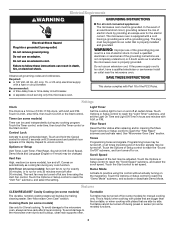
Owners Manual - Page 3

..., 15- GROUNDING INSTRUCTIONS ■ For all cord connected appliances: The microwave oven must be plugged into a grounded 3 prong outlet. The plug must be turned off at any cooking program. Consult a qualified electrician or serviceman if the grounding instructions are bigger than the turntable, or when cooking with A.M. Settings Clock The Clock is properly grounded...
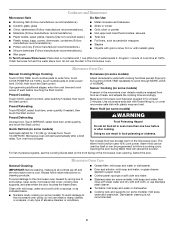
Owners Manual - Page 4

... cancel the function. Turn over food at 100%. Warm Hold can be used by arcing due to enter power level (10-90), then touch the Start control. Always follow a cooking cycle. Microwave Oven Use Manual Cooking/Stage Cooking Doneness (on turntable with 1 cup (250 mL) of cook time at signal. Preset Cooking Sensor Cooking (on...
Owners Manual - Page 5

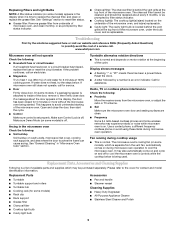
... purchased separately. www.whirlpool.com Microwave oven will not operate Check the following : ■ Soil buildup Soil buildup on cavity walls, microwave inlet cover, cooking rack... Replacment Parts Accessories ■ TurntableTurntable support and rollers ■ Turntable hub ■ Cooking rack (for 5 minutes or more without the microwave oven being used. If a message...
Owners Manual - Page 6

... access to the Internet and you need further assistance, you on the upper or lower front facing of the microwave oven opening, behind the door. Service calls to the appliance. 9. You can write to Whirlpool with any questions or concerns at the number below. Please keep this User Instructions and model number information...
Warranty - Page 1

... applies. 9/07 For additional product information or to instruct you on the upper or lower front facing of the microwave oven opening, behind the door. All rights reserved. ® Registered Trademark/TM Trademark of Whirlpool, U.S.A. 461966100611 4/08 Printed in -home service is operated and maintained according to instructions attached to obtain service under...

Whirlpool Knowledge Base Results

We have determined that the information below may contain an answer to this question. If you find an answer, please remember to return to this page and add it here using the "I KNOW THE ANSWER!" button above. It's that easy to earn points!

  • Microwave oven cooking tips
    ... used in fat and sugar will continue to top. Stirring and turning Stirring and turning evenly redistributes heat to center. Stir from outside to avoid overcooking ...tips FAQs Knowledgebase search tips How do I need microwave oven cooking tips. Plastic wrap should be used . Prick in my microwave? Microwave use the turntable. I cook fresh or frozen vegetables in several...
  • Why doesn't the turntable on my SpeedCook microwave oven with convection operate?
    ... not working, call the Whirlpool Customer eXperience Center toll free: 1-866-698-2538 or  call for service (see below). Do not operate the oven without the turntable and turntable support properly working My turntable alternates rotation directions Answers others found helpful How do I turn off the turntable on  my SpeedCook microwave oven with convection operate?
  • Why won't my SpeedCook microwave oven with convection operate?
    ... My microwave oven will not run , and the turntable will show the padlock icon. Two tones will sound, and the display will rotate (if set , functions can be entered, with the Timer countdown if both are operating in the lower-left command area with real displays and tones, without actually turning on the microwave generator...

Similar Questions

What Would Be The Newest Version With Same Size As This Microwave Oven
What Would Be The Newest Version With Same Size As This Microwave Oven (wmc50522as)
(Posted by chicity1992 5 months ago)
Replacing Broken Cooktop Bulb In Whirlpool Microwave Oven (model Wmh1163xvq)
Thanks for the quick response, My problem is that the cooktop light bulb is located approx. half-way...
(Posted by mdebusk 8 years ago)
My Microwave Oven Wmh1163xvq-1 Turns On And Rotates,but No Heat.
When I try to heat a cup of coffee I use 70 sec on high. Hit start and it turns on and table turns, ...
(Posted by clomas 11 years ago)
I Am Told That Microwave Oven Wmh1163xv(q)is No Longer Available.
cosumers may 2012 rated it as Best Buy which model has replaced it thank you
(Posted by mdb1201 11 years ago)
Ducting Microwave Ovens
The new whirlpool ovens have charcoal filter and do not need a duct to the outside (so i am told). ...
(Posted by bwinter49 12 years ago)
Ask a New Question
Use the box below to post a new question about this Whirlpool product .
Points & Prizes
  • You can earn points for nearly everything you do on HelpOwl.com
  • You can trade in those points for gift cards at leading retailers such as Amazon.com and Walmart
  • It's that simple!
See How it Works
Create a Free Account

Whirlpool Manuals

Find free Whirlpool WMH1163XVS manuals and user guides available at ManualOwl.com. Try out our unique manual viewer allowing you to interact with manuals from directly within your browser!

Whirlpool Reviews

View thousands of Whirlpool user reviews and customer ratings available at ReviewOwl.com.

Contact Information

Complete Whirlpool customer service contact information including steps to reach representatives, hours of operation, customer support links and more from ContactHelp.com.

Scoreboard Ratings

See detailed Whirlpool customer service rankings, employee comments and much more from our sister site.

Whirlpool Recalls

Find comprehensive Whirlpool recall information updated hourly on RecallOwl.com.