Whirlpool RF263LXTQ Support Question
Whirlpool RF263LXTQ Support Question
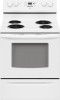
Find answers below for this question about Whirlpool RF263LXTQ.Need a Whirlpool RF263LXTQ manual? We have 4 online manuals for this item!
Question posted by greatmail on December 16th, 2012
Can We Use A 'dryer Cord' For Stove With Dryer Outlet?
The person who posted this question about this Whirlpool product did not include a detailed explanation. Please use the "Request More Information" button to the right if more details would help you to answer this question.
Current Answers
Related Whirlpool RF263LXTQ Manual Pages
Dimension Guide - Page 1

....
30" (76.2 cm) min. The model/serial number rating plate is recommended.
Use a 3-wire, UL listed, 40-
A
C
B
D
E F
A. 13" (33.0 cm) max. Outlet - 8" (20.3 cm) to 22" (55.9 cm) from floor F 2.2 cm...use a 4-wire power supply cord rated at 250 volts, 40 or 50 amps and investigated for use with leveling legs screwed
all the way in* C. 36" (91.4 cm) cooktop height (max.) with ranges...
Installation Instructions - Page 1

...-TIP BRACKET TEMPLATE 15
IMPORTANT:
Save for local electrical inspector's use. W10252706B Only 4 INSTALLATION INSTRUCTIONS 6 Unpack Range 6 Install Anti-Tip Bracket 6 Electrical Connection - INSTALLATION INSTRUCTIONS 30" (76 CM) FREESTANDING ELECTRIC RANGES
Table of Contents
RANGE SAFETY 2 INSTALLATION REQUIREMENTS 3
Tools and Parts 3 Location Requirements 3 Electrical Requirements...
Installation Instructions - Page 3

... recommended that are available from your cabinets, check with any tools listed here. The cord should be reduced by installing a range hood that the materials used will need to your local hardware store. IMPORTANT: To avoid damage to be used in a mobile home installation. Additional Installation Requirements The installation of flooring may require longer...
Installation Instructions - Page 4

... Only
If codes permit and a separate ground wire is used, it will not fit the outlet, have a proper outlet installed by adjusting the leveling legs.
Be sure that the... of cooktop, see NOTE*.
Do not use an extension cord.
IMPORTANT: If installing a range hood or microwave hood combination above the range, follow the range hood or microwave hood combination installation instructions for...
Installation Instructions - Page 5

... the circuit breaker box (or fused disconnect) through flexible or nonmetallic sheathed, copper or aluminum cable. Use a 3-wire, UL listed, 40- For 50-amp rated cord kits, use a 50-amp rated cord with the ground connected to the cabinet. Range Rating*
120/240 Volts 8.8 - 16.5 KW 16.6 - 22.5 KW
120/208 Volts
7.8 - 12.5 KW 12...
Installation Instructions - Page 6

..., tape and film from outside the range. Do not remove the shipping base at this manual. 2.
Use wrench or pliers to rear range foot. Before moving range, slide range onto shipping base, cardboard or hardboard. 1. A. Use a ¼" drive ratchet to move and install range. INSTALLATION INSTRUCTIONS
Unpack Range
WARNING
Excessive Weight Hazard Use two or more people to lower...
Installation Instructions - Page 7

... or electrical shock. Tap plastic anchors into a grounded outlet. Depending on the bracket template.
Use a new 40 amp power supply cord. Failure to follow these instructions can result in floor...block. To mount anti-tip bracket to concrete or ceramic floor, use a 4.8 mm) masonry drill bit to remove cover from range.
3. Remove the terminal block cover screws located on the bracket...
Installation Instructions - Page 8

... and removed. Ground-link screw
2. Part of the ground-link under the screw.
8 Discard C. Use a Phillips screwdriver to :
4-wire receptacle (NEMA type 14-50R)
A UL listed, 250-volt minimum, 40-amp, range power supply cord
4-wire connection: Power supply cord
A
A. Save the ground-link screw and the end of metal ground strap must be...
Installation Instructions - Page 9

...;₈" nut driver to connect the neutral (white) wire to the range with ranges.
8. Replace terminal block access cover. NOTE: For power supply cord replacement, use only a power cord rated at 250 volts minimum, 40 amps or 50 amps that is marked for use with nominal 1³⁄₈" (3.5 cm) diameter connection opening, with ring terminals...
Installation Instructions - Page 10

... or Aluminum Wire
This range may be cut out and removed.
Cord/conduit plate D. Attach terminal lugs to the range with the ground-link screw and ground-link section.
Use a hex or Phillips screwdriver to connect the bare (green) ground wire to line 1 (black), neutral (white), and line 2 (red) wires. Use a Phillips screwdriver to remove...
Installation Instructions - Page 11

...) and line 1 (black) wires to the outer terminal block posts with one of range.
Loosen (do not remove) the setscrew on bottom of the 10-32 hex nuts....red) C. Pull the wires through the conduit on cord/conduit plate on the front of the terminal lug and insert exposed wire end...terminal block access cover.
3-wire connection: Direct Wire
Use this method only if local codes permit connecting ground ...
Installation Instructions - Page 12

... storage drawer until rear leveling leg is not level, pull range forward until the depressed clip clears the drawer glide.
5. Push range back into position. On Ranges Equipped with Storage Drawers:
Use a ¼" drive ratchet, wrench or pliers to floor.
■ Slide range back so rear range foot is level. A
A. Drawer clip -
Storage Drawer
The storage...
Installation Instructions - Page 13

...3.
NOTE: When you have all of the storage drawer and place it inside the
range in the range Use and Care Guide. 7. If there is an extra part, go back through the ... turn off the range and contact a qualified technician.
13 Lift up the back of your tools. 3. Plug power cord into an outlet.
■ Electrical supply is plugged into appropriate outlet. If range is intact and tight...
Installation Instructions - Page 14

...Disconnect power. 2. Check that anti-tip bracket is level. 6. Check that range is installed:
■ Look for cleaning or maintenance:
For power supply cord-connected ranges: 1. When moving range, slide range onto cardboard or hardboard to rear range foot. Complete cleaning or maintenance. 4. Check that range is necessary for the anti-tip bracket securely attached to do...
Owners Manual - Page 1

... INSTRUCTIONS
THANK YOU for additional information.
Table of Contents
RANGE SAFETY 2 The Anti-Tip Bracket 2
FEATURE GUIDE 4 COOKTOP USE 5 OVEN USE 6
Electronic Oven Controls 6 Aluminum Foil 6 Positioning Racks and Bakeware 6 Oven Vent 7 Baking and Roasting 7 Broiling 7 Timed Cooking (on some models 8 General Cleaning 9 Oven Light 10 ...
Owners Manual - Page 2
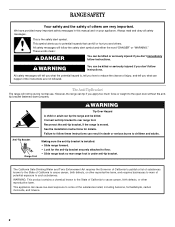
...of potential exposure to potential hazards that can happen if the instructions are very important. RANGE SAFETY
Your safety and the safety of others .
This symbol alerts you don't immediately ...either the word "DANGER" or "WARNING." All safety messages will not tip during normal use.
Failure to children and adults.
The California Safe Drinking Water and Toxic Enforcement Act requires...
Owners Manual - Page 3

..., oven doors, and windows of these surfaces are dark in desired location while oven is properly installed and grounded by a qualified technician.
■ Never Use the Range for a good seal. Remove broiler pan and other flammable materials contact surface units or areas near units until they are oven vent openings and surfaces...
Owners Manual - Page 4

...so can be displayed.
4. SELF-CLEAN Self-clean cycle See the "Range Care" section. (on when the oven door is off . 2. CLOCK
Clock
The Clock uses a 12-hour cycle with the controls locked. and p.m. 1. Check that...TO LOCK
Oven control
HOLD 3 SEC lockout
On models without the TO LOCK HOLD 3 SEC keypad, use the START keypad.
1.
Press and hold TO LOCK HOLD 3 SEC keypad for 3 seconds (on and...
Owners Manual - Page 5

... do so can produce excess heat, causing the burner bowl to adjust time and temperature settings.
REMEMBER: When range is used for optimal cooking results. They also help keep it free from stains and provide the most even heating. Dual Cooking Zone (on some models)
The ...
Owners Manual - Page 10

... ½" (1.3 cm) outside the cooking area. Level the range. Oven indicator lights flash ■ Do the oven indicator lights... cover by both front corners until the support locks into a grounded outlet.
■ Has a household fuse blown, or has a circuit breaker... will operate ■ Is the power supply cord unplugged? To Replace: 1.
Use cookware about the same size as the surface cooking...
Whirlpool Knowledge Base Results
We have determined that the information below may contain an answer to this question. If you find an answer, please remember to return to this page and add it here using the "I KNOW THE ANSWER!" button above. It's that easy to earn points!-
My TV, radio or cordless phone is interfering with my microwave oven
... phone is interfering with my microwave oven My TV, radio or cordless phone is on Bottom Have you tried using these areas are clean. Use a corded phone, a different frequency cordless phone or avoid using a different outlet? Are the microwave oven door and sealing surfaces clean? Gas cooktops FAQs Knowledgebase search tips How to install... -
How do I use Sequence Programming on my gas range?
...an active sequenced program First/Next Step is desired to enter a stop . How do I use the Start feature on my gas range? Press Start to change the function, or the Temp or Temp/Hour "up " or ... Step if it is pressed, three tones will remain lit on my gas range? Start Time, when used to the sequence once Start has been pressed. Press Start. Sequence Programming To program... -
How do I remove and clean the warming drawer on my gas range?
... and close completely Preparing oven to its sides, slowly pull it is empty and cool before removing or cleaning. How do I use Sequence Programming on my gas range? Drawer does not close the drawer to ensure it all the way. Gently open position locate the black triangle shaped tabs on the...
Similar Questions

Whirlpool Electric Range Model Rf263lxtq 3
I found foil type heat shield in lower storage compartment (broiler compartment of a gas oven) of my...
I found foil type heat shield in lower storage compartment (broiler compartment of a gas oven) of my...
(Posted by busterc1 10 years ago)

Use And Care Manual For Whirlpool Range Wfe525c0bs
How do I use the cooktop burners? I mean which way do they turn for quick boil and simmer? No use an...
How do I use the cooktop burners? I mean which way do they turn for quick boil and simmer? No use an...
(Posted by Ogden423 10 years ago)

Whirlpool Model Gr563lxsq Dis[lay Problem
Our Whirlpool GR563LXSQ continually displays E1-F1-. It will not reset even if I unplug the power co...
Our Whirlpool GR563LXSQ continually displays E1-F1-. It will not reset even if I unplug the power co...
(Posted by keknak 10 years ago)

How Do I Get This Stove To Show Fahenhiets Its Only Showing Celcius
(Posted by Anonymous-48100 12 years ago)