Get support for Whirlpool GH7208XRY

Whirlpool GH7208XRY Support Question

Whirlpool GH7208XRY Support Question

Find answers below for this question about Whirlpool GH7208XRY.
Need a Whirlpool GH7208XRY manual? We have 4 online manuals for this item!
Question posted by ccsd595 on July 9th, 2013

Oven Loses Power After Use.

The oven loses "all" power after use. if I wait a couple hours it comes back on. sometimes I don't even use it when it loses power. Why & how do I fix this issue? 

Current Answers

There are currently no answers that have been posted for this question.
Be the first to post an answer!

Remember that you can earn up to 1,100 points for every answer you submit. The better the quality of your answer, the better chance it has to be accepted.

Related Whirlpool GH7208XRY Manual Pages

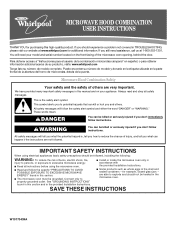
Owners Manual - Page 1

... la parte frontal de la abertura del horno de microondas, detrás de la puerta. WARNING You can be grounded. IMPORTANT SAFETY INSTRUCTIONS When using the microwave oven. ■ Read and follow instructions. ® MICROWAVE HOOD COMBINATION USER INSTRUCTIONS THANK YOU for example, closed glass jars - Connect only to explode and should...
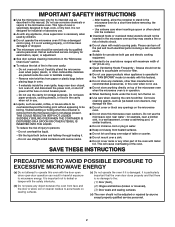
Owners Manual - Page 2

... under the hood, turn oven off, and disconnect the power cord, or shut off power at the fuse or circuit breaker panel. - Pieces can result in harmful exposure to accumulate on hood or filter. ■ Do not use paper products when appliance is operated in the oven cavity: - Do not use the cavity for examination, repair...
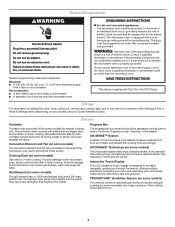
Owners Manual - Page 3

...a grounded 3 prong outlet. TRUCAPTURE® Ventilation System (on some models) The vent fan comes on automatically during preset or sensor (on some models) for manual cooking only. Failure to...governing codes and ordinances. Do not use of 100% and 0% power Interactive Touch Display The LCD interactive touch display is designed to whether the microwave oven is properly grounded. Do not ...
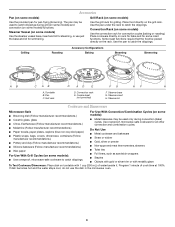
Owners Manual - Page 4

... vessel base, insert and lid for steaming, or use the dish in the microwave oven. 4 Grilling Roasting Accessory Configurations Baking Steaming Simmering A B C AB D A D E F G HF H A. Use ovenproof, microwave-safe cookware for simmering. Grill rack D. Steamer insert H. Use the pan under the rack to catch the drippings. Use the pan to catch the drippings. Pan C. Steamer...
Owners Manual - Page 5

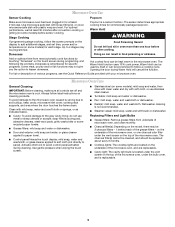
... touches the frame clean. on the underside of the microwave oven, or one hour before sensor cooking. To avoid damage to the microwave oven caused by itself or can be used by arcing due to lessen doneness. The Warm Hold function uses 10% cook power. Microwave Oven Care General Cleaning IMPORTANT: Before cleaning, make sure all controls...
Owners Manual - Page 6

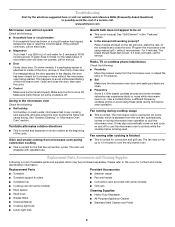
...Make sure Control Lock is set properly. Odor and smoke coming from microwave oven during microwave oven operation to the cover for some models), which may run ...at 100% cooking power. Please refer to cool the microwave oven. Turntable alternates rotation directions ■ This is not unusual. Use a corded phone, a different frequency cordless phone or avoid using manual grill - ...
Owners Manual - Page 8

...Trademark of Whirlpool, U.S.A. 461966100262 11/07 Printed in accordance with electrical or plumbing codes, or use of consumables or cleaning products not approved by this warranty. 8. Service calls to correct the ...instructions. 11. Costs associated with the removal from your home of the microwave oven opening, behind the door. Service must be easily determined. ITEMS EXCLUDED FROM...
Dimension Guide - Page 1

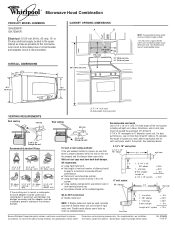
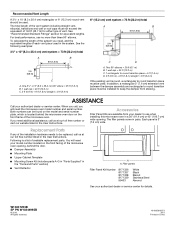
...-the-roof Recommended standard fittings Wall venting wall cap 3-1/4" x 10" through-the-wall Recommended vent length Use 3-1/4" x 10" or 6" vent. See examples below . 18¹⁄₄" (46.4 cm...10004; flexible metal vent. Because Whirlpool Corporation policy includes a continuous commitment to the microwave oven hood. wall cap 8 feet straight Length of 6" system = 73 ft. NOTE: If...
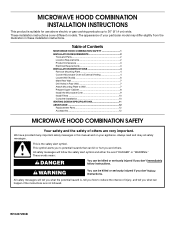
Installation Instructions - Page 1

... your appliance. W10247293B MICROWAVE HOOD COMBINATION INSTALLATION INSTRUCTIONS This product is suitable for use above electric or gas cooking products up to reduce the chance of injury, ... can kill or hurt you to Wall 7 Prepare Upper Cabinet 8 Install the Microwave Oven 9 Install Filters 10 Complete Installation 10 VENTING DESIGN SPECIFICATIONS 11 ASSISTANCE 12 Replacement Parts ...
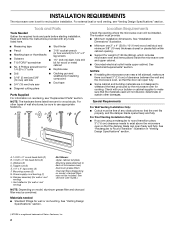
Installation Instructions - Page 2

...oven will not discolor, delaminate or sustain other types of 150 lbs (68 kg), which includes microwave oven and items placed inside the microwave oven...use appropriate fasteners. Damper ...the microwave oven for ...oven so that the door can open fully. ■ Some cabinet and building materials are using...used will be free of Saturn Fasteners, Inc. 2 INSTALLATION REQUIREMENTS The microwave oven...
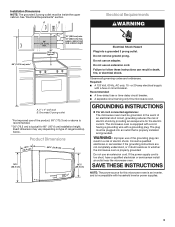
Installation Instructions - Page 3

.... Recommended: ■ A time-delay fuse or time-delay circuit breaker. ■ A separate circuit serving only this microwave oven is an inverter, and is properly installed and grounded. WARNING: Improper use an extension cord. If the power supply cord is typical for 66" (167.6 cm) installation height. Do not remove ground prong. The microwave...
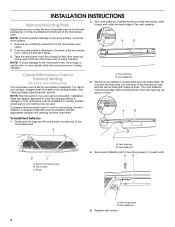
Installation Instructions - Page 4

... packaging, or it and set for wall or roof venting only) The microwave oven is reinstalled in inset. NOTE: To avoid possible damage to the microwave oven, do not grip or use the door or door handle while the microwave oven is attached to the back of the vent opening , as shown (wide side...
Installation Instructions - Page 5

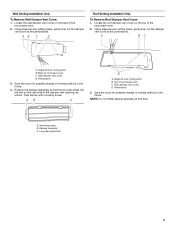
... B. Wall damper vent cover D. Top of microwave oven C. Damper assembly C. Locate the wall damper vent cover on the back of venting method in the future. 4. Using diagonal wire cutting pliers, gently snip out the damper vent cover at the perforations. Perforations 3. Roof damper vent cover D. Using diagonal wire cutting pliers, gently snip out...
Installation Instructions - Page 6

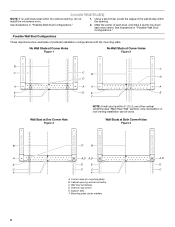
...Studs at One Corner Hole Figure 3 NOTE: If wall stud is within the cabinet opening, do not install the microwave oven. 1. Holes for lag screws E. See illustrations in "Possible Wall Stud Configurations." 2. Cabinet opening . Wall stud centerlines... recirculation or roof venting installation can be done. Using a stud finder, locate the edges of the wall stud(s) within the opening ...
Installation Instructions - Page 7

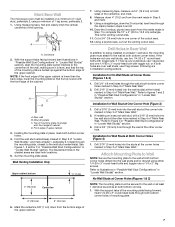
... round-head bolts through the wall at the other corner hole. Mark Rear Wall The microwave oven must be secured to the wall on at least 1 wall stud as well as at both ... bottom ³⁄₈" (1 cm) 4" (10.2 cm) Centerline 6" (15.2 cm) 6" (15.2 cm) 6. Using a straightedge, draw the 2 horizontal, level lines through the marks made in one 1/4-20 x 3" round-head bolt with toggle...
Installation Instructions - Page 8

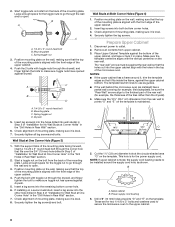
...on the template. Check alignment of the upper cabinet, and tape or tack it is level. 8. Disconnect power to the thickest part of the upper cabinet. 4. The "rear wall" arrows must be against the ... the front edge of the rear wall (for two 1/4-20 x 3" bolts and washers used to secure the microwave oven to open . 3. NOTE: If upper cabinet is aligned with toggle nut through the wall...
Installation Instructions - Page 9

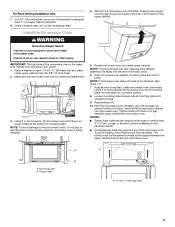
..., cut out the rectangular area. Install the Microwave Oven WARNING Excessive Weight Hazard Use two or more people, lift microwave oven off of mounting plate, and set aside on support tabs at least one corner of the upper cabinet. 5. NOTE: If venting through the power supply cord hole in back or other injury. If...
Installation Instructions - Page 10

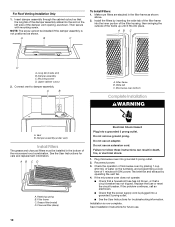
... Only 1. AB C D A. A B A. See the User Instructions for future use an adapter. Reconnect power. 3. Test vent fan and exhaust by inserting the wide tab of the filter frame...be installed in death, fire, or electrical shock. 1. Grease filter (metal) D. Plug microwave oven into the slot on the turntable, and programming a cook time of the damper assembly slides into...
Installation Instructions - Page 11

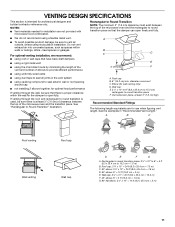
... piece, at least 3" (7.6 cm) of clearance between the top of elbows to provide efficient performance ■ using uniformly sized vents ■ using the most direct route by minimizing the length of the vent and number of the microwave oven and the rectangular to round transition piece F. For optimal venting installation, we recommend: ■...
Installation Instructions - Page 12

...PN W10344995B © 2010. For best performance, use when installing this microwave oven in a 36" (91.4 cm) or 42" (106.7 cm) wide opening , behind the microwave oven door on the front facing of the microwave oven. One 3¹⁄₄" x 10" (8.3... in the User Instructions. The filler panels come in China ASSISTANCE Call your authorized dealer or service center for details.

Whirlpool Knowledge Base Results

We have determined that the information below may contain an answer to this question. If you find an answer, please remember to return to this page and add it here using the "I KNOW THE ANSWER!" button above. It's that easy to earn points!

  • Foods undercook during convection and combination cooking
    ... comfortable. Waiting an additional 10 minutes after the preheat conditioning time ends to place in the oven is suggested when baking foods with a 208 volt power supply, preheating will take longer. Once the oven is preheated, there is no difference in certain models: You have not followed the recipe closely enough. Use the following...
  • No or low ice production - Bottom freezer/French door refrigerator
    ...use a ¼" type valve that  an ice cube is not jammed in the reverse-osmosis system is there no ice or not enough ice being made fast enough, adjust the freezer control one setting colder. Wait 24 hours...Category Washer or Dryer Refrigerator or Freezer Dishwasher Electric Range, Oven or Cooktop Gas Range, Oven or Cooktop Microwave Trash Compactor Window Air Conditioner Hot Water ...
  • The ice maker on my upright freezer is not producing ice or not enough ice
    ...been installed? Wait 72 hours for full ice production to 1,350 g) of unfrozen food per cubic foot (28.32 L) of freezer space. Once your Use and Care Guide. See "Using the control"... - Allow 24 hours for ice production. Find a local service provider: Product Category Washer or Dryer Refrigerator or Freezer Dishwasher Electric Range, Oven or Cooktop Gas Range, Oven or Cooktop Microwave ...

Similar Questions

The Oven's Microwave Suddenly Heats Only Moderately. As If It Were At 50% Power.
The repair suggestions I have seen so far are based on the situation where the microwave does not he...
(Posted by privatesurfer2002 8 years ago)
Why Is The Oven Not Working After Using The Precise Clean Mode Set For 4 Hours?
For the first time I tried using the precise clean mode on my Whirlpool oven. I had it set for 4 hou...
(Posted by lauriefisher2011 8 years ago)
What Is The Part # For The Membrane Panel/touch Pad For Whirlpool Gh7208xry3
Receiving error message F1Q2 and microwave beeps and beeps until I unplug it. Happens most of the ti...
(Posted by owenspam7176 10 years ago)
Double Oven Lost Power
I have a Whirlpool double wall over model RBD305PDQ1.I used it last night, and 2 hours later the dis...
(Posted by cdasilva71 11 years ago)
Ask a New Question
Use the box below to post a new question about this Whirlpool product .
Points & Prizes
  • You can earn points for nearly everything you do on HelpOwl.com
  • You can trade in those points for gift cards at leading retailers such as Amazon.com and Walmart
  • It's that simple!
See How it Works
Create a Free Account

Whirlpool Manuals

Find free Whirlpool GH7208XRY manuals and user guides available at ManualOwl.com. Try out our unique manual viewer allowing you to interact with manuals from directly within your browser!

Whirlpool Reviews

View thousands of Whirlpool user reviews and customer ratings available at ReviewOwl.com.

Contact Information

Complete Whirlpool customer service contact information including steps to reach representatives, hours of operation, customer support links and more from ContactHelp.com.

Scoreboard Ratings

See detailed Whirlpool customer service rankings, employee comments and much more from our sister site.

Whirlpool Recalls

Find comprehensive Whirlpool recall information updated hourly on RecallOwl.com.